How to Fix the Hypervisor Error in Windows 11
A hypervisor error in Windows can cause your computer to crash. Learn how to fix the hypervisor error in Windows 11.
We’ve all felt the frustration of the dreaded blue screen of death. After the initial bout of shouting at your computer and pounding the desk in frustration is over, you’ll probably move on to checking the cause of the crash. One of the error codes you may see in Windows is HYPERVISOR ERROR. This indicates the crash was caused by a problem with the hypervisor platform on your computer.
What is a hypervisor, and how can you stop this error from occurring in the future? Here’s how to fix a hypervisor error in Windows.
What is the Hypervisor Error in Windows?
When something goes wrong with your computer, you may see a Blue Screen Of Death (BSOD). This is the blue screen that tells you that your PC ran into a problem and needs to restart. It’s a frustrating thing to occur as it often means you may lose the data that you were working on when the crash occurred.
At the very bottom of the BSOD is a small bit of text that gives the cause of the error. There is a huge selection of BSOD errors, one of which is HYPERVISOR ERROR. If you see this at the bottom of your BSOD it means that the crash was related to problems with the hypervisor platform that your computer uses to help run virtual machines. Apps such as VirtualBox allow you to run different operating systems from within Windows, but they rely on the hypervisor platform to run. If there are problems with this platform and BSOD errors are occurring, here are some things you can try.
Turn Off Hypervisor
If you’re not using any virtual machines, you don’t need the Hypervisor feature to run, especially if it’s causing your computer to crash. You can turn off these features in Windows to see if disabling stops your computer from continuing to have Hypervisor errors. If you do want to use virtual machines in Windows 11, try turning Hypervisor features off, restarting, and then turning them back on again.
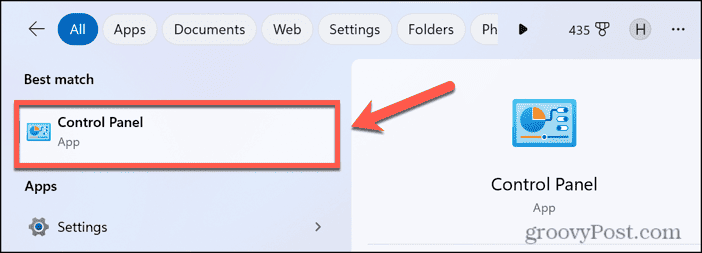
- In the search field in the taskbar, type Control Panel.


- Open the Control Panel app in the results.

- Click Programs.


- Under Programs and Features click Turn Windows Features On Or Off.


- Uncheck Hyper-V and Windows Hypervisor Platform.


- Click OK.
- Once the process is complete, restart your computer.
- If you want to use virtual machines, repeat steps 1 through 4 and turn Hyper-V and Windows Hypervisor Platform back on.
- Restart again and see if this fixes your errors.
Stop or Restart the Hyper-V Services
You can also try stopping or restarting Hyper-V services on your computer to see if this fixes your problems. Services are programs that run in the background of your computer and issues with the Hyper-V services may be the cause of your hypervisor BSOD. If you don’t need to run a virtual machine, you can try stopping the service altogether, or if you do run a VM, try stopping the service and starting it again.
- Click in the search field in the taskbar and type Services.
- Open the Services app from the results.


- Scroll down until you see the Hyper-V services.

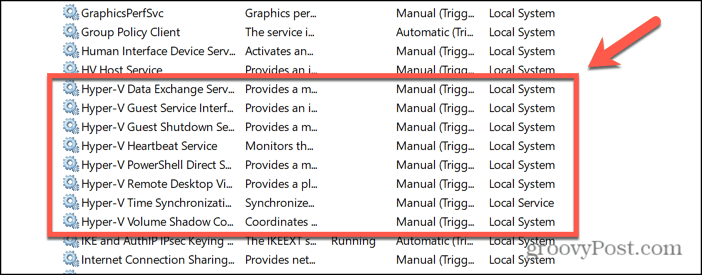
- For any running Hyper-V services, right-click the name of the service.
- Select Stop to stop the service.


- If you want to use virtual machines, restart the service again by right-clicking and selecting Start.


- Repeat for any other running Hyper-V services.
Update Device Drivers
If your device drivers are out of date, this may also raise issues that could cause your computer to crash. You can update the hypervisor drivers, as well as any other outdated drivers to see if this solves your issue.
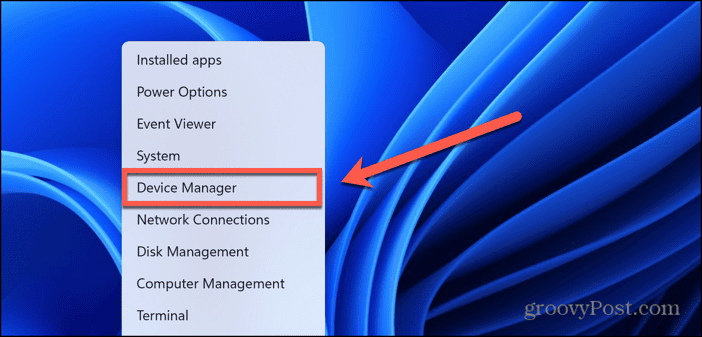
- Right-click the Start icon in the taskbar.


- Select Device Manager.

- Click the arrow next to System Devices to expand it.


- Scroll down to the Microsoft Hyper-V Virtualization Infrastructure Driver.


- Right-click it and select Update Driver.


- Select Search Automatically For Drivers.

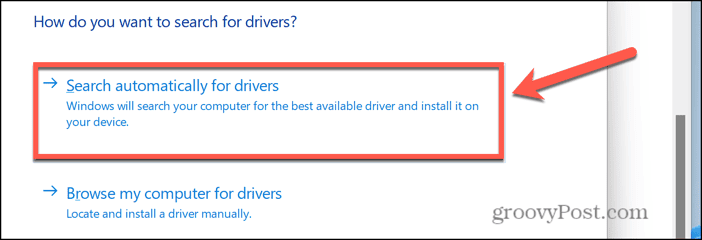
- If updated drivers are found, you can install them.
- If not, you’ll see a notification that you’re already using the best available drivers.
- Take a look through the other devices in the device manager. If any of the devices have a yellow warning triangle next to them, repeat the steps above to update their drivers.
- Repeat until there are no more devices with warning symbols.
Update Windows
Known issues are often fixed in updates for Windows 11. It may be that there is a fix for your hypervisor issue that simply requires you to update Windows. Try searching for any available updates and installing them, then see if your hypervisor error persists.
- Right-click the Start icon in the taskbar.


- Select Settings.

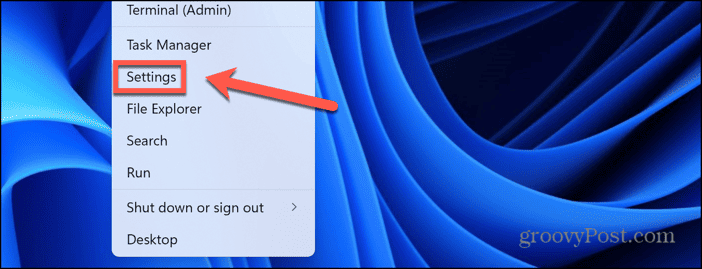
- In the left-hand menu, click Windows Update.


- Click the Check For Updates button.


- If any updates are found, install them and then restart your computer.
Repair System Files
If you have issues with corrupt system files, this can cause your computer to crash and may lead to the hypervisor error. You can use the Deployment Image Servicing and Management Tool to scan for any issues and automatically repair them by downloading and replacing any corrupted files. This is always a good thing to try if you’re having issues with your computer crashing.
- In the taskbar, right-click the Start icon.


- Select Terminal (Admin).

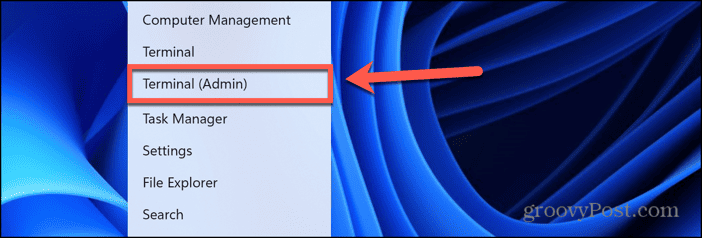
- Confirm that you want to allow Terminal to make changes to your computer.
- In the Terminal window, enter the following command and press Enter.
DISM.exe /Online /Cleanup-image /Restorehealth


- After a few moments, the tool will start running.
- Once the process has been completed, restart your computer.
Check For Memory Issues
Another possible cause of the hypervisor error on Windows 11 may be that you have issues with your RAM. You can use the Windows Memory Diagnostic Tool to check for any issues with your RAM. If any issue is found, can try reseating or cleaning the affected RAM module. If this doesn’t work, you may need to replace the faulty RAM module.
- Type Windows Memory Diagnostic in the search field in the taskbar.


- Open the Windows Memory Diagnostic app from the results.


- Click Restart Now And Check For Problems (Recommended).

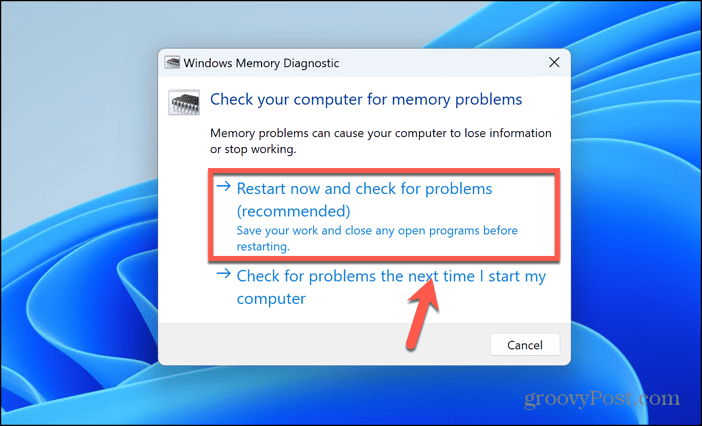
- Your computer will restart, and the tool will scan for any memory problems.
- Once the process is complete you can see the results in a notification when your computer has restarted.
- If any problems are detected, try reseating, cleaning, or replacing the problematic RAM.
Reset Your Computer
If nothing else works, you can try resetting your computer. This allows you to keep your personal files and folders but will perform a clean install of Windows, removing any apps that you’ve installed and returning everything to the default settings. This should hopefully remove the issues that are causing your Hypervisor error.
- Right-click the Start icon in the taskbar.


- Select Settings.


- In the left-hand menu, click System.


- Scroll down and select Recovery.


- Under Recovery Options click the Reset PC button.


- Select Keep My Files to ensure that your files and folders aren’t deleted.

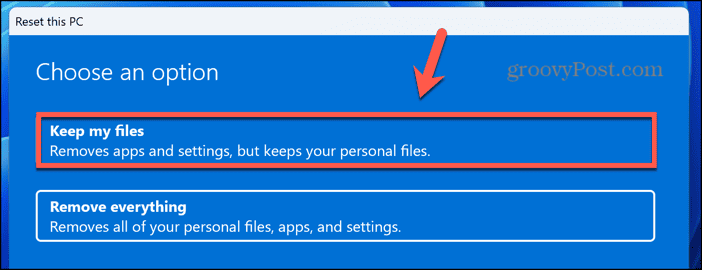
- Choose whether to reinstall from a Cloud Download or a Local Reinstall.
- Click Reset and the process will begin.

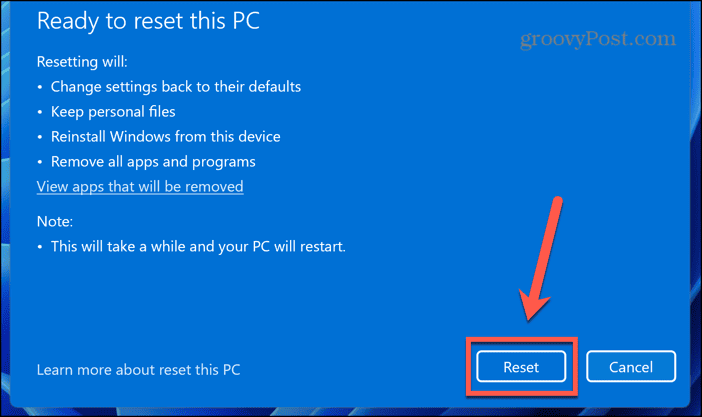
- Once your PC is reset, try it out again to see if the Hypervisor error has been fixed.
Fixing the Hypervisor Error on Windows 11
Hopefully one of the methods above has helped you figure out how to fix the hypervisor error in Windows 11. If you find any other useful methods that work for you, then please let us know in the comments.
Crashes on Windows do occur, so it’s always a good idea to keep your data backed up. You can also create restore points to roll back Windows to a previously working state. The more prepared you are for a BSOD, the better.
6 Comments
Leave a Reply
Leave a Reply


bromberg
March 18, 2024 at 9:13 am
Great article, thanks!
Does it apply to Windows 10’s hypervisor as well?
Jeff Butts
March 18, 2024 at 9:40 am
Hey Bromberg, thanks for the question. Yes, the troubleshooting and possible fixes should apply to Windows 10, too. There may be some minor differences in how some of the screens look, but the basic concepts will be the same.
Jeff Butts
groovyPost
bromberg
March 18, 2024 at 1:53 pm
The article states:
“This allows you to keep your personal files and folders but will perform a clean install of Windows, removing any apps that you’ve installed and returning everything to the default settings.”
Is it possible to not only keep my personal files and folders but to also keep my installed apps?
Dan
Jeff Butts
March 19, 2024 at 3:49 am
Hey Dan,
Unfortunately, no, Microsoft doesn’t give such an option. This is likely because when you install an application under Windows, it installs a number of library and configuration files in C:/Windows, which has to be deleted completely to perform a clean install.
Cheers,
Jeff
dan
March 19, 2024 at 8:44 pm
Jeff,
So the next best thing to retain (most of) my apps would be to use the latest restore point (assuming I can get to it) – correct?
Dan
Jeff Butts
March 20, 2024 at 10:54 am
Hey Dan,
Yeah, you could try that. However, if the corrupted file that was causing the BSOD in the first place is in that restore point, you’ll have to go back further.
Cheers,
Jeff