How to Run DISM and SFC Scans on Windows

Having problems with your Windows PC? After basic troubleshooting, you may need to run DISM and SFC scans. This guide explains how.
Windows 11 runs much better than previous Windows versions, but problems can still pop up from time to time. When troubleshooting an issue, it’s a good idea to run DISM and SFC scans on Windows.
System File Checker (SFC) and Deployment Image Servicing and Management (DISM) scans are command line utilities that check your PC for missing or corrupt system files and automatically apply fixes. To run DISM and SFC scans on your Windows PC, follow these steps.
How to Run an SFC Scan on Windows 11
An SFC scan is a command tool that will repair corrupt or missing system files. The SFC scans your system and repairs or replaces damaged system files. It cross-references files from a locally cached copy located in the Windows folder.
Note: For this guide, we’re using Windows 11. However, the steps and commands for SFC and DISM scans work the same on Windows 10.
To run an SFC scan on Windows 11:
- Press the Windows key to launch the Start menu.
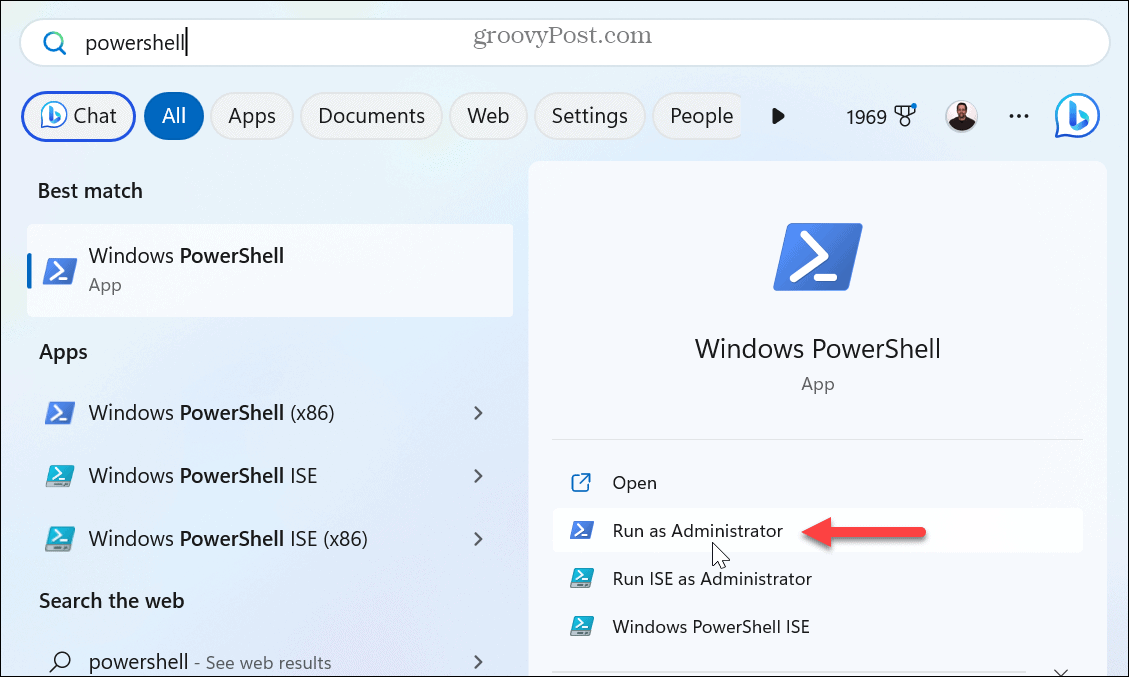
- Type PowerShell and select the Run as Administrator link in the left column.


- Type (or copy and paste) the following command in the terminal and press Enter.
sfc /scannow


- You will see a progress verification message while the scan runs. When complete, it will show you the results of the scan.
- You can find the log file by navigating to the following location to learn more about the scan.
%windir%/Logs/CBS/CBS.log


- Instead of browsing the path for the log file, you can open it directly.
- Press the Windows key + R combo on your keyboard, paste the above path in the Run dialog, and click OK.


- The file will open in Notepad with additional details.


Run a DISM Scan on Windows 11
A DISM scan is also a command line utility that repairs corrupt or missing system files. A DISM scan detects and fixes corrupt files in the component store of the Windows system image.
Running a DISM scan is helpful when SFC isn’t working or if SFC misses a damaged system file.
To run a DISM scan on Windows 11:
- Press the Windows key.
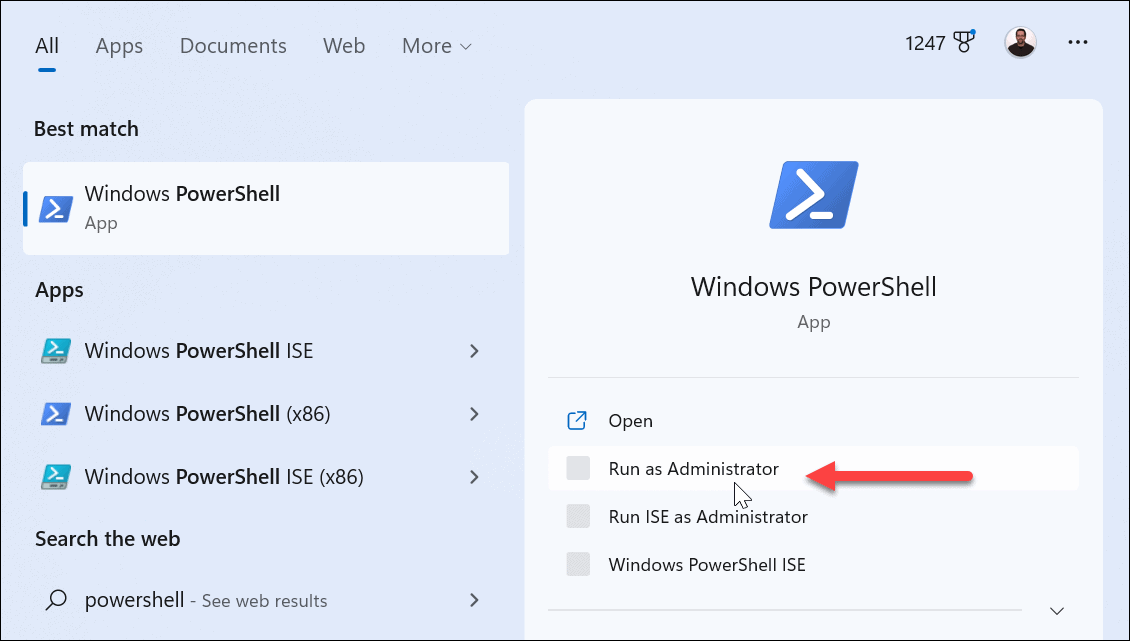
- Search for PowerShell and select the Run as Administrator option in the right column.


- Type (or copy and paste) the following command in the terminal and press Enter.
DISM /Online /Cleanup-Image /RestoreHealth


- A progress bar will appear while the scan runs and display the results when complete.
- Press Windows key + R to open the Run dialog, enter the following path, and click OK to get additional details regarding the scan.
%windir%\Logs\DISM\dism.log


- The DISM log file will open in Notepad for further review.


It’s important to note that these scans can take a while to complete. The amount of time it takes will vary, and when the scans finish, it’s a good idea to restart your PC for the best results.
It’s also important to mention that you can use System Restore to replace missing and corrupt system files by restoring your PC to an earlier state before the point was created. And if the Restore Point doesn’t work, you can use the Reset This PC feature to factory reset your system or perform a clean install of Windows 11.
Troubleshooting Issues on Windows 11
The SFC and DISM utilities on Windows 11 are helpful in many situations when your PC has problems. Typically, if basic troubleshooting steps don’t work to fix problems with Windows, then running the SFC and DISM scans is your best bet.
There are several things you can repair with SFC and DISM scans. For example, using the scans can help fix a missing sign-in screen or fix Snip and Sketch not working on Windows.
SFC and DISM scans also help to fix a blue screen of death problem like a Clock Watchdog Timeout error. In addition, you can run the same command in the Command Prompt to fix PowerShell not working.
1 Comment
Leave a Reply
Leave a Reply


Jean-Michel
May 26, 2023 at 12:38 pm
Hi Brian
Thanks for that update on these basic considerations we are often forgetting to refer to !
Good shot, indeed !