How to Fix the PFN List Corrupt BSOD on Windows 11

Are you having trouble with your PC crashing due to a corrupt PFN list? Here’s how to fix the PFN list corrupt BSOD on Windows 11.
The color blue is meant to be calming and relaxing, like the sea or the sky. However, when your computer crashes and you see that screen turn blue, it can make your blood boil. Crashes in Windows are rare, but when they happen you can lose work or data, so you’ll obviously want to try to stop them from happening. If you’re having crashes relating to the PFN list being corrupt, there are a few things that you can try. Here’s how to fix the PFN list corrupt BSOD on Windows 11.
What is the PFM List Corrupt BSOD?
When your PC crashes, you’ll see a blue screen (or green in some cases) informing you that something went wrong. At the bottom of this screen, there will be an error code that gives an indication of the cause of the crash. One of those error codes indicates that the problem was due to the PFN list being corrupt.
PFN stands for Page Frame Number. The PFN list is a database Windows uses to keep track of the physical memory on your computer. If this list becomes corrupted, your computer cannot access it properly, which causes the PC to crash. The good news is that there are several things you can try to fix this issue.
Uninstall Software
Many users have reported their third-party antivirus software causing a corrupt PFN list BSOD. Uninstalling this software may fix the problem. If you have recently installed new software and have been experiencing this BSOD since it was installed, you can try uninstalling that software, too.
- Right-click the Start icon in the taskbar.


- Select Settings.


- In the left-hand menu, click Apps.

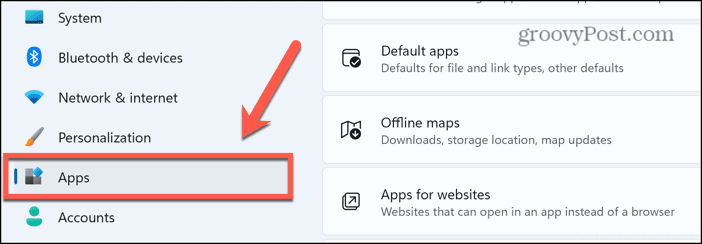
- Select Installed Apps.


- Find the app you want to uninstall and click the Three Dots icon.


- Select Uninstall.


- Once the uninstall completes, restart your computer.
Update Windows 11
Microsoft applies fixes for known operating system issues in Windows updates. It may be the case that by updating Windows 11 you can fix your PFN list corrupt BSOD error.
- Right-click the Start button in the taskbar.


- Select Settings.


- In the left-hand menu, select Windows Update.


- Click the Check For Updates button.


- Install any available updates and restart your computer.
Update Windows 11 Drivers
Outdated Windows device drivers could also be a potential cause of the PFN list corrupt BSOD. Updating any outdated device drivers may resolve the problem.
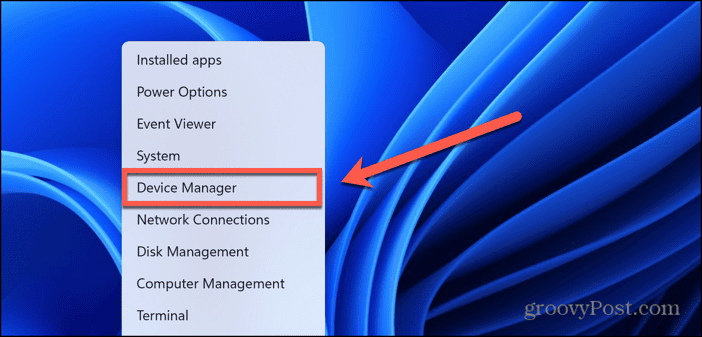
- Right-click the Start icon.


- Select Device Manager.

- Click the arrow next to each device in turn to expand it.


- Look for any devices that have a yellow warning triangle next to them. This indicates that there is an issue with the device.
- Right-click the device and select Update Driver.


- Select Search Automatically For Drivers.

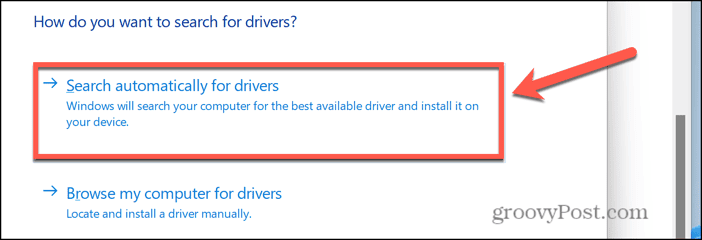
- If Windows locates updated drivers, you can install them.
- If not, you’ll see a notification that you’re already using the best available drivers.
- Repeat with all other devices until there are no more warning symbols.
Run the BSOD Troubleshooter
Windows has a number of troubleshooters that can help you identify the causes of problems with your PC. One such troubleshooter is the BSOD troubleshooter, which may be able to help you resolve your problem.
- In the search field in the taskbar, type, Get Help.


- Open the Get Help app from the results.


- In the search field on the Get Help app, type Troubleshoot BSOD Error and press Enter.


- The BSOD troubleshooter will start. Follow the on-screen instructions to work through the potential fixes.
Run a System File Checker Scan
System File Checker (SFC) is a Windows utility that can check for issues with system files on your computer. It can replace any corrupt system files that are found and get your PC back up and running again.
- Right-click on the Start icon in the taskbar.


- Select Terminal (Admin).

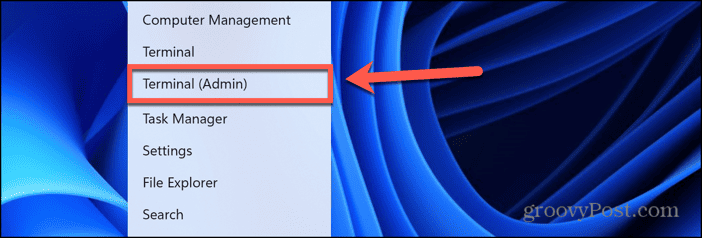
- Confirm that you allow Terminal to make changes to your computer.
- In the Terminal window, type sfc /scannow making sure you leave a space after ‘sfc’.


- The System File Check scan will begin. This can take some time to complete.
- When you see the message Verification 100% Complete type exit and press Enter to quit the tool.


- Restart your computer.
Run the DISM Tool
The Deployment Image Servicing and Management Tool is able to repair your system image by downloading and replacing any corrupted files. Running this tool may be able to stop the PFN list corrupt error from recurring.
- Right-click the Start icon.


- Select Terminal (Admin).


- Confirm that you want to allow Terminal to make changes to your computer.
- In the Terminal window, enter the following then press Enter:
DISM.exe /Online /Cleanup-image /Restorehealth
- The tool will start running; there may be a short delay before you see any progress.
- Once the process has been completed, restart your computer.
Run the Windows Memory Diagnostic
If there are problems with the RAM in your computer, this could be the cause of your PFN list corrupt BSOD. The Windows Memory Diagnostic tool can scan your RAM for any issues. You can then try to fix the issues by ensuring that your RAM is correctly seated, or by replacing the modules that are causing the problem.
- Type Windows Memory Diagnostic in the taskbar search field.


- Select the Windows Memory Diagnostic app from the results.


- Click Restart Now And Check For Problems (Recommended).

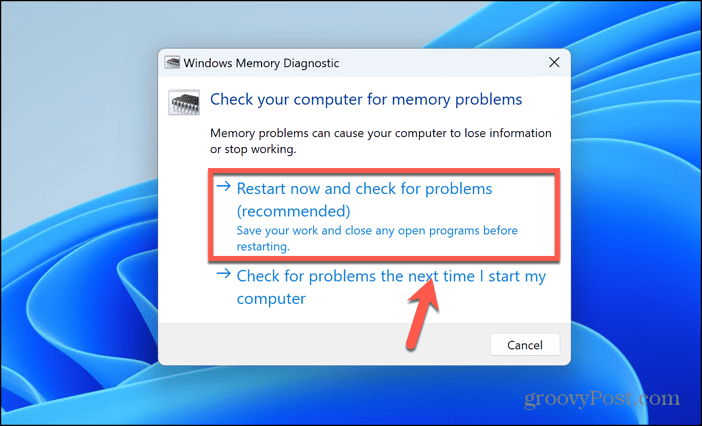
- Your computer will restart. The Windows Memory Diagnostic tool will then scan your RAM.
- You’ll see a notification providing information on any RAM issues that were found.
- If problems are detected, you can try cleaning or reseating your RAM. If this doesn’t work, you may need to replace or remove some RAM modules.
Check Your Hard Drive
If there are issues with your hard drive, this could lead to the PFN list corrupt BSOD error. You can use the Check Disk utility to scan your hard drive and fix any logical errors in the file system. It can also ensure that any bad sectors that are discovered aren’t used in the future.
You can check your disk through File Explorer or use the Terminal if you want more control over the parameters of your check.
- Open File Explorer and navigate to the hard drive that you want to check.
- Right-click the hard drive and select Properties.


- Select the Tools tab.


- Click the Check button.


- You may see a message saying that you don’t need to scan this drive. Click Scan Drive to scan for errors.

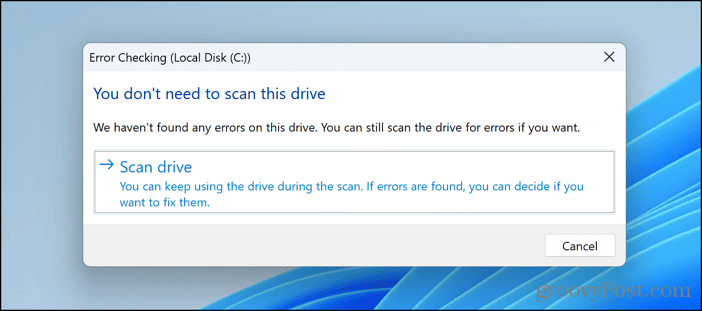
- If any errors are found, you have the option to fix them.
- You can also run the Check Disk utility from the command line by right-clicking the Start icon and selecting Terminal (Admin).


- In the Terminal window, type chkdsk /f and press Enter. This setting will scan for errors and then automatically fix any errors that are found.


- You’ll see a message that Chkdsk cannot run because the volume in use. Type Y and press Enter to schedule the scan to run when your computer restarts.

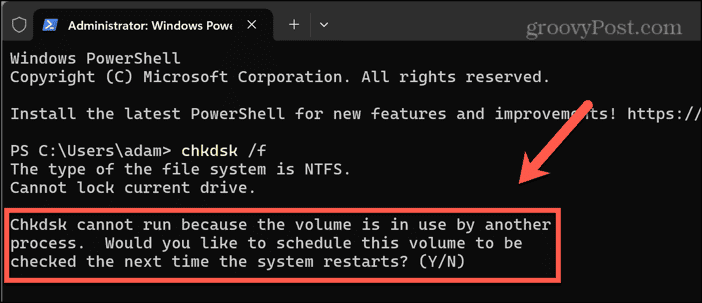
- Restart your computer and the scan will start.
Disable OneDrive
Some people who have had the PFN list corrupt BSOD have found that disabling OneDrive has stopped the crash from recurring. You can try disabling OneDrive to see if this solves the problem for you.
- Right-click the OneDrive icon in the taskbar.


- Select Settings.


- In the left-hand menu, select Account.


- Click Unlink This PC.


- Click Unlink Account to confirm your decision.


- OneDrive will no longer sync files on your computer and any online-only files will be removed.
Fixing the PFN List Corrupt BSOD on Windows 11
If you wanted to know how to fix the PFN list corrupt BSOD on Windows 11, hopefully one of the fixes above has helped. If you do find another successful way to stop the crashes, then please do let us know in the comments.
BSOD errors aren’t just frustrating; they can also lead to you losing data or hours of hard work. That’s why it’s always advisable to save regularly and back up your files to minimize the impact of any data loss. One irony is that backing up your files with OneDrive may actually be the cause of your PFN list corrupt error, but there are other options available.
4 Comments
Leave a Reply
Leave a Reply


bromberg
March 19, 2024 at 10:48 am
Wonderful article but if you’re faced with the BSoD and your PC is unbootable, how can you perform the fixes you suggest?
Jeff Butts
March 19, 2024 at 1:20 pm
The hope is that after rebooting, Windows gives you enough time to try at least one before it BSODs again.
bromberg
March 19, 2024 at 1:59 pm
My (fortunately limited) experience with a BSoD has been that it will happen again on my next reboot (though sometimes a 3rd reboot has let me into a recovery screen).
Steve Krause
March 19, 2024 at 2:58 pm
Just chatting-out-loud… Normally when I run into the BSOD (generally speaking,) and it only happens once ever three reboots or so, it’s probably a hardware issue. If you have some geek skills, I would start by looking at eventvwr and from there (if no clues) start removing isolating which piece of HW it might be. I’ve been lucky over the years. A bad stick of ram here, a bad SSD there, or even a bad GPU or power supply. All fairly easy to swap and test (if you have a massive box of junk parts like I do). Otherwise, once you get to the CPU and MB… yeah, probably time for a new box for most ppl. That said, over the past 30 years, I’ve only had 1 motherboard go bad and I’ve never had a CPU die.
Steve
groovyPost