How to Disable OneDrive on Windows 11

You can prevent it if you don’t need or like OneDrive syncing files. Learn how to disable OneDrive on Windows 11 in this guide.
OneDrive, Microsoft’s cloud-based storage and sharing solution, activates automatically during the initial setup or “Out of Box Experience” (OOBE) on a Windows PC. OneDrive is tied to your Microsoft account unless you choose a different configuration.
While it’s a convenient feature that lets you “set and forget” during installation, you might not want your files stored in the cloud on Microsoft’s servers. Instead, you may prefer to keep them stored locally on a drive or a different third-party service. You may have no reason to sync files between PCs.
Whatever the reason, once you use the following steps, it will permenently disable OneDrive on Windows 11. Here’s how to do it.
How to Disable OneDrive on Windows 11
If you think OneDrive serves no purpose for your computing needs, you can disable it. For example, you might prefer a local account and keeping the file management on your own devices. Or, you might not have a limited or metered network connection.
Luckily, with a few steps, you can disable OneDrive on Windows 11, preventing it from running or wasting network bandwidth.
To Prevent OneDrive from Running During Startup on Windows 11
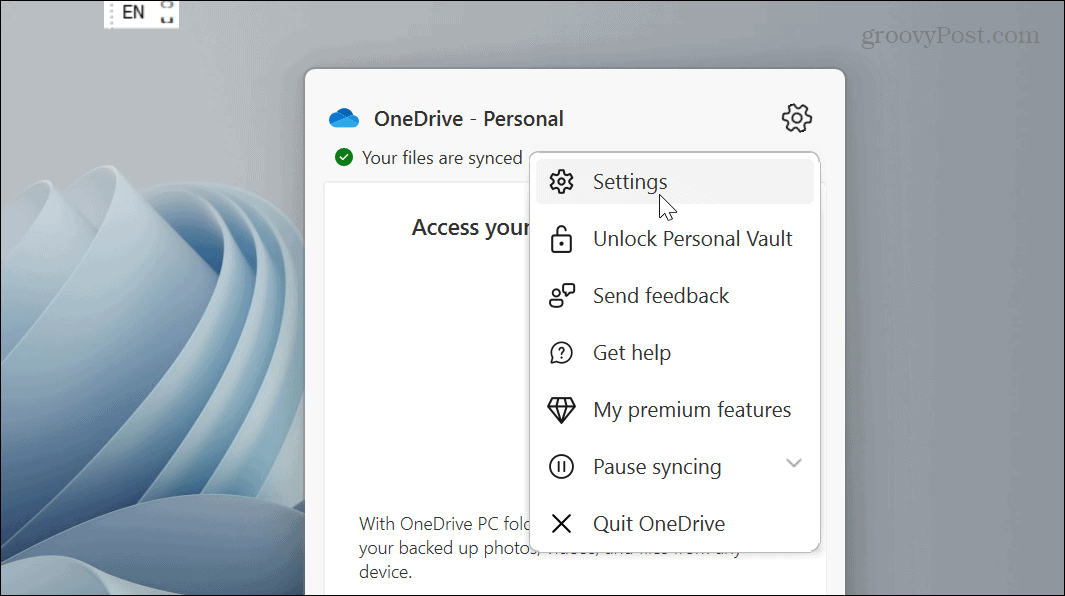
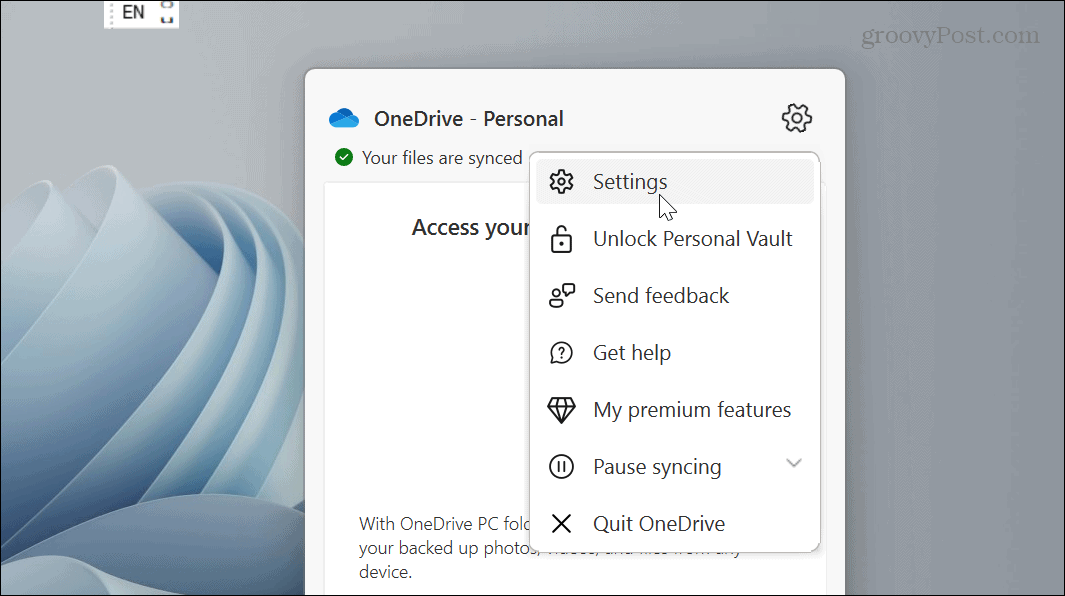
- Click the OneDrive icon on the system tray. You might need to click the overflow arrow to find it.


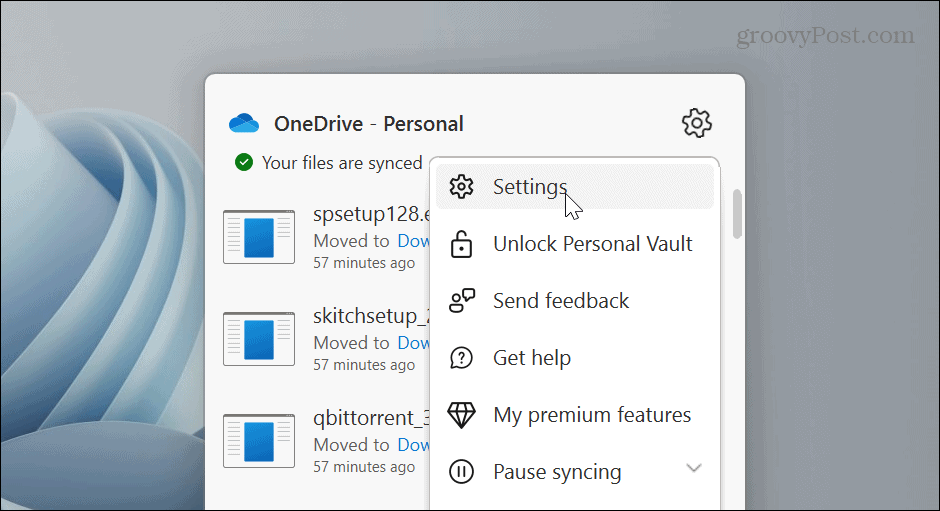
- Click the gear icon in the top-right corner and choose Settings from the menu.

- Ensure you select the Settings Uncheck the Start OneDrive automatically when I sign in to Windows option in the General section of the menu.
- Click OK.

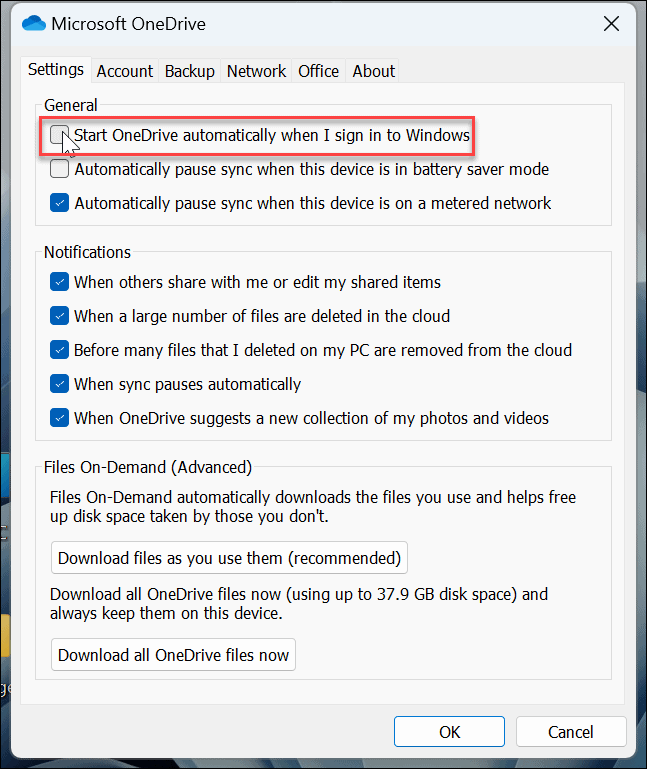
After following the steps, OneDrive will no longer launch automatically when you start up your PC.
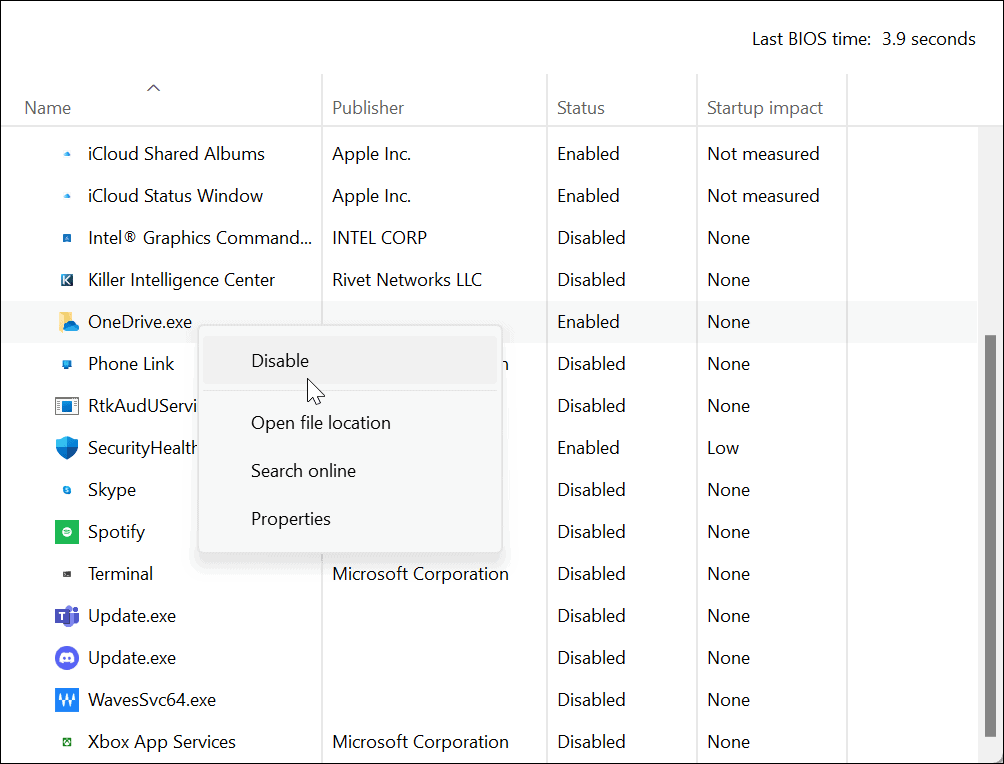
However, if you don’t want to use the OneDrive menu system, you can follow our instructions on disabling startup apps on Windows 11. Just select the OneDrive.exe option.

How to Disable OneDrive with Group Policy Editor
Another method you can use to disable OneDrive if you’re running Windows Pro, Enterprise, or Education editions is to use the Local Group Policy Editor.
Note: This option doesn’t work on the Home editions of Windows 11.
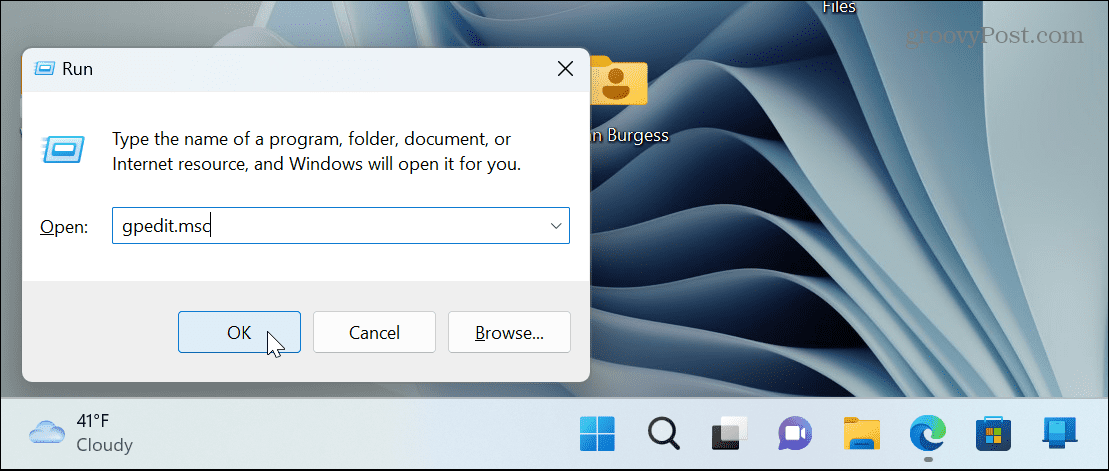
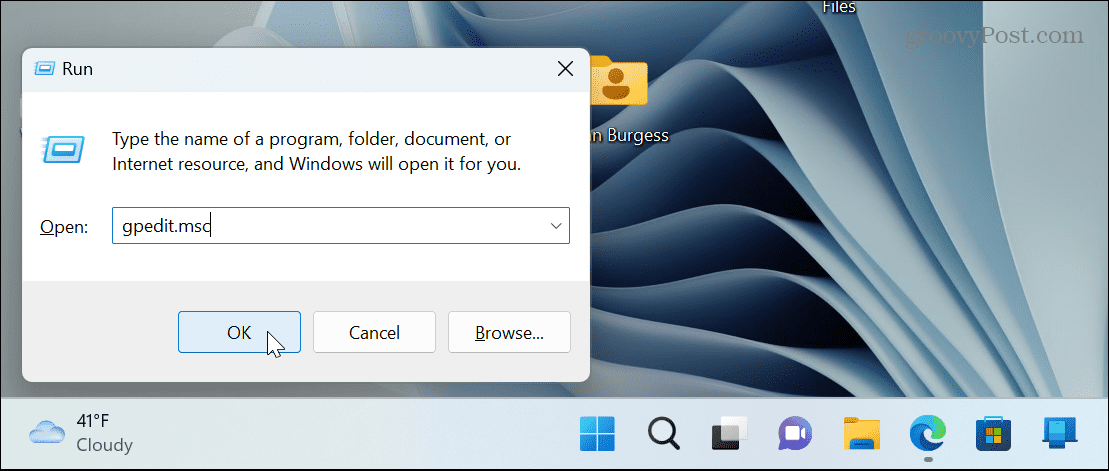
- Hit Windows key + R on your keyboard to bring up the Run box.
- Type gpedit.msc and click OK or hit Enter.

- Navigate to the following path:
Computer Configuration > Administrative Templates > Windows Components > OneDrive

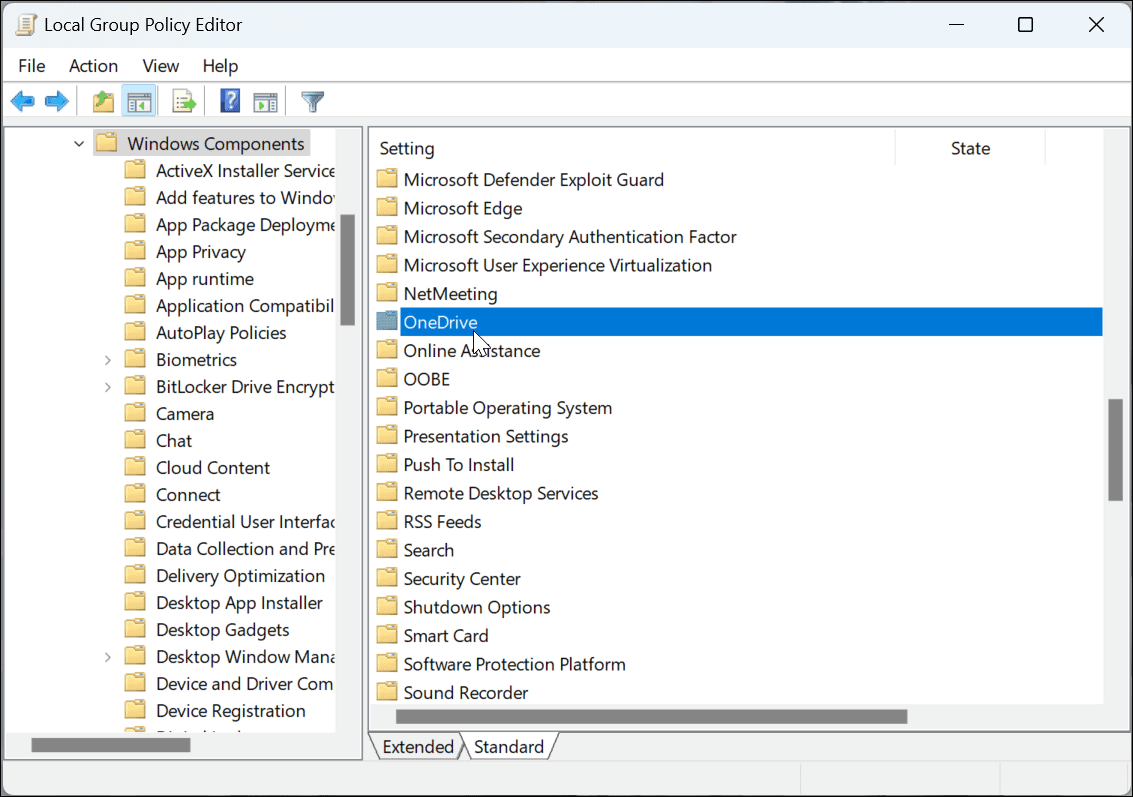
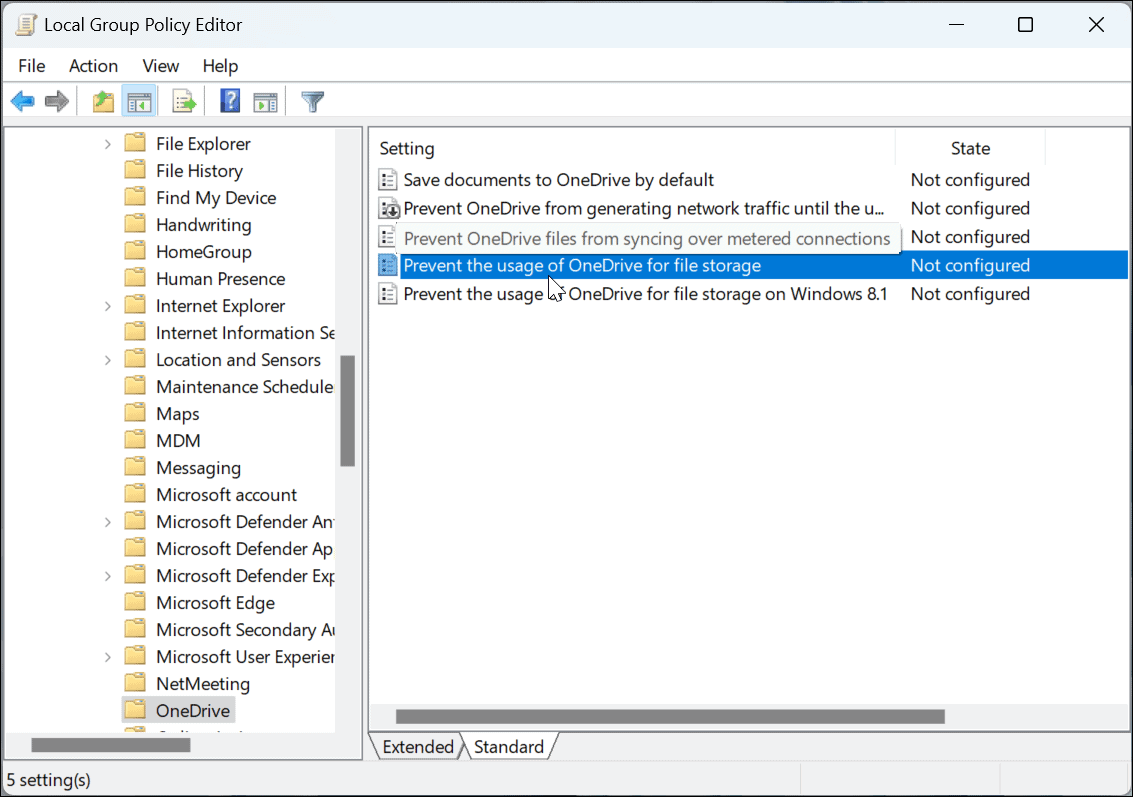
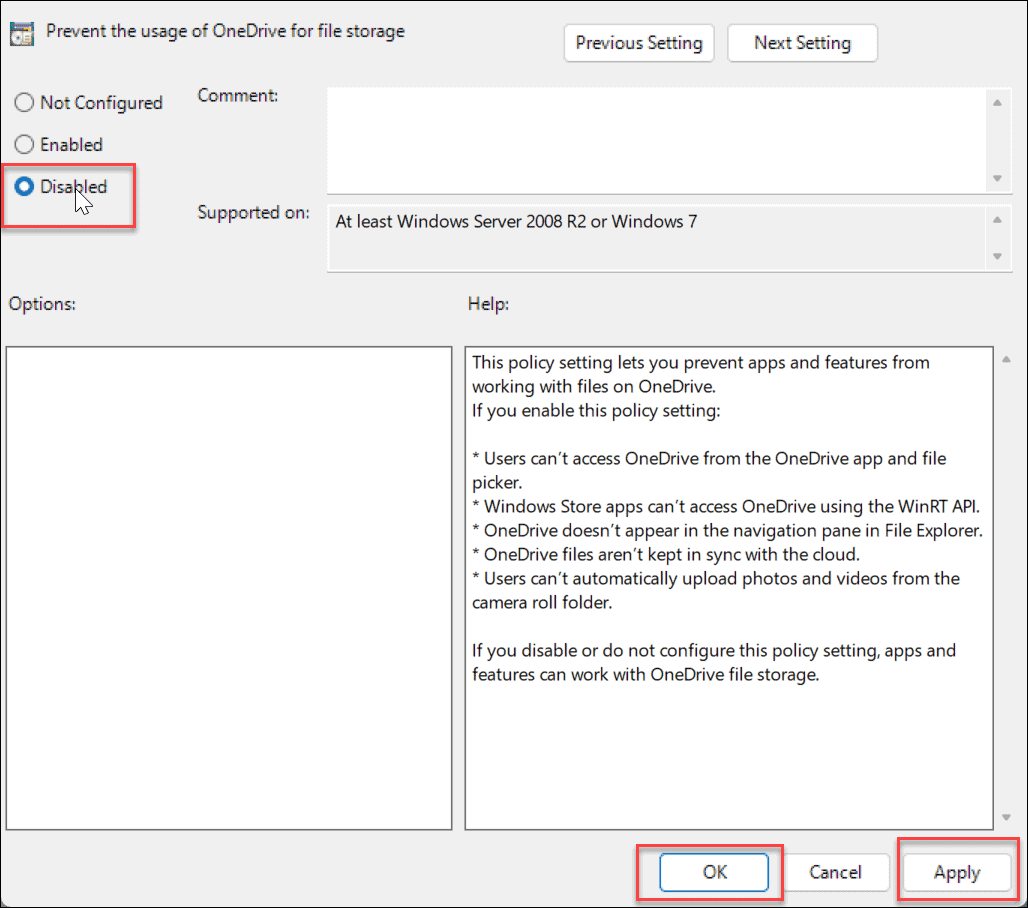
- Double-click the OneDrive folder and double-click the Prevent the usage of OneDrive for file storage policy.

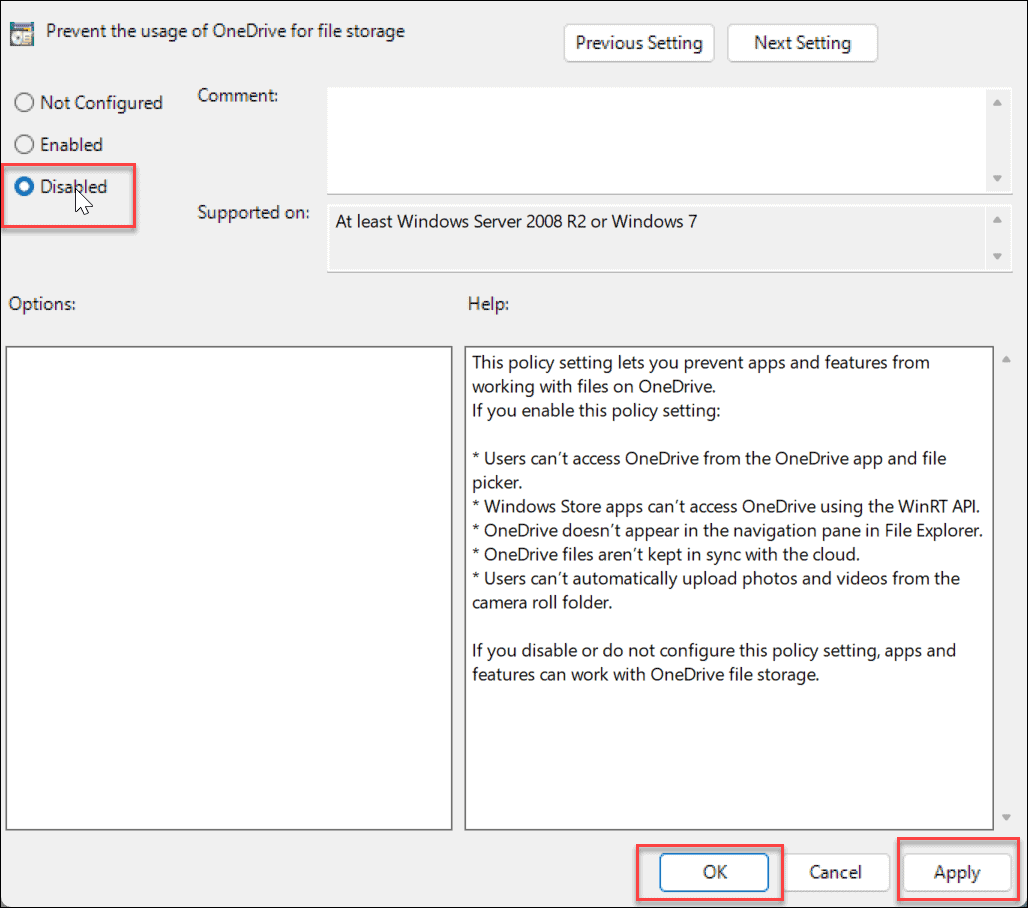
- Select the Disabled button, click Apply and OK, and exit Group Policy Editor.
- Restart Windows 11 to verify OneDrive is disabled on your PC.

Unlink Your OneDrive Account
In addition to preventing OneDrive from startup, it’s a best practice to unlink your PC. After you unlink the computer, it will no longer sync files.
- Launch OneDrive on your PC, click the gear icon in the top-right corner, and choose Settings from the menu.

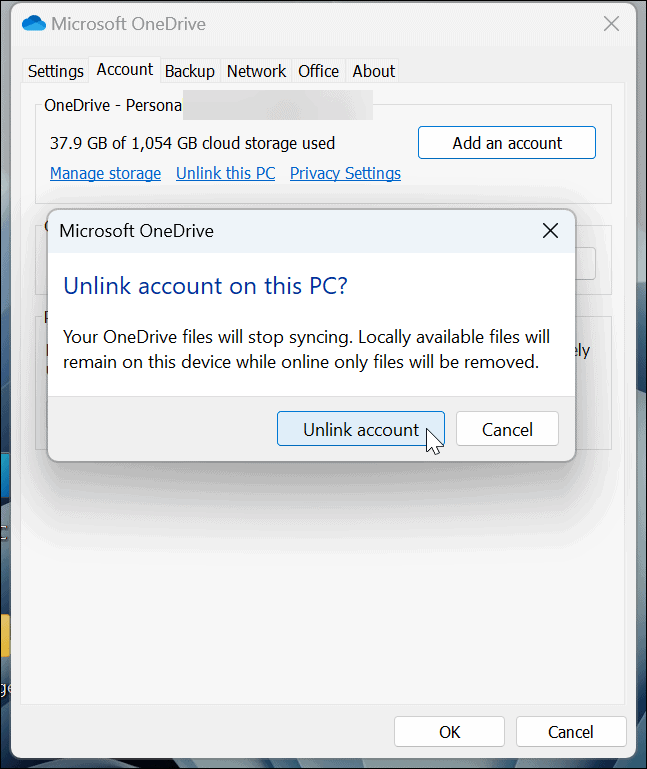
- Select the Account tab at the top and click the Unlink this PC link.


- Verify you want to unlink the account on your PC by clicking the Unlink account button when the verification message appears.

- After unlinking your account, the OneDrive icon will appear gray with a line through the cloud icon. Hover your mouse over the icon, and you’ll see you’re not signed in.


- Moving forward, you’ll need to sign in if you want to reaccess your OneDrive account.

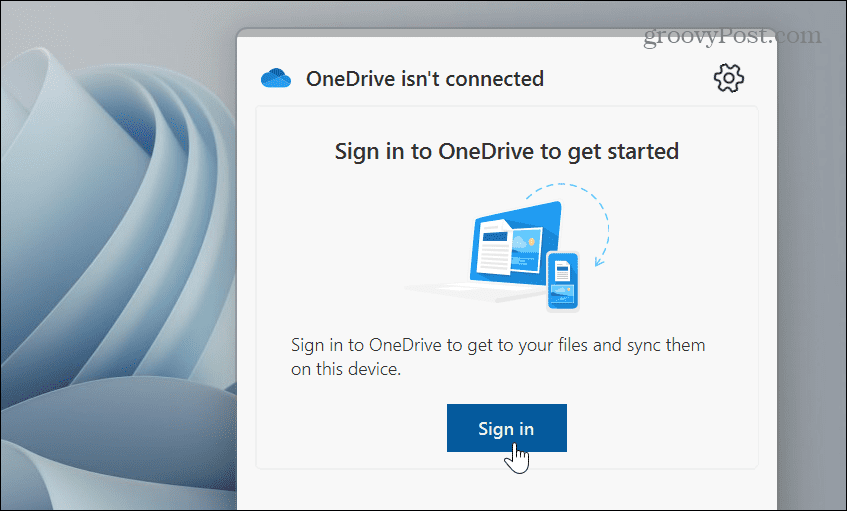
Unlinking your account and disabling it from starting up keeps OneDrive out of your way and remains inactive. If you want to reaccess it, you’ll need to launch it manually and sign in again with your Microsoft account credentials.
Uninstall OneDrive on Windows 11
Another way to get OneDrive out of your way is by uninstalling the app. Uninstalling it is straightforward by using the Settings app.
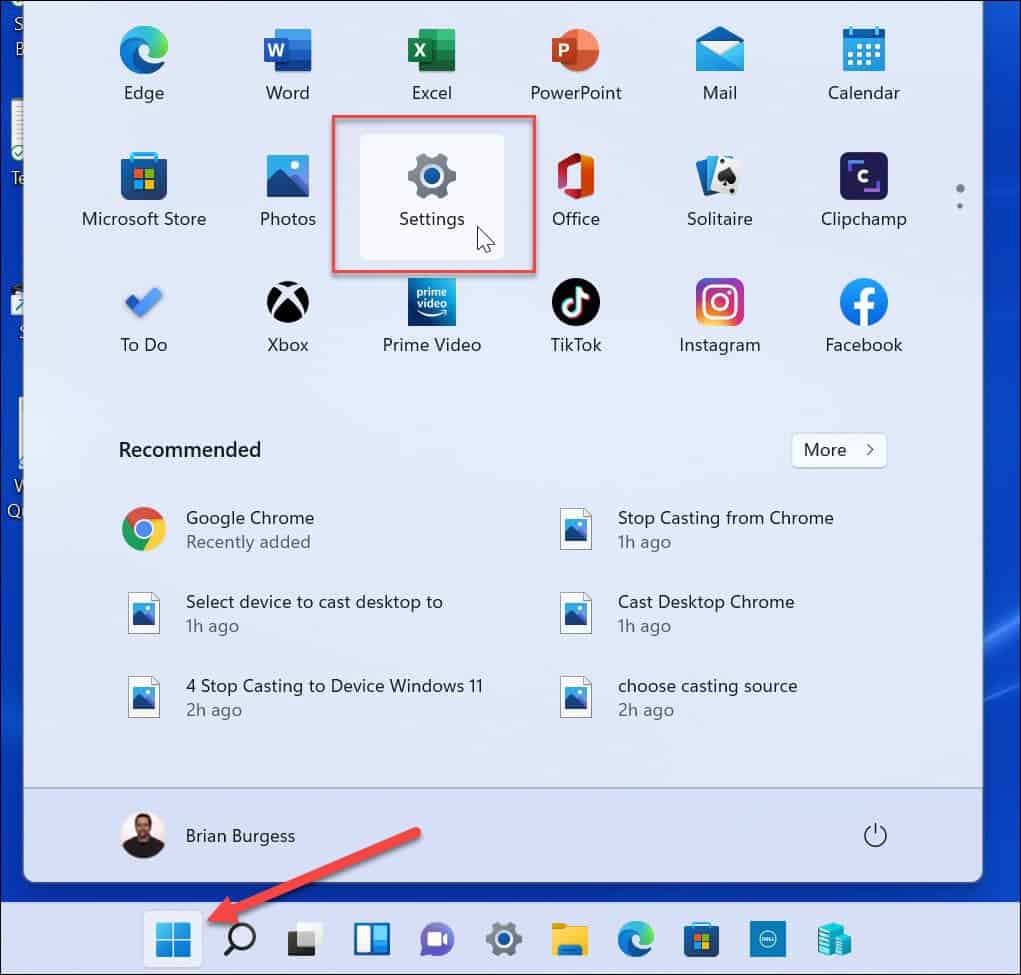
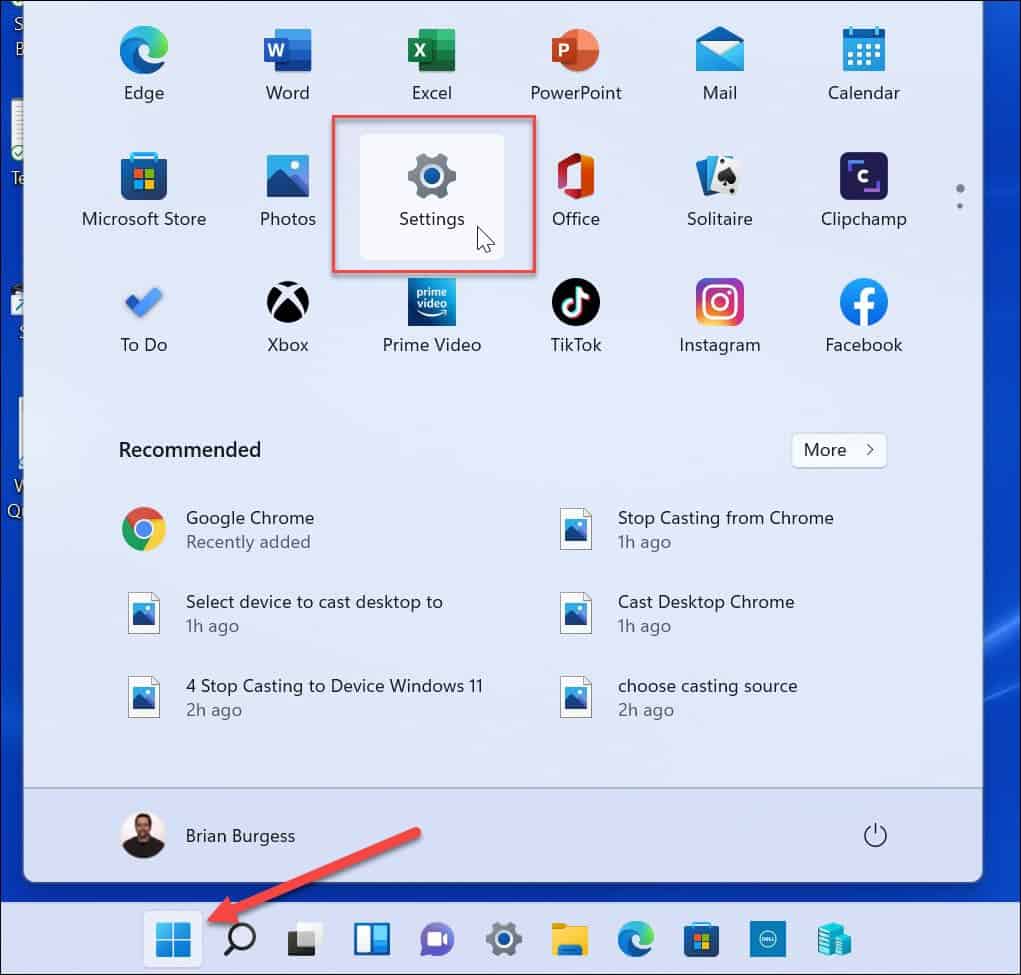
- Press the Windows key, choose Settings from the Start menu or use the Windows key + I keyboard shortcut.

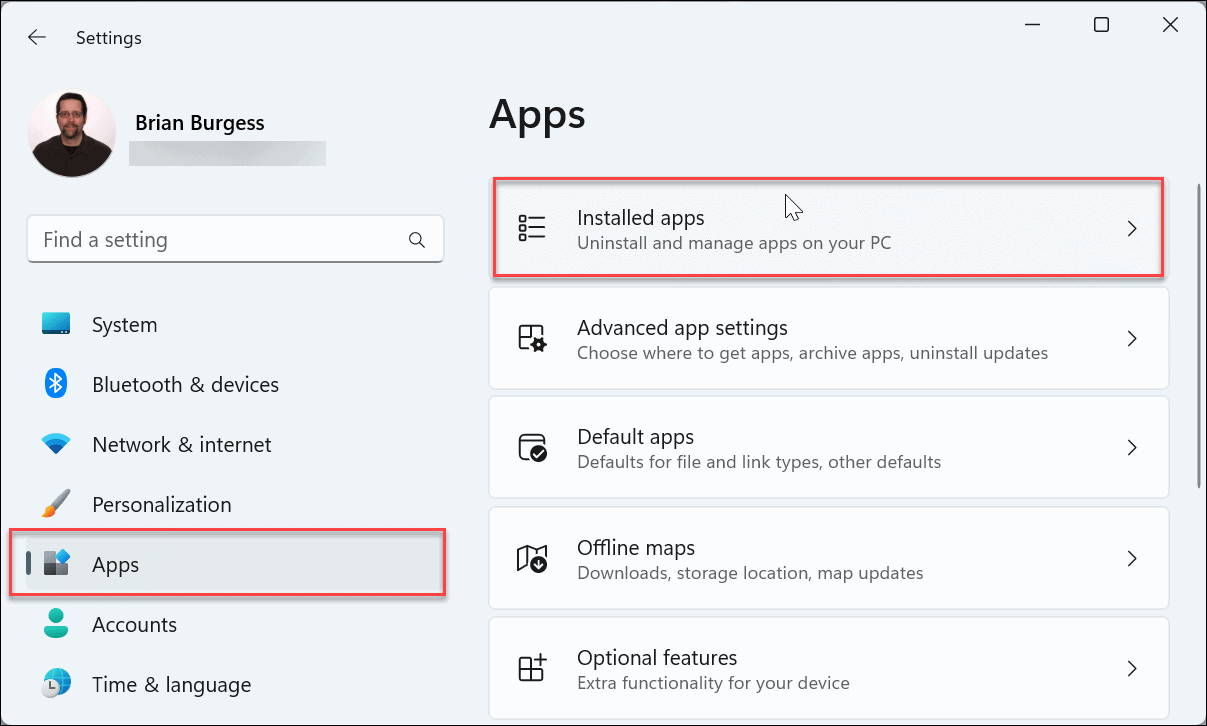
- When Settings launches, click Apps from the left column and the Installed apps option on the right.

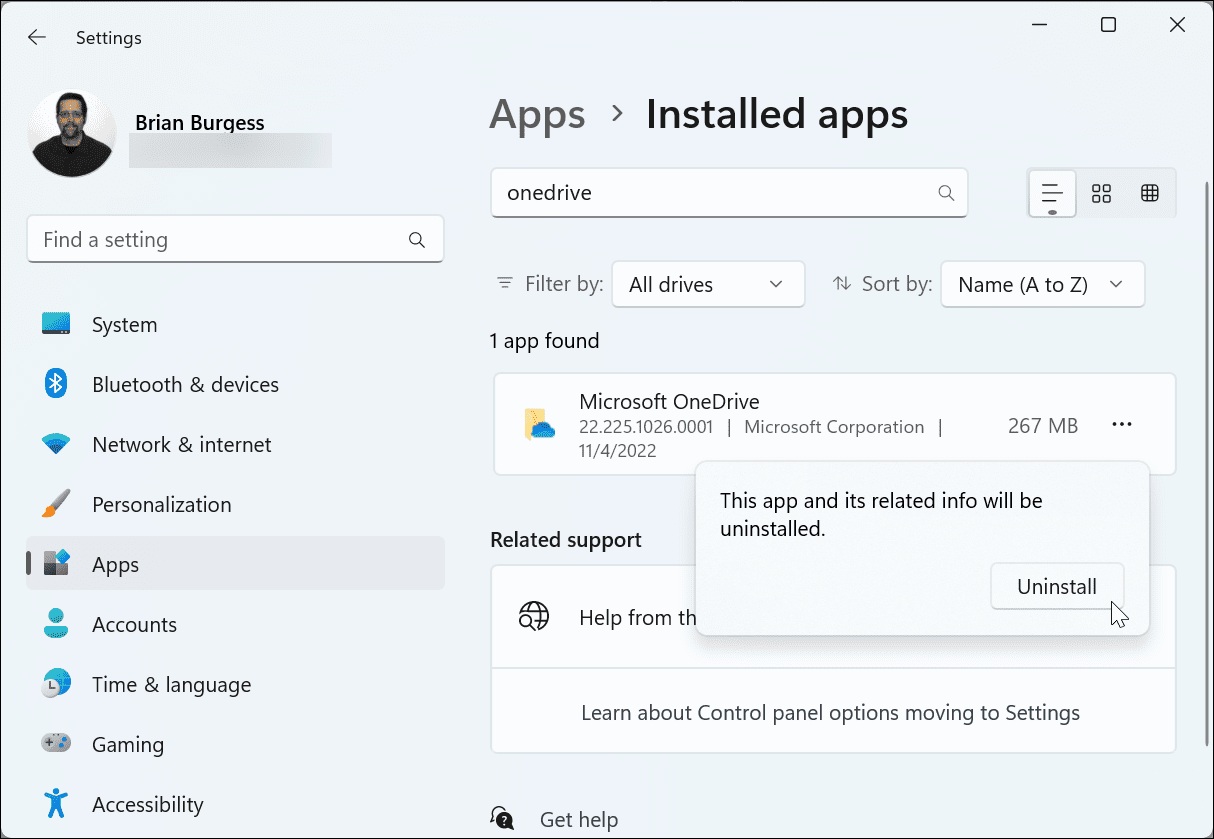
- Type OneDrive in the Search field at the top, click the three-dot button to the right of OneDrive, click Uninstall, and click Uninstall again to verify.

Use PowerShell or Windows Terminal to Uninstall OneDrive
If you prefer to work from the command line, you can use the Windows Terminal or Windows PowerShell tools to uninstall OneDrive by running a single command.
- Open the Start menu.
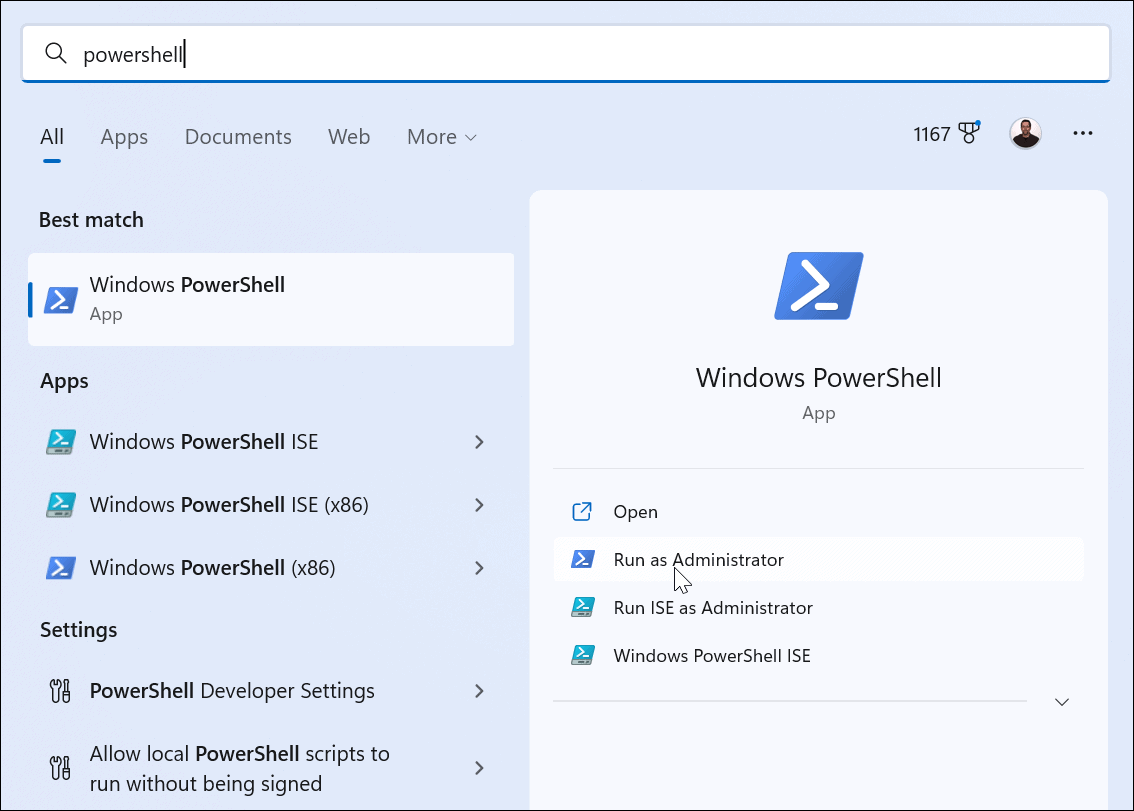
- Search for PowerShell or Windows Terminal and select the Run as Administrator option.

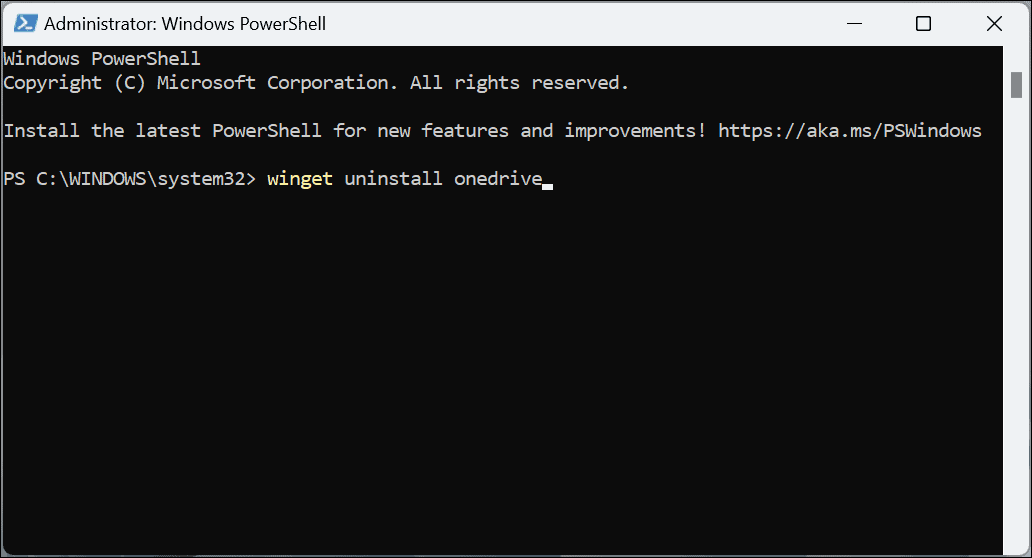
- When the terminal opens, run the following command:
winget uninstall onedrive

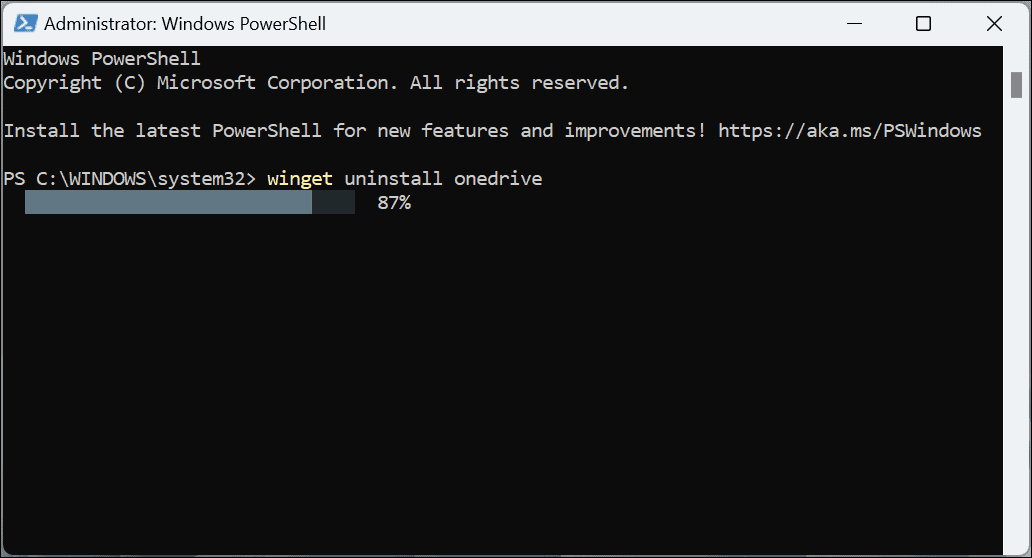
- You’ll see a progress bar while the process of removing OneDrive executes.

- Type Y to agree to the source agreements and hit Enter.

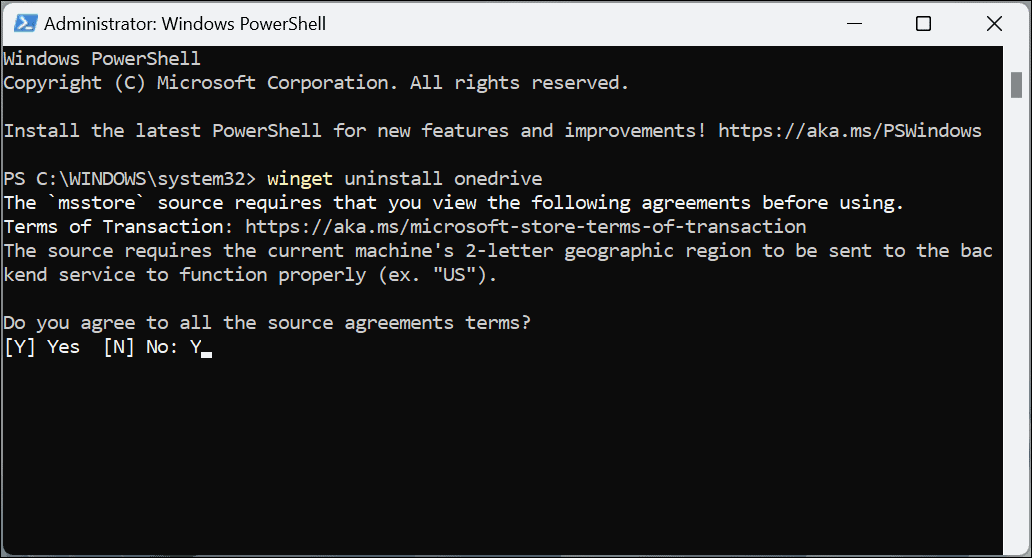
- Finally, you’ll get a message that the uninstall was successful, and you can close out of PowerShell.
OneDrive Out of Your Way
Whether you remove the app or simply unlink your PC from it, OneDrive will be less invasive using the steps above. However, if you want it back in the future, it might be best to unlink your account and sign into it later. If you want all signs of it gone, uninstall it or disable it via Group Policy.
Another reason you might want to disable OneDrive on Windows 11 is because you prefer to use a third-party option like Apple iCloud, Dropbox, or Google Drive instead. Like OneDrive, those services allow you to store and share files.
2 Comments
Leave a Reply
Leave a Reply











bug
January 25, 2023 at 5:14 am
“Prevent the usage of OneDrive for file storage” setting should be set to ENABLED if you want to disable onedrive!
Every site in the internet has the same bad information.
Kevin
October 11, 2023 at 11:12 am
Glad I read the comment, hope he edits the instructions to fix the Enable and adds a list of each example with notes of anything extra needed to disable all the OneDrive pop ups.
I’m facing hours of work since I never caught the fact that everything I installed on a new build was being placed into the cloud, I noticed it when my web access slowed down. Where I’m at people live on POT lines or cellular hot spots, all the band width is needed to deal with today’s websites that are designed for broadband connections. And yes, my government helped my local phone company install fiber to the door but 5 years latter that local phone company is now charging twice the price for ‘limited’ bandwidth compared to cities, which is still better than that they did at first, 5 times more.