How to Trim Video in PowerPoint

Videos can make your slide presentations more engaging, but you don’t want to make them too long. Here’s how to trim video in PowerPoint.
Adding a video to your PowerPoint presentation is a simple way to get across a lot of information in an easily digestible manner. Instead of having to create multiple slides to impart the information, you can embed a video that can provide the same information much more easily.
Sometimes, however, the video you insert in PowerPoint contains more information than you need. It may have extra content at the beginning or end that isn’t relevant to your presentation. In order to only use the information that’s pertinent to your presentation, you’ll need to trim the video down. Luckily, PowerPoint has some simple tools to help you cut down your video to the right length. Here’s how to trim video in PowerPoint.
How to Trim Video on PowerPoint
If you’ve inserted a video into a PowerPoint slide, you can use the native tools in PowerPoint to trim it down to just the portion that you want. PowerPoint allows you to change the start and end points of the video clip so that you can remove any unnecessary parts from the beginning and end.
You can’t cut sections out of the middle of a video clip this way, however. It’s also not possible to trim a video that’s been embedded in PowerPoint from a website such as YouTube. The method is similar on Windows and Mac, but things do look a little different on each OS.
How to Trim Video in PowerPoint on Windows
- If you’re using PowerPoint on Windows, you can use the Video tools to trim down a video that you’ve inserted into a slide.
- Open your PowerPoint presentation.
- Click the video that you want to trim.
- In the menu bar, click Playback.


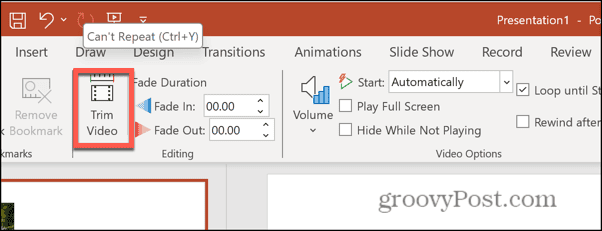
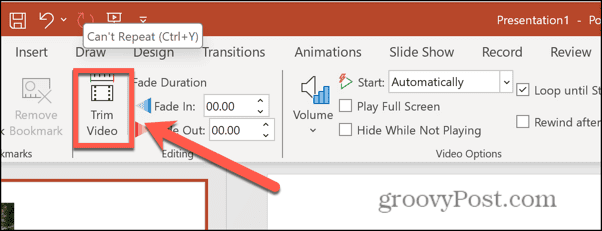
- Click the Trim Video button in the ribbon.


- To find a specific point to trim to, play the video by clicking the Play button.


- When you reach the appropriate point, click Pause.
- You can use the Previous Frame and Next Frame buttons to move back or forward a single frame at a time.


- To set your beginning point, drag the green Start Point handle to the appropriate position.


- To set your end point, drag the red End Point handle to the appropriate position.


- You can see the new start and end times and edit them as appropriate.


- When you’re happy with your selection, click OK to trim the clip.
How to Trim Video in PowerPoint on Mac
The method for trimming video in PowerPoint on a Mac looks a little different, but the process is essentially the same.
- Open your PowerPoint presentation containing your video.
- Click on the video to select it.
- In the menu bar, you should see two new menus: Video Format and Playback.
- Select Playback.


- Click the Trim Video button in the ribbon.


- To play through the video clip to find the point where you want to trim, click the Play button.


- When you’ve found the correct point, click the Pause button.
- You can move backward or forward frame by frame using the Nudge Forwards and Nudge Backward buttons.


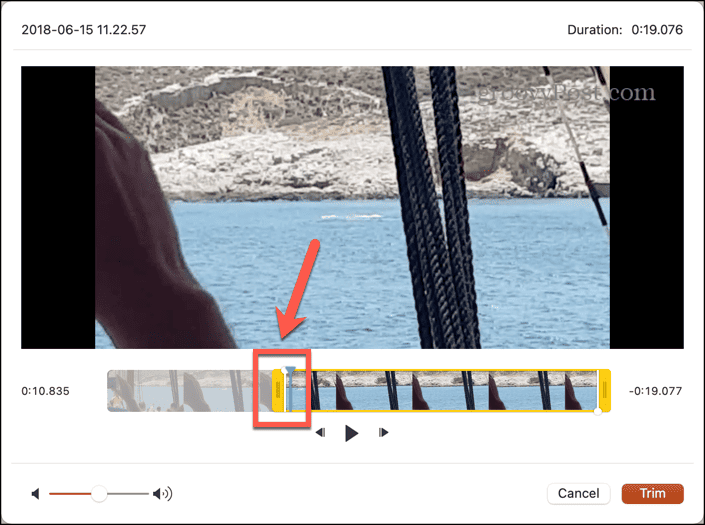
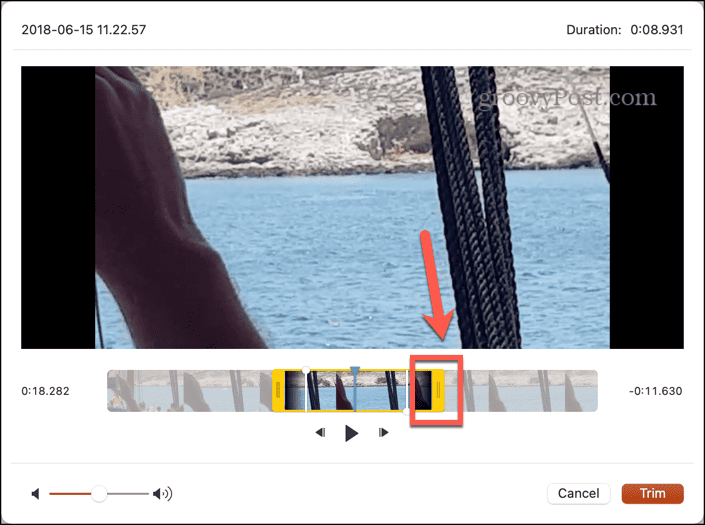
- When you’ve found the right location for your trim, click and hold either the Start Trim or End Trim handles.


- Drag the handle to the appropriate point in your video clip.


- Repeat the process for the other trim handle if necessary.


- You can view your current selection by pressing Play. Only the section of the video between the Start Trim and End Trim markers will play.
- Once you’re happy with your selection, click Trim.
- Your video is now replaced with the trimmed version.
Get Creative With PowerPoint
Learning how to trim video in PowerPoint allows you to quickly cut out any unnecessary parts from the start and end of your video clips so that you only use the parts you really need. Trimming your videos in this way makes them shorter and snappier and makes for a better presentation. Sitting through seconds of video that aren’t actually relevant is a great way to turn off the audience for your PowerPoint presentation.
Inserting videos in PowerPoint is just one of the effective ways to make your slideshows more creative. For example, you can add more visual interest by making your text curve in PowerPoint. This allows you to create some impressive slides that have a much more striking visual impact and are far more likely to capture the attention of your audience than a simple block of text.
Leave a Reply
Leave a Reply


