How to Make Word Pages White in Dark Mode

By default, Word turns the page black with white writing in dark mode. Here’s how to make Word pages white in dark mode.
Most modern devices with screens have some form of dark mode. This allows you to use darker backgrounds instead of lighter ones, meaning that less of your screen is brightly lit. This can be easier on your eyes, and can also help to extend battery life if less of your screen is consistently brightly lit.
By default, Word will switch to a black page in dark mode, with white text. Sometimes, however, you might prefer to stick to the classic black text on a white page when you’re working in Word. If so, it’s easy enough to change the Word settings to get the software to keep a white page color even when dark mode is on. Here’s how to make Word pages white in dark mode.
How to Make Word Pages White in Dark Mode on Windows
If you’re using Word on a Windows computer, you can change the Office Theme for Windows. This will override the color of the page dictated by dark mode. If you choose the White, Dark Grey, or Colorful theme, your Word pages will show a white page with black text, even when dark mode is turned on for your computer.
- Open Word and click the File menu.


- At the bottom of the left-hand menu, click Account.


- Click the Office Theme drop-down on the left-hand side of the Account settings page.


- Select the Dark Gray, White, or Colorful theme, all of which use white pages.


- Your Word pages should now display as black text on a white page.


- If you select Use System Setting as the Office Theme, Word will have black pages when using dark mode on Windows, but white pages when using light mode.


- Choosing Black as the Office Theme will make Word pages black with white text, even when Windows is in light mode.


How to Make Word Pages White in Dark Mode on Mac
If you’re using Word for Mac, you can choose how Word pages display in dark mode through the Word preferences. You can choose to turn of Word dark mode completely, to use dark mode with a dark page color, or to use dark mode with a white page color. This option keeps the Word ribbon and menu bar dark but makes the pages white.
- Open Word and click the Word menu in the menu bar.


- Select Preferences.


- Under Authoring and Proofing Tools click General.


- In the Personalize settings, select Turn Off Dark Mode to return all of Word to the default color scheme, including a white page, and a light ribbon and menu bar.


- Select Dark Mode Has A White Page Color to make the pages white in Word, but to leave the ribbon and menu bar in the dark mode colors.


- Select Dark Mode Has A Dark Page Color to use dark mode for the ribbon and menu bar and make the Word pages dark.


How to Choose the Page Color on Windows
Another way to make the page white in Word when Windows is in dark mode is to manually choose the page color. This works counterintuitively when you’re in dark mode; in order to make the page white, you’ll need to select the page color as black. Choosing black in dark mode will turn the page color to white. The cursor will automatically switch to black, making it easily visible on the white page.
- Open Word and click the Design menu.


- In the ribbon, click Page Color.


- If you hover over any of the colors, the Word page color will change to give you a preview of how that selection will look, which is the opposite to what you would expect.
- Select Black from the theme colors.

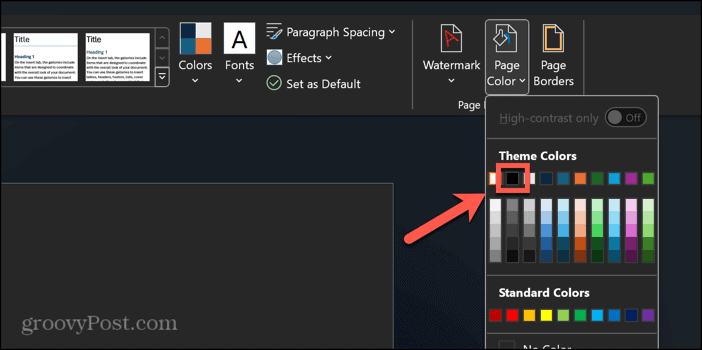
- The Word page will turn white, with the cursor switching to black. The rest of the Word app will remain in the dark mode colors.


- To revert to the standard dark mode settings, click the Page Color tool again.
- Select No Color.


- The page will revert to black with a white cursor which is the default setting for dark mode.
How to Choose the Page Color on Mac
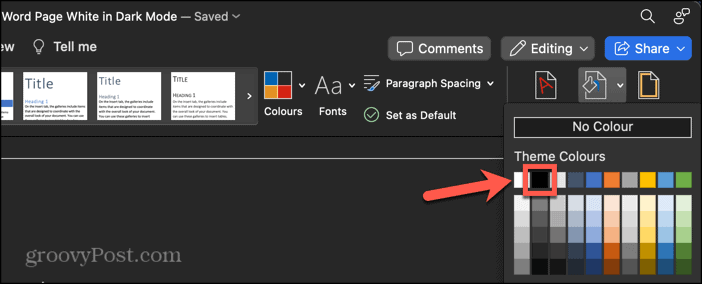
If you’re using Word for Mac, you can choose the page color using the Page Color tool. You can use this method to turn the page white, while still keeping the dark mode theme for the rest of Word, such as the page background and the ribbon and toolbar. However, unlike on Windows, the color of the cursor won’t automatically change. Choosing black from the top row of the theme colors in dark mode will turn the page white. However, this makes the cursor invisible as the cursor is also white in dark mode. Your text will be black, making it visible on the white page, but you won’t be able to see the cursor.
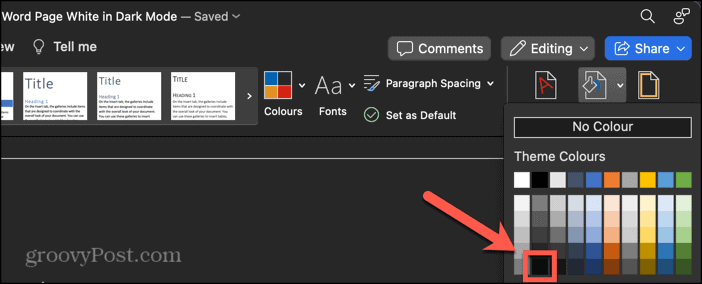
You can change the cursor color in Accessibility settings, but this will change the color for all of your apps. The best solution is to opt to select black from the main body of color options instead. This will turn the Word pages a very, very light gray, but makes the cursor white, which allows you to still see the white cursor against the light background.
- Open Word and click the Design menu.


- Click the Page Color tool in the ribbon.


- Choose a page color. If you select Black from the top row of colors, the page will turn white, but the white cursor will be invisible, making Word much harder to use.

- If you select Black from the main body of color options, this will make the white cursor visible against the almost white background making Word much easier to use.

- To revert to the standard dark mode colors, click the Page Colour tool again and select No Colour.

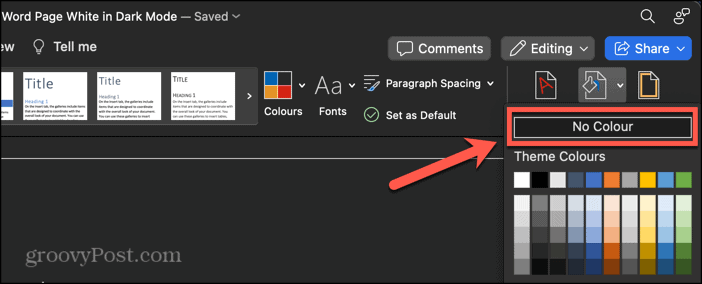
- The page will return to a black background with white text.
How to Turn on Dark Mode on Windows
Dark mode is a useful tool for reducing the light emitted by your computer or smartphone without making it any less usable. By utilizing predominantly dark colors instead of light, reducing the amount of glare from your screen, and making it easier on your eyes. You can turn on dark mode in Windows through the Personalization settings.
- Right-click the Start button in the taskbar.


- Select Settings.


- In the left-hand menu, click Personalization.


- Select Colors.


- Click the Choose Your Mode drop-down.


- To use the default dark mode settings, select Dark.


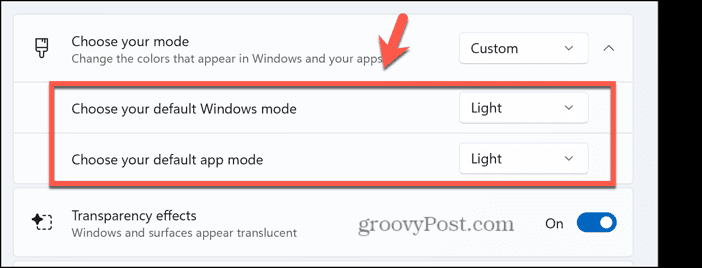
- If you want more control, click Custom.


- You can now select light or dark mode for both Windows and apps, with the option to choose different settings for each.

How to Turn on Dark Mode on Mac
On Mac, you have three options. You can manually turn on dark mode or light mode, or you can choose an automatic mode. This will automatically change your display from light mode to dark mode based on the schedule that you set in Night Shift.
- Click the Apple icon in the top-left corner of the screen.


- Select System Settings.


- In the left-hand menu, select Appearance.


- Select Light or Dark to manually select that mode.


- Select Auto if you want your Mac to automatically switch between light and dark mode based on your Night Shift settings.


- To change your Night Shift settings, click Displays in the left-hand menu.


- Click the Night Shift button.


- Click the Schedule drop-down.

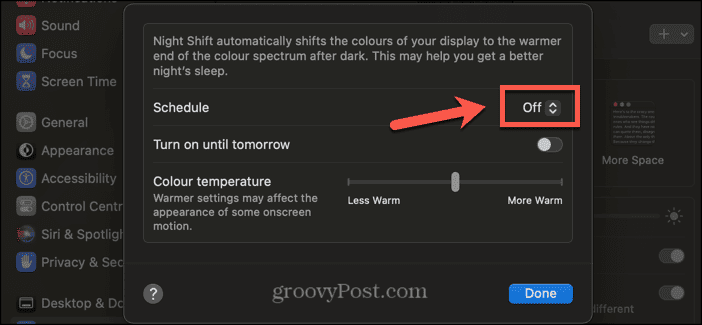
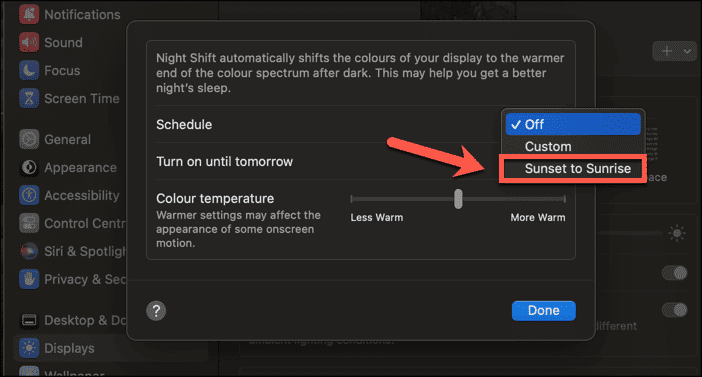
- Choose Sunset to Sunrise to have dark mode turn on at sunset and off and sunrise.

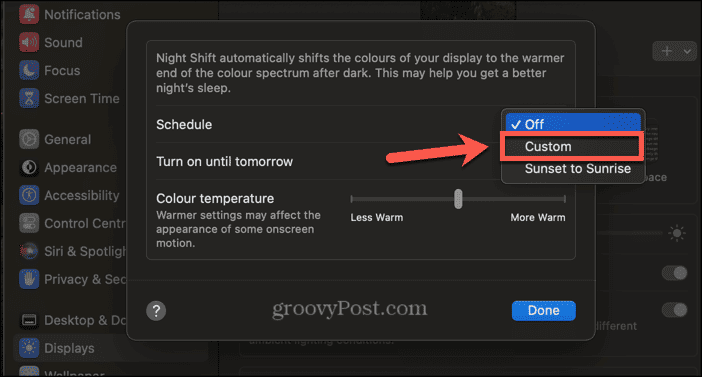
- Choose Custom to see your own range of times.

- You can also quickly switch from light mode to dark mode in the Control Center.
- Click the Control Center icon in the menu bar.


- Click Display.


- Toggle Dark Mode on or off.


Making Word Pages White in Dark Mode
Learning how to make Word pages white in dark mode allows you to keep your computer in dark mode, but still use Word with the default white pages. If you prefer working in Word with black text on a white background but want to keep the rest of your computer in dark mode, it’s easy enough to do with a couple of tweaks.
Taking advantage of dark mode on your computer is a good way to ensure that you’re not getting too much glare from your screen, especially if you’re working in darker conditions, so it’s always worth giving it a try.
Leave a Reply
Leave a Reply


