How to Angle and Rotate Text in Microsoft Excel

In Microsoft Excel, you can rotate text, angle it, or display it vertically. Here’s how to change the orientation of the text in your sheet.
Whether for appearance or space, you can easily rotate text in Excel. You have simple ways to angle it, make it display vertically, or rotate it up or down. And if you have a precise setting you want to use, you can customize the text using an exact number of degrees.
Here, we’ll show you how to use these settings to display your text in Microsoft Excel to fit your preference.
How to Rotate Text at an Angle in Excel
Using an angle for your text can be visually pleasing, especially for column and row headers. You can quickly rotate the text to an angle counterclockwise or clockwise.
- Select the cells containing the text you want to angle. This can be a column, row, cell, or range of cells.
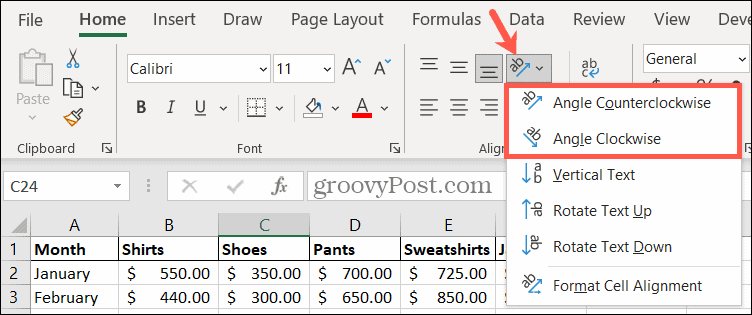
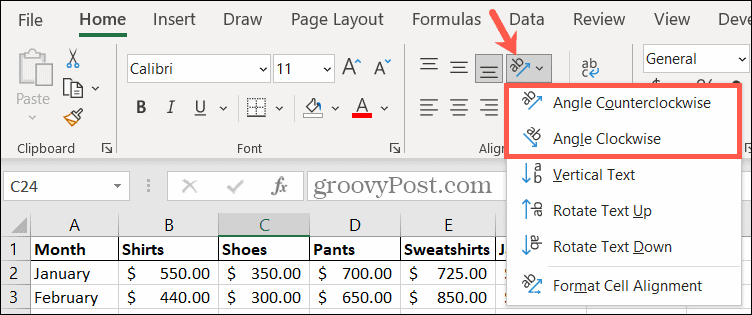
- Go to the Home tab and click the Orientation button in the Alignment section of the ribbon.
- Choose one of the top two options for Angle Counterclockwise or Angle Clockwise.
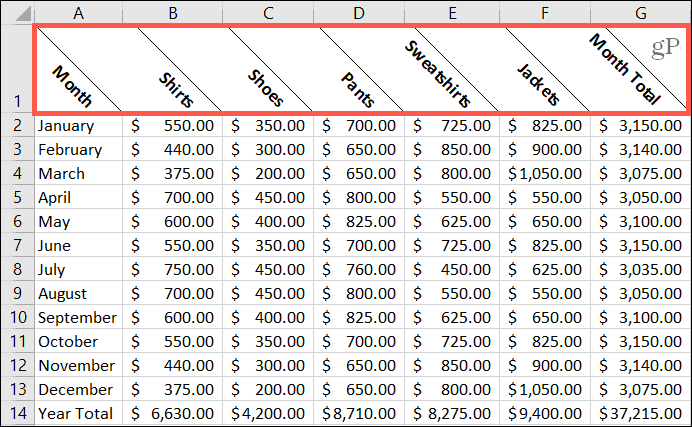
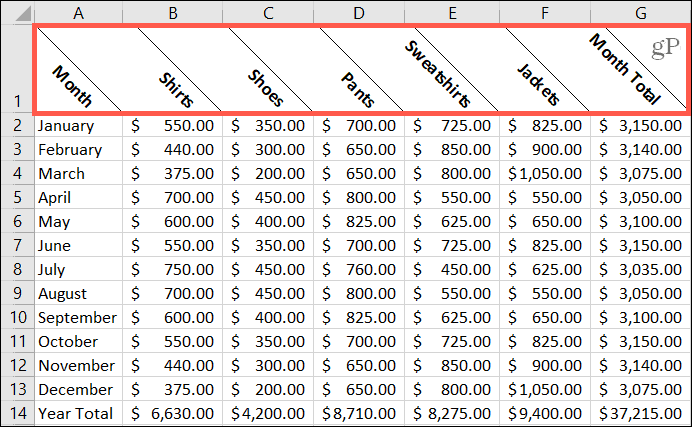
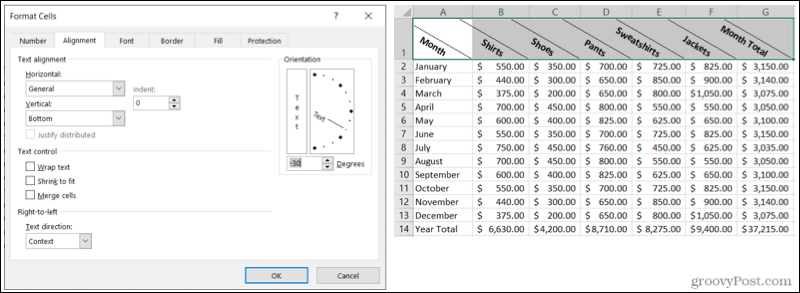
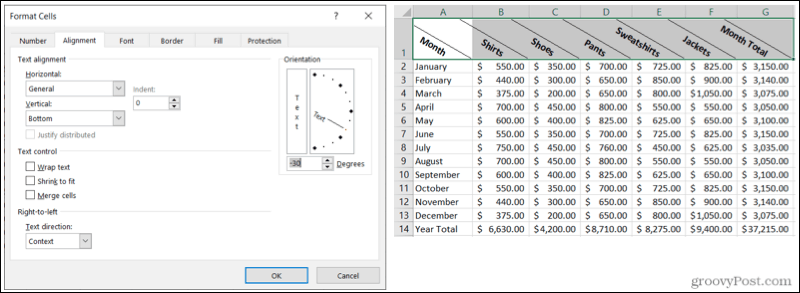
You’ll then see your sheet immediately update with your newly aligned text. In the screenshot below, we angled our column headers clockwise.
How to Display Text Vertically in Excel
Displaying your text vertically may not be an orientation you use often but can be useful in certain circumstances. This can be helpful if you use row headers that cover several rows. You can optionally merge the cells and then apply the alignment; we’ll show you how to do both.
Merge the cells
- Select the cells you want to merge.
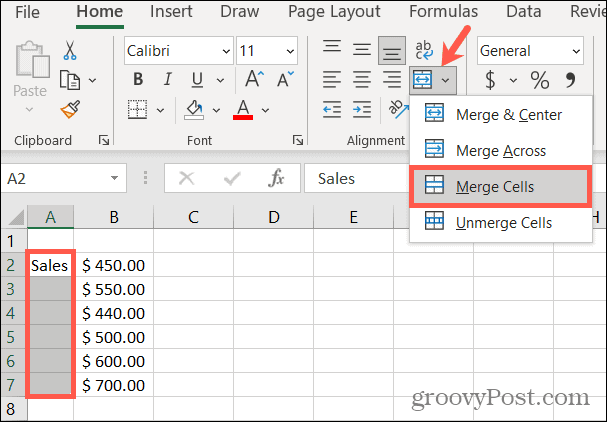
- Go to the Home tab and click the Merge button in the Alignment section of the ribbon.
- Choose either Merge & Center or Merge Cells per your preference.
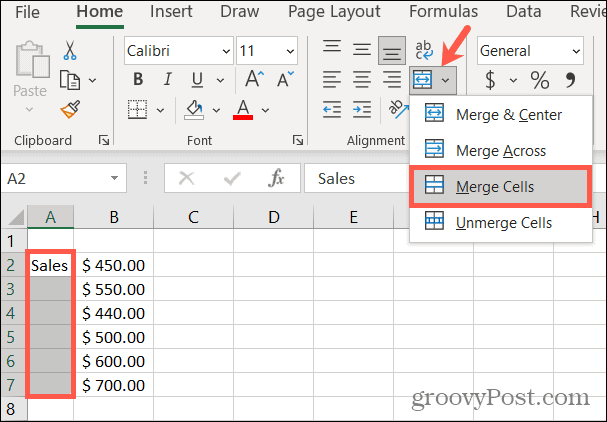
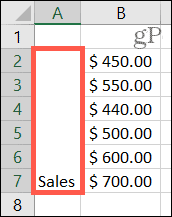
The text in the group of cells now resides in a single cell.

Apply the alignment
- Select the cell(s) containing the text you want to display vertically.
- Go to the Home tab and click the Orientation button.
- Choose Vertical Text.
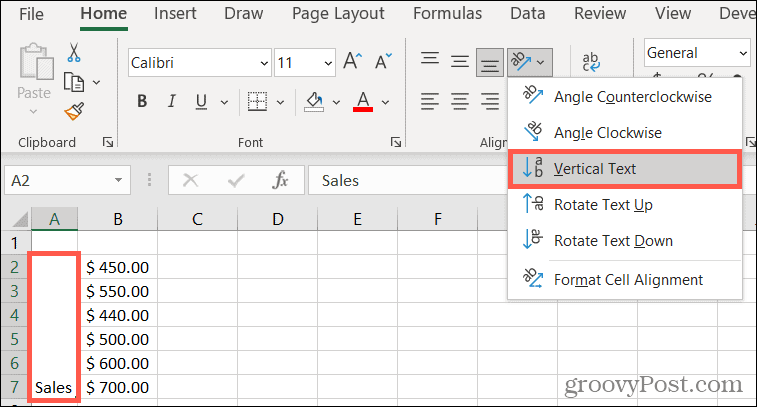
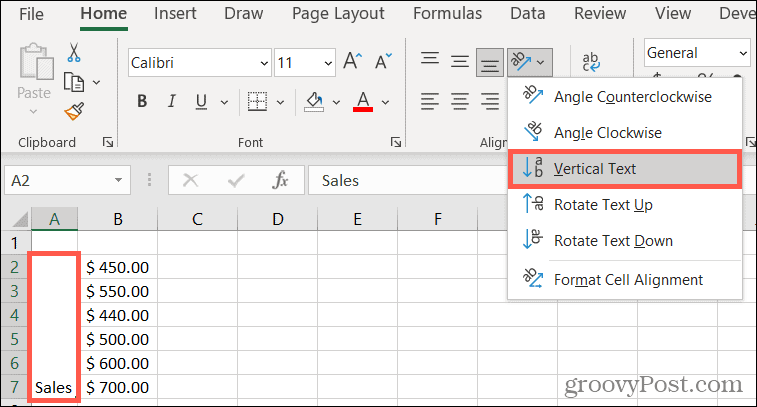
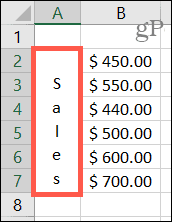
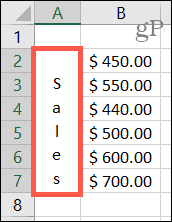
Your merged cell will then display the text or characters vertically. This places the characters below each other and can be read from top to bottom.
How to Rotate Text Up or Down in Excel
Maybe you like the vertical alignment but don’t want the characters displayed from top to bottom. You can rotate the text up or down to be read sideways. This is also helpful if you use merged cells. So follow the steps above if you’d like to merge your cells first. Then, do the following to apply the alignment.
- Select the cell(s) containing the text you want to rotate.
- Go to the Home tab and click the Orientation button.
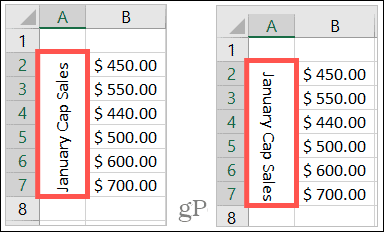
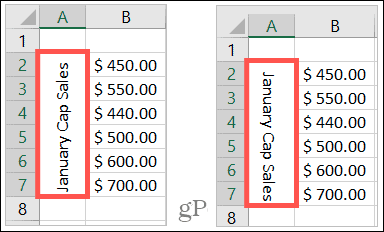
- Choose either Rotate Text Up or Rotate Text Down per your preference.
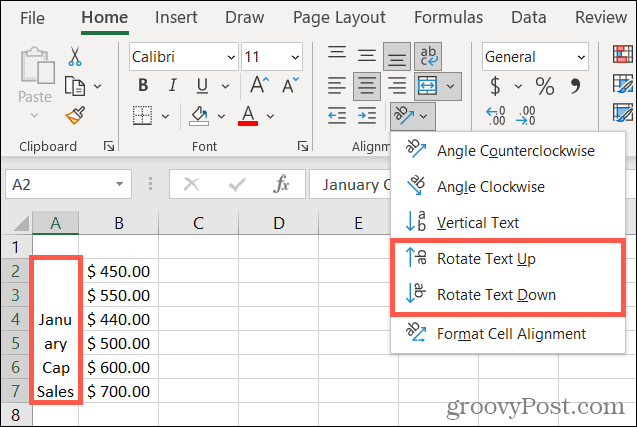
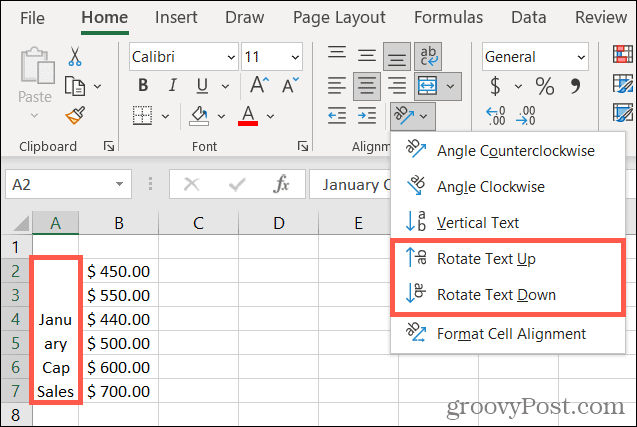
And like the other alignment settings, you’ll see your cell(s) update with the new layout.
How to Rotate Text Using Exact Degrees in Excel
When you apply any of the above orientations to your text, you can also use an exact number of degrees. This can help you get just the right angle or spacing for the text. You can also use the following feature right from the start rather than following the previous steps if you prefer.
For this example, we’re going to adjust text where we applied the Align Clockwise orientation. We want to decrease the angle slightly.
- Select the cell(s) containing the text you want to adjust.
- Go to the Home tab and click the Orientation button.
- Choose Format Cell Alignment.

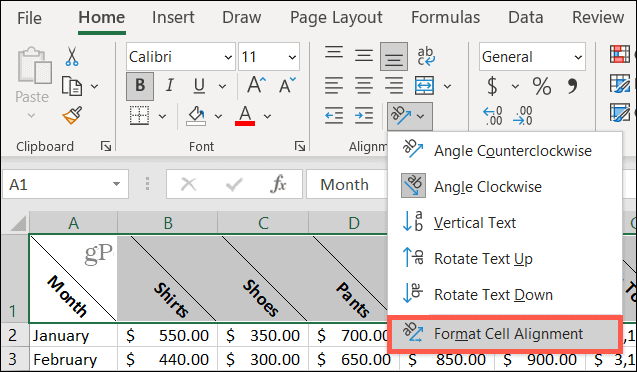
- In the Orientation section of the pop-up window, make your adjustment. You can drag the dial, use the up and down arrows, or enter the number of degrees in the box.
- When you finish, click OK.
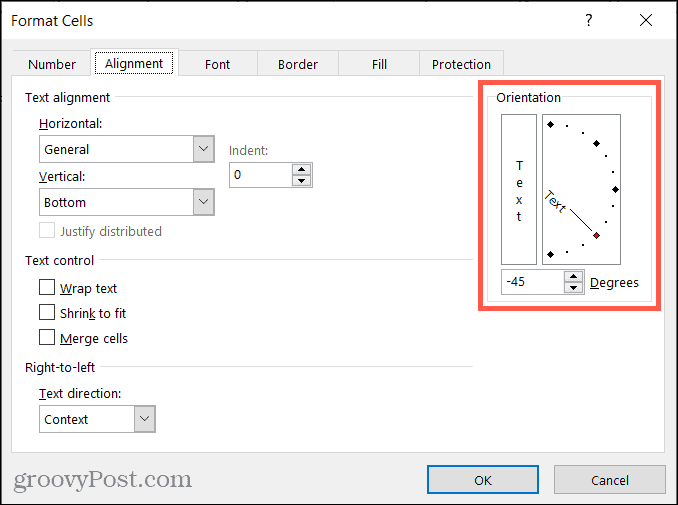
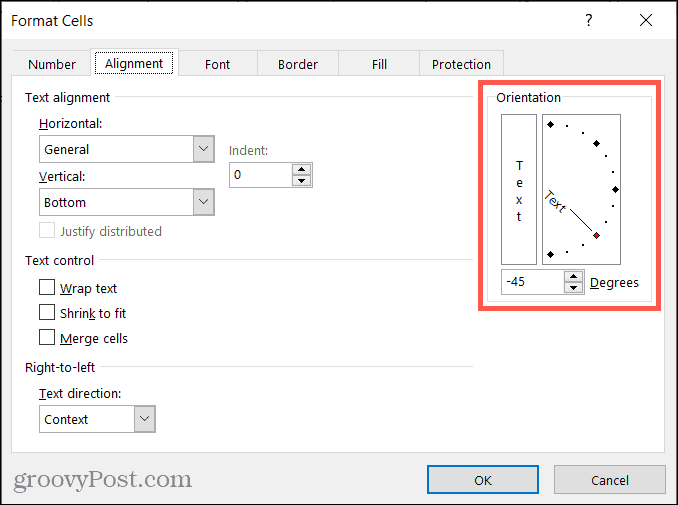
Now the angle of our text is slightly more horizontal because we changed the angle from -45 to -30 degrees.
Angle, Rotate or Display Text Your Way in Excel
No matter which way you want to angle, rotate, or turn that text in your Excel spreadsheet, these orientation options should have you covered.
Note: The Orientation feature is not currently available in Excel for the Web.
For more, take a look at how to wrap text in Excel or use Excel’s functions to capitalize your text or make it upper or lower case.
Leave a Reply
Leave a Reply


