How to Password Protect a Folder on Mac

If you have sensitive content you want to keep safe, you can add passwords to your folders. Here’s how to password protect a folder on Mac.
Keeping your information safe isn’t always that easy. Malware may give hackers access to your files, your computer might be lost or stolen, or you might just have a friend or family member who has a sneaky look at your computer when you’re not around. Anything that’s unprotected on your computer is then accessible by those people.
The good news is that it’s possible to add an additional layer of protection to your files and folders, ensuring that no one can access them without the right password. By password protecting your folders, the contents will remain safe even if your computer is compromised. If you want to keep your data safe from prying eyes, then here’s how to password protect a folder on Mac.
How to Password Protect a Folder on Mac Using Disk Utility
You can password protect a folder on Mac by using the Disk Utility tool to create an encrypted image of your folder. Once set up, in order to decrypt and see the contents of the folder, you’ll need to enter a password. This method creates a new disk image that includes the contents of the original folder, so once it’s created, you’ll need to delete the original folder, as this will still be unprotected.
To create a password protected image using Disk Utility:
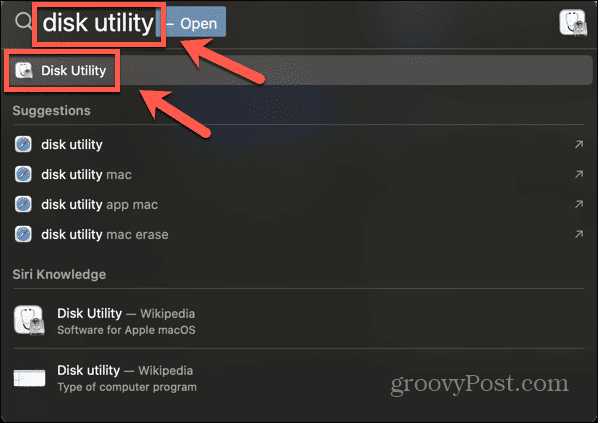
- Open Spotlight by pressing Cmd + Space.
- Type Disk Utility and select the Disk Utility app from the results.

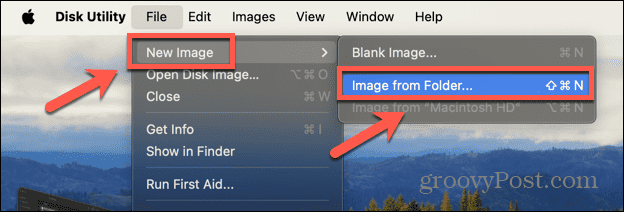
- In the menu bar, click the File menu.


- Select New Image > Image From Folder.

- Navigate to the folder that you want to password protect and click Choose.
- Edit the name and location of the folder if you wish.
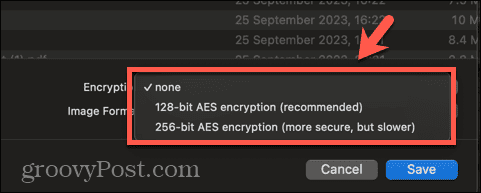
- Click the Encryption drop-down and select 128-bit AES Encryption (Recommended) or 256-bit AES Encryption (More Secure, But Slower).

- Enter a password when prompted. You should use a strong password for better security, but you must ensure that you can remember it or use a password manager.
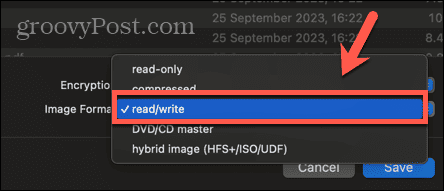
- Click the Image Format drop-down and select Read/Write if you want to be able to edit the contents of the folder.

- Click Save and Disk Utility will create an encrypted image of your folder.
- To open your files, double-click the disk image and enter your password.
- The decrypted image will mount, and you can access your files.
- To protect the files again, right-click the disk image and select Eject.


- Once you’ve checked that you can access your files, you can delete the original folder, if necessary, as this will still be unprotected.
How to Password Protect a Folder on Mac Using Encrypto
You can also password protect folders on your Mac using third-party tools. There are a range of options available. In this example, we’ll be using Encrypto, which is a free third-party app that’s available for Mac and Windows. If you’re sharing the encrypted folder with someone else, they’ll need to install Encrypto too in order to be able to open the folder.
To password protect a folder using Encrypto:
- Download and install Encrypto from the App Store.
- Click the + (plus) sign and select the folder that you want to protect.


- Alternatively, you can drag and drop the folder into the Encrypto.
- Enter your password. A strong password is recommended, but you must be able to remember it or use a password manager, as you won’t be able to recover it.

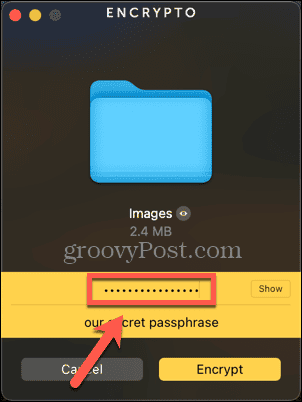
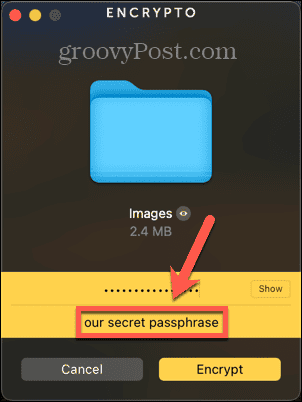
- You can enter a hint to remind you or the person you’re sharing the folder with of the password.

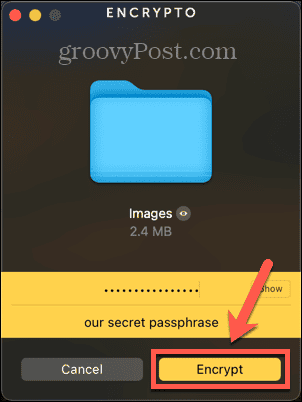
- Click Encrypt and Encrypto will encrypt your folder.

- Click Save As to save the encrypted folder to a specific location, or Share File to share the encrypted folder.

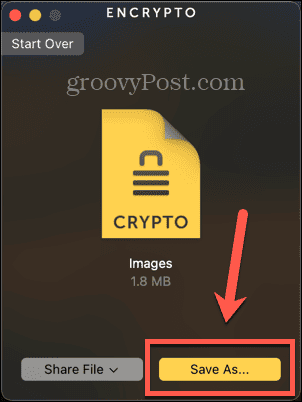
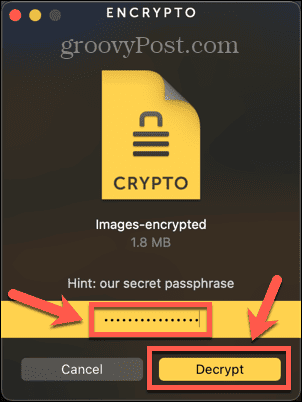
- Once saved or shared, to open the encrypted folder, double-click the Encrypto image file.
- Enter the password and click Decrypt and the folder is decrypted.

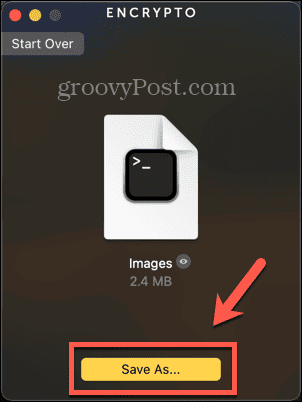
- Click Save As to save the decrypted folder to a specific location.

- Once you’re sure that the folder has been successfully encrypted, you can delete the original unprotected folder if necessary.
Why Password Protect a Folder on Mac?
There are two key reasons why you might want to password protect a folder on your Mac. The first is if you have sensitive information on your Mac that you don’t want anyone else to be able to access. Whether you’re concerned that other people may have access to your Mac, or you want to protect sensitive information in the case of loss or theft, password protecting your folder ensures that no one can access the contents without the correct password.
The other common reason why you might want to password protect a folder is when you’re sharing a folder with someone else. If you share a folder by email or on a USB drive, for example, then if it’s unprotected, anyone who has access to that email or that USB drive can open the folder. By password protecting the folder, even if anyone else gets access to it, they won’t be able to open the folder without the correct password.
Take Control of Your Mac Folders
Learning how to password protect a folder on Mac ensures that you can protect sensitive information on your computer. It also allows you to share content with other people, safe in the knowledge that only those people who have the password will be able to access the files. For maximum protection, you should use a strong password when encrypting your folders, so you might want to consider using a password manager. This means that you don’t have to remember a whole range of complicated passwords by yourself.
There are plenty of other ways that you can take control of your Mac folders. One useful trick is to set the default folder that opens in Finder. By default, Finder will open the Recents folder, but it is possible to change this to whichever folder you wish. If there’s a folder you use most of the time, setting this as the default folder that opens when you launch Finder can save you precious time.
Leave a Reply
Leave a Reply


