How to Make a Book in Google Docs

Are you a budding novelist? If so, you don’t need to splash out on Office. Learn how to make a book in Google Docs right here.
Google Docs is a free and surprisingly powerful online word processor. It comes with a range of ready-made templates for common document types, including resumes, letters, project proposals, and class notes.
If you’re looking to write a book in Google Docs, however, then there aren’t any suitable templates to use. Thankfully, it’s fairly simple to set up your own template if you’re looking to write a novel.
If you want to know how to make a book in Google Docs, here’s what you need to do.
Configuring Page Settings
Before you can start writing your book, you need to configure your page settings so that it’s set up to look like a novel. The first step is to create your document and tweak some settings.
How to Configure Page Settings
- Navigate to the Google Docs webpage in your browser.
- Sign in to your Google account.
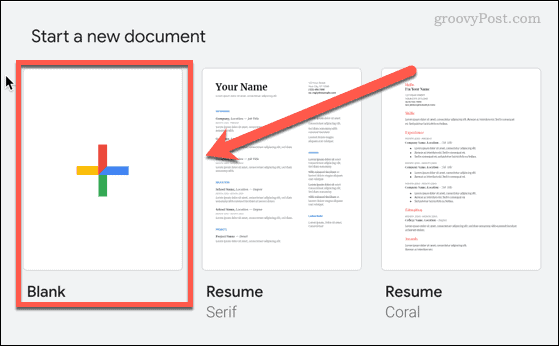
- Under Start a New Document, click on the Blank template.

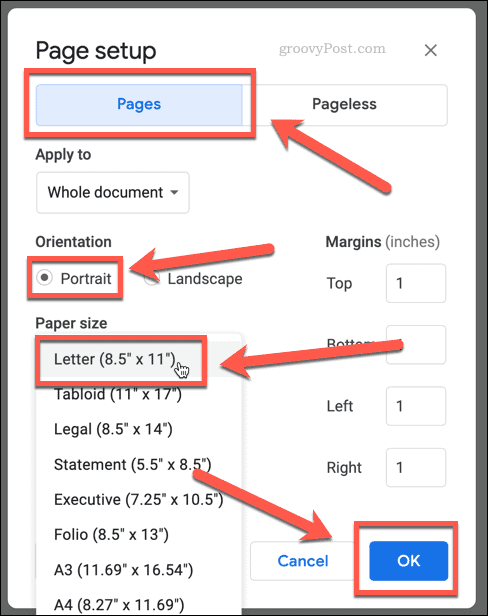
- Once your new document has opened, click on File > Page Setup.
- Choose your page options. For most book templates, you should select Portrait for the Orientation, Letter for the Paper Size, and ensure that Pages is selected.
- Click OK when you’re done.

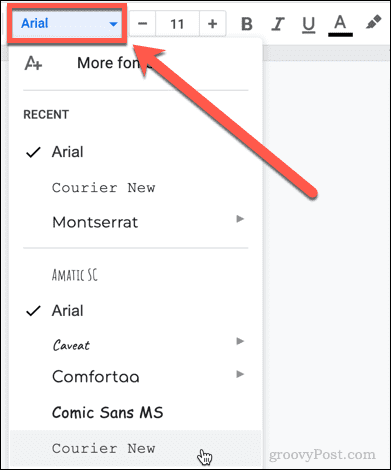
- Click on the Font dropdown at the top of the page, and choose your font. Times New Roman is a common font used for many books.

- Set the font size to 11 or 12. You can use the plus and minus buttons, or just type the font size into the box.


Create a Title Page in Google Docs
Now it’s time to create your title page for your novel. This will be the first page that anyone sees from your book.
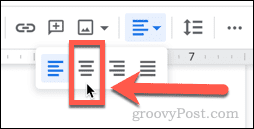
- Make sure your text is center-aligned by clicking on the Center Align icon.

- Type the title of your book.
- Press Enter twice, then type your name.
- Highlight the title of your book, then click on the Styles dropdown that should currently read Normal Text
- Scroll down to Heading 1 then click on Apply ‘Heading 1’.

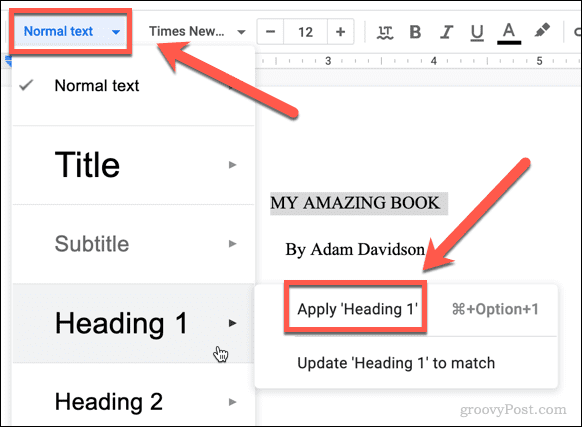
- Your book title will now appear as a large heading on your title page.


Rename Your Document in Google Docs
This is a good time to name your document. The reason that we’ve waited until this point is that Google Docs will generate a file name for you from the first content in your document, which saves you from having to type it out.
How to Rename a Document in Google Docs
- Click in the document name field, which should currently read Untitled Document.

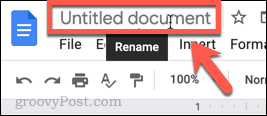
- The field should automatically populate with the title of your book.

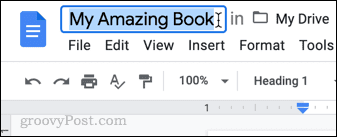
- If you want to use a different name for your document, you can type it in here.
Create Your First Chapter in Google Docs
Your title page is done, and your document has been named. Now it’s time to create your first chapter.
- Click at the end of your name on the title page.
- Press Ctrl-Enter on Windows or Cmd-Enter on Mac to create a page break. This ensures that your first chapter starts on a different page to your title page.
- Type the name of your chapter.
- It’s important to use a heading rather than just writing your chapter title in bold font, as it will help when it comes time to create a table of contents. Highlight your chapter name, and click on the Text dropdown.
- This time, scroll down and then click on Heading 2.

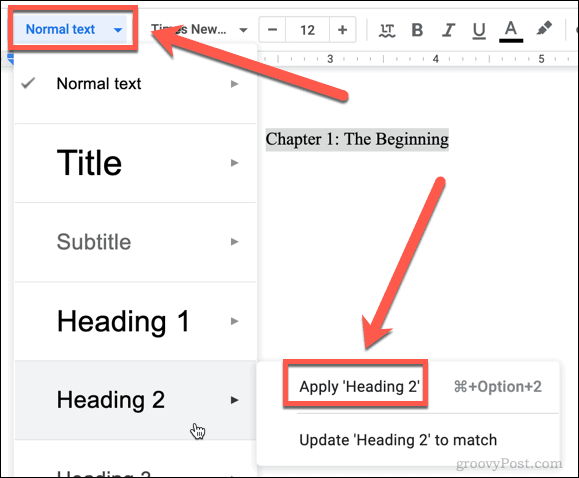
- If you want to, click on the Center Align icon, to put your chapter title in the middle of the page.


- Click at the end of your chapter title, and then press Enter to start the first paragraph.
- Start writing your chapter.


- When you finish your chapter, repeat steps 2-7 above to create the next chapter.
Configuring Headers and Footers in Google Docs
Now that you’ve got some pages written, you’re going to need some page numbers for your book. We can add these in by using headers and footers.
How to Configure Footers and Headers
- Click on Insert > Headers & Footers > Header.

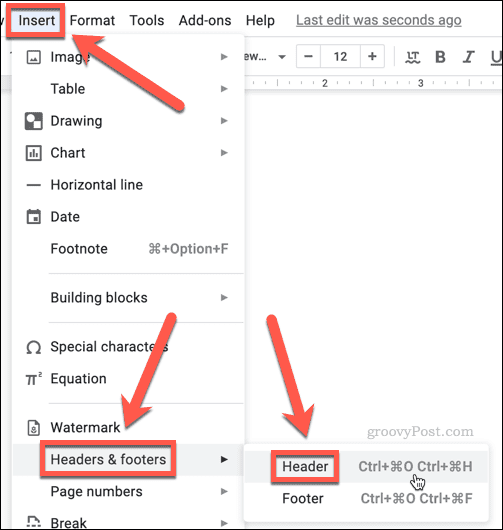
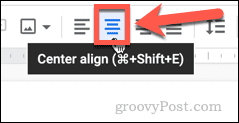
- Type the name of your book. If you want this to appear centrally, click on the Center Align icon.

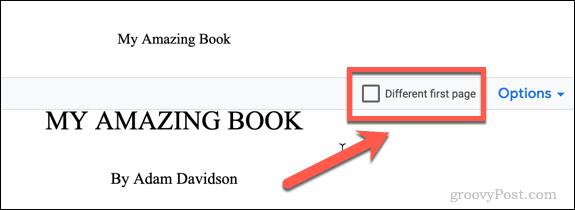
- If you scroll to the top of your document, on the first page you will see a Different First Page checkbox. Ensure this is unchecked so that the header doesn’t appear on your title page.

- Now click on Insert > Headers & Footers > Footer.
- Click on the Options dropdown and then click on Page Numbers.

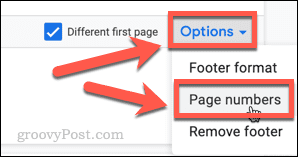
- Uncheck the Show On First Page checkbox if you don’t want a page number on your title page. (It looks much better without one). Click Apply.

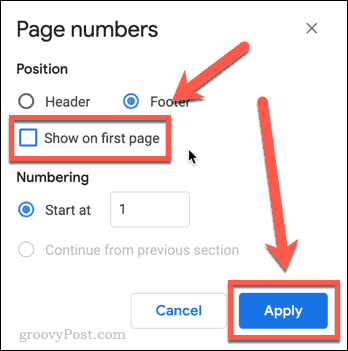
- Click anywhere in the main body of the document. You should now see your page header and page numbers on every page except the title page.
Create a Table of Contents in Google Docs
The final step is to set up a table of contents. This is why we made all of our chapter titles H2 headers rather than simply bold text: Google Docs will now create the table of contents using those headers.
How to Create a Table of Contents
- Click at the end of your name on the title page, and press Ctrl-Enter on Windows or Cmd-Enter on Mac to create a page break. This will insert a new page for our table of contents.
- Click Insert > Table of Contents and select whether you want your table of contents to include page numbers, or just be made up of links to each chapter.

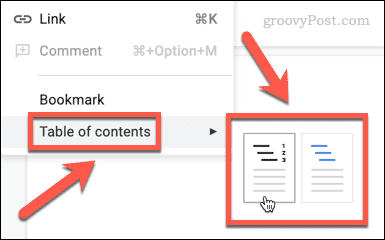
- Your table of contents will now be created.


- When you add more chapters, you made need to update your table of contents. To do so, click on it, and then click on the Update Table of Contents button.


Create a Book Template in Google Docs
If you’re planning to write more than one book, then we definitely recommend saving a copy of your document that can use as a template for other books.
Here’s How to Create a Book Template in Google Docs
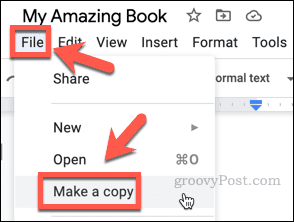
- Click on File > Make a Copy.

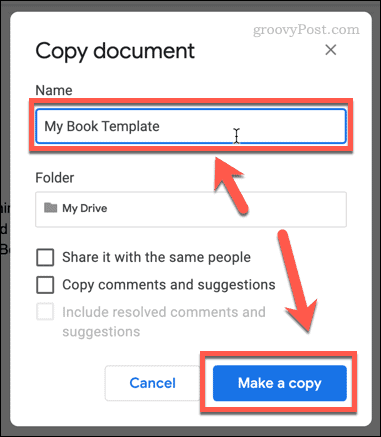
- Name your template and click on Make a Copy.

- Strip out any of the chapter text, but leave the chapter headings; you can just overwrite these when you write a new book, and it saves having to set up the formatting again.
- Now when you want to create another book, just open your book template, and click on File > Make a Copy to create a new document. That way, your template will always remain unaltered.
Get The Most Out of Google Docs
There aren’t many word processing tasks that can’t be done in Google Docs. Now that you know how to make a book in Google Docs, there’s plenty more to learn.
1 Comment
Leave a Reply
Leave a Reply


Michael Krumpak
October 3, 2023 at 6:24 am
This was great. I was searching for 30 minutes to find a template, and created one using your clear instructions in 5 minutes Thanks. Coach Krumpak
Zechariah felts
December 8, 2023 at 7:12 am
Honestly im in school rn but still i like writing and this really has helped thank you so much for your help u da bomb