How to Set an Alarm in Windows 11

Sometimes you need a reminder of when things need to happen. An alarm can help. Here’s how to set an alarm in Windows 11.
When you’re using a computer, time can do funny things. For example, you might be gaming on your PC for what feels like ten minutes, only to check the time and realize that several hours have passed, and you’ve completely forgotten to eat.
The good news is that in Windows 11, you can create alarms to help you remember to do things at specific times. You can set multiple, repeating alarms, and give them names to remind you what they’re going off for. Here’s how to set an alarm in Windows 11.
How to Set an Alarm in Windows 11
If you want to set an alarm in Windows 11 you can do so using the native Clock app. This app allows you to set multiple alarms that will sound on your computer at the designated time. You can give each alarm a name if you’re setting multiple alarms so that you know what each alarm is for when it goes off. You can also set your alarms to repeat on specific days of the week, choose from a selection of alarm sounds, and set up snooze options.
- Click the Start button in the taskbar.


- Click All Apps.


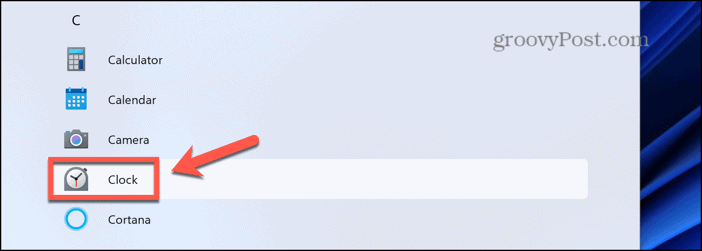
- Select the Clock app.

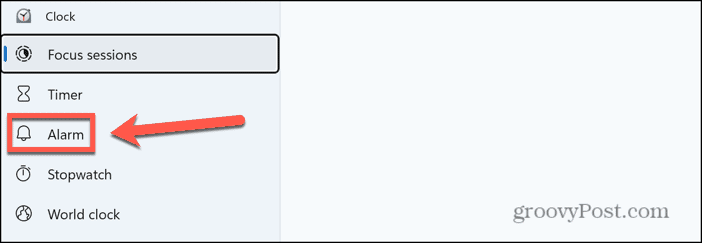
- In the left-hand menu, select Alarm.

- To add a new alarm, click the + (plus) icon in the bottom-right of the screen.


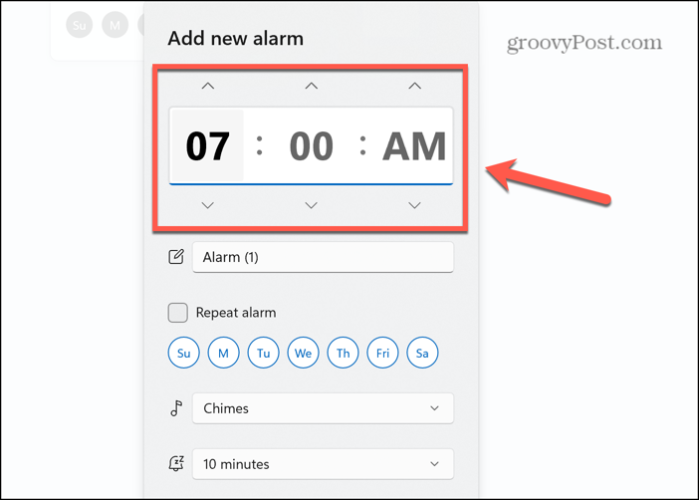
- Use the up and down arrows to set the alarm time. You can also click in each section and type in a value.

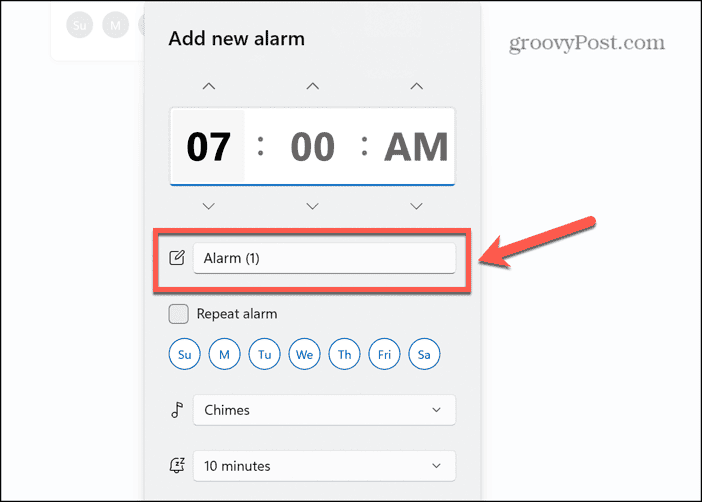
- If you wish, edit the name of the alarm. This is useful if you’re setting multiple alarms so you can distinguish between them.

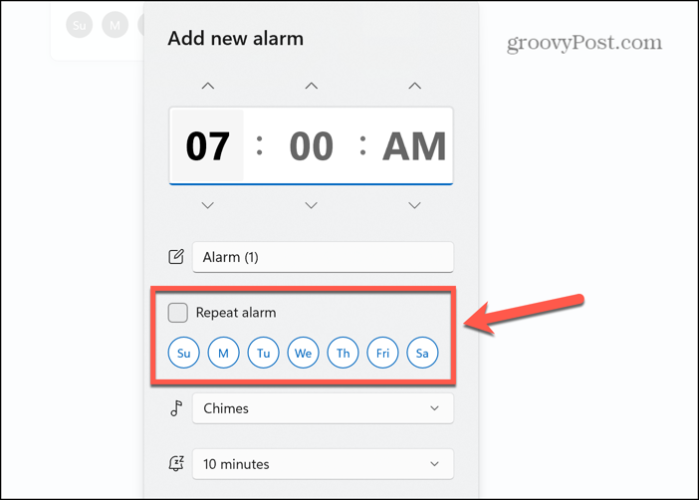
- If you want the alarm to repeat on specific days, check Repeat Alarm and select the days that you want the alarm to repeat.

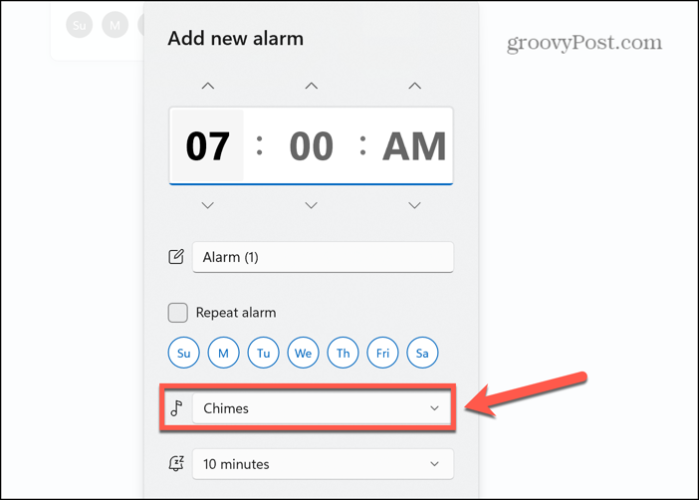
- To change the alarm sound, click the Alarm Chime drop-down and select one of the chime options.

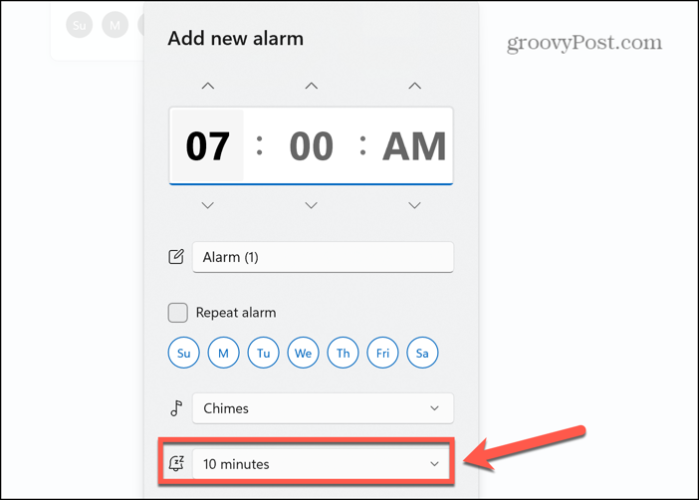
- To change the default snooze time, click the Snooze Time drop-down and select one of the snooze options.

- When you’re happy with your alarm, click Save.
- You can add more alarms by clicking on the + (plus) icon again.
Your alarm is now set. You’ll need to ensure that your computer volume is at an appropriate level. You may also need to disable sleep mode as explained later in the article, as your alarm won’t go off if your computer is asleep.
Turning Off or Snoozing Your Alarm When It Goes Off
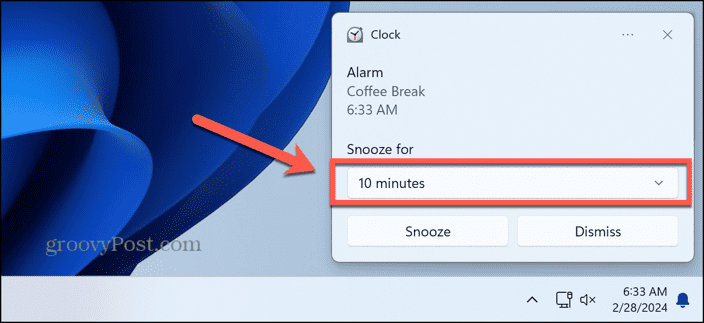
- When an alarm goes off, you have the option to Dismiss the alarm or Snooze it.

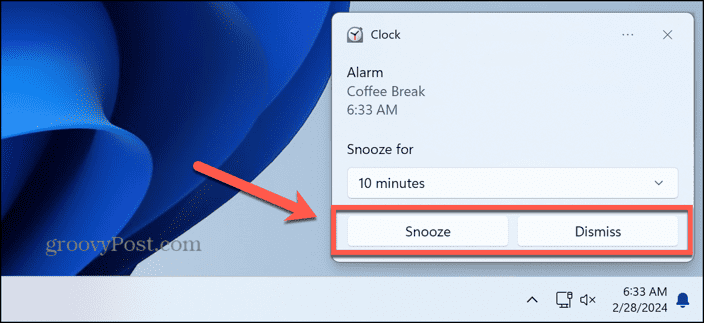
- The Snooze option will use the default time that you set in the alarm. To change this, click the Snooze For drop-down and choose a different value.

How to Edit an Alarm in Windows 11
Once you’ve created an alarm in Windows 11, you can make changes to it whenever you wish. You can change any of the alarm settings, from the time it goes off to the chime sound.
- Click the Start button in the taskbar.


- Click All Apps.


- Select the Clock app.


- In the left-hand menu, select Alarm.


- Click the alarm that you want to edit.
- You can now make any changes you wish to the alarm.

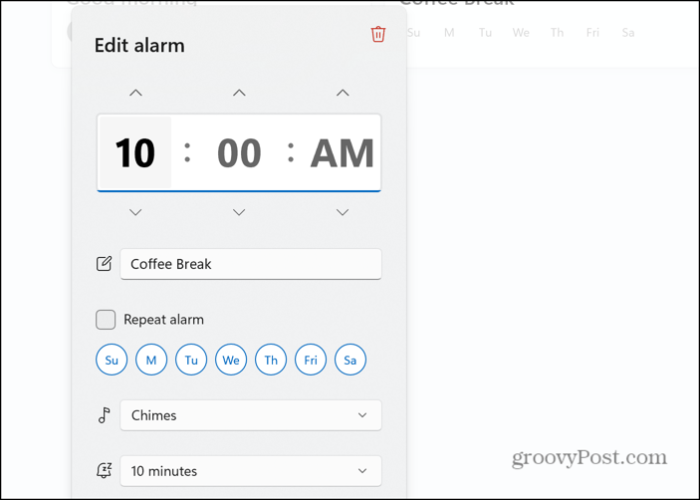
- When you’ve made your changes, click the Save button to apply them.
How to Disable an Alarm in Windows 11
If you don’t want your alarm to go off, you could just turn down the sound on your computer, but you have the option to disable it or delete your alarm. Deleting the alarm will remove it completely. Disabling the alarm means that it won’t go off, but the details of the alarm will still be saved in the Clock app. This means that you can turn the alarm back on again at any time you wish.
- Click Start.


- Select All Apps.


- Click the Clock app.


- In the left-hand menu, select Alarm.


- To disable any alarm, turn the Toggle Switch off for that alarm.


- Any disabled alarms are grayed out in the Clock app.
- You can repeat with as many alarms as you wish.
- When the alarm is disabled, it won’t go off until you enable it again by toggling it back on.
How to Delete an Alarm in Windows 11
Disabling an alarm allows you to turn it back on again at a later if you wish. However, if you’re not going to need a specific alarm again, you can opt to delete it instead, to stop it clogging up the Clock app. Once you delete an alarm, you’ll have to create it again from scratch if you want to reinstate it.
- Click the Start button in the taskbar.


- Select All Apps.


- Click the Clock app.


- In the left-hand menu, select Alarm.


- Select the alarm that you want to delete.
- In the top-right corner of the alarm window, click the Delete icon that looks like a trash can.

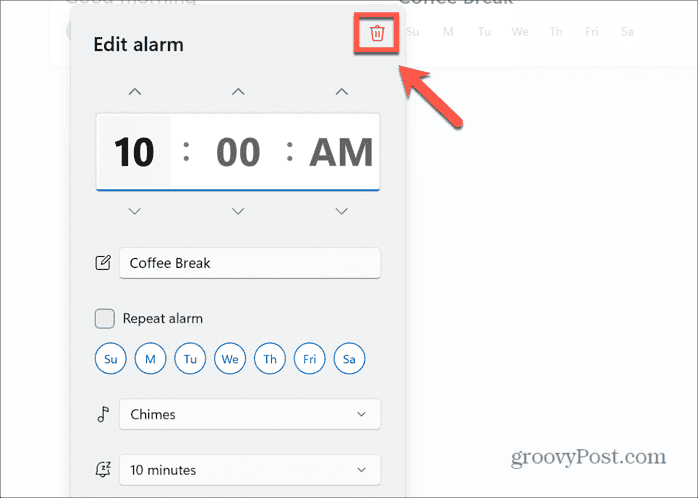
- Your alarm is immediately deleted.
How to Set a Countdown Timer in Windows 11
Sometimes, rather than having an alarm go off at a specific time, you want one to go off after a specific duration has elapsed. This is useful if you need to time something, such as giving yourself a ten-minute break from work, or when cooking. In these cases, you can use a countdown timer that will go off after a set period of time.
- Click the Start button.


- Select All Apps.


- Open the Clock app.


- In the left-hand menu, select Timer.


- If you need a timer for one, three, five, or ten minutes, click the Play icon under the appropriate default timer.

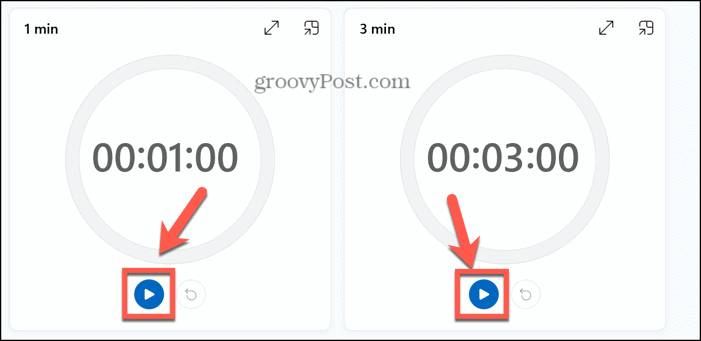
- To create your own custom timer, click the + (plus) icon at the bottom-right of the window.


- Edit the Hours, Minutes, and Seconds values for your timer using the arrows or by clicking on the appropriate section and typing a new value.

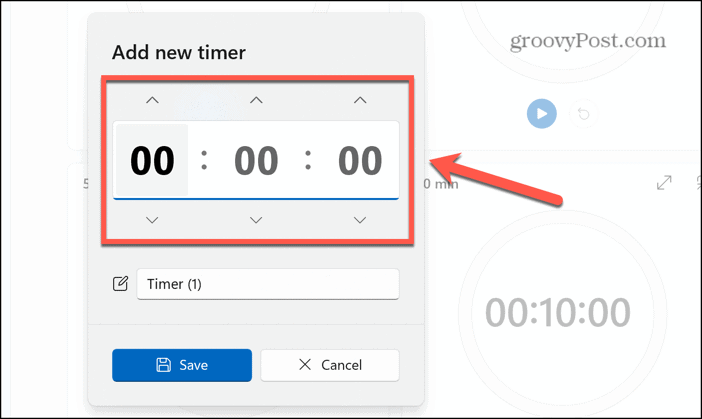
- Give your timer a name if you wish.

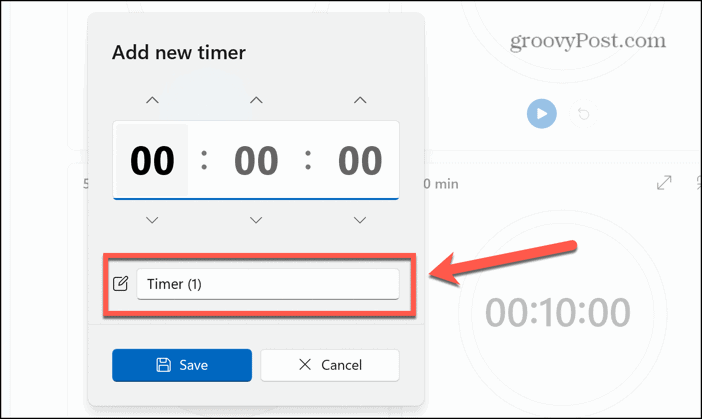
- Click Save.
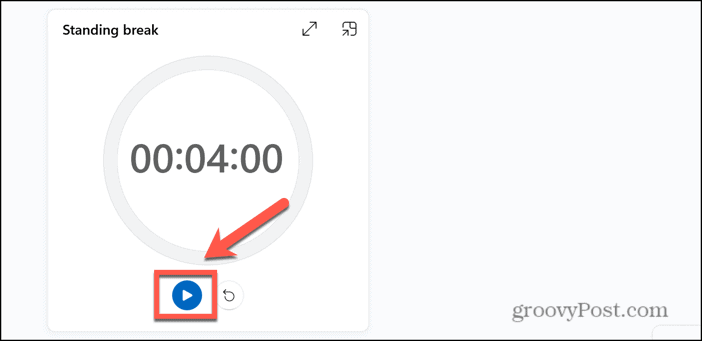
- The timer is created. In order to start it, click the Play icon underneath your timer.

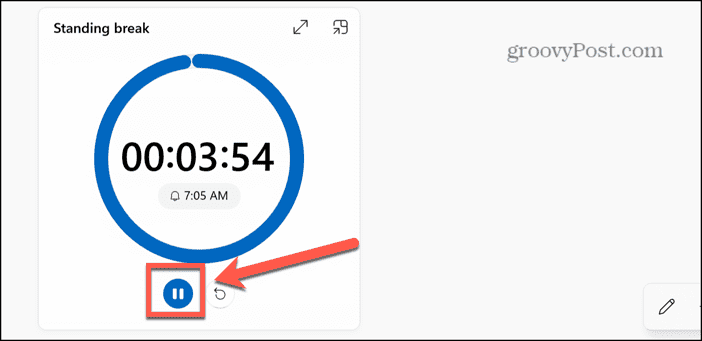
- The timer will start. In the Clock app, you’ll see a countdown for your timer. You can click the Pause icon to pause the timer if you wish.

- When the timer reaches zero, a sound will play, and you’ll get a notification.
- Click Dismiss to stop the alarm. There’s no option to snooze a timer.


- You can edit any of your timers whenever you wish by clicking on them in the Timer section of the Clock app.
How to Turn Off Sleep Mode in Windows 11
In order for alarms and timers to go off, your computer must be awake. If it goes into sleep mode before your alarm or timer is due to go off, nothing will happen; you won’t hear any alarm. That’s why it’s a good idea to disable sleep mode for Windows 11 if you are using alarms or timers.
- Right-click the Start button.


- Select Settings.


- Click System in the left-hand menu.


- Choose the Power settings.


- Select Screen and Sleep.


- Set When Plugged In, Put My Device to Sleep After to Never.

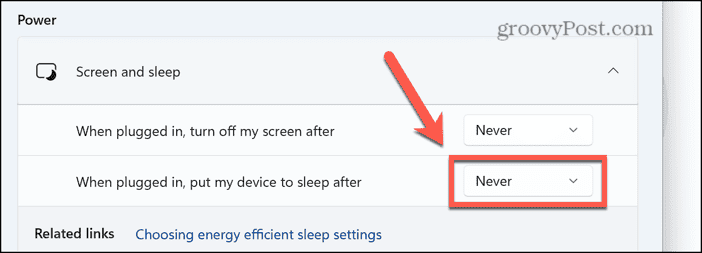
- If you’re using a laptop, set On Battery Power, Put My Device to Sleep After to Never.
- Your computer will no longer sleep, and all alarms should sound.
How to Change Your Time Zone Settings in Windows 11
Like all alarm clocks, the alarm in Windows 11 will only go off at the right time if the clock itself is set to the right time. If you find that your computer clock time doesn’t match your local time, you can change the time zone settings.
- Right-click the Start button.


- Select Settings.


- Click Time & Language in the left-hand menu.


- Select the Date & Time settings.


- Use the Time Zone drop-down to select your preferred time zone.


- Your system clock in the taskbar should now reflect your selected time zone. All alarms will sound based on this time.
Using Alarms in Windows 11
Learning how to set an alarm in Windows 11 is a useful thing to know. Being able to create multiple alarms or timers is a great way to keep organized by reminding you to do things at specific times. It’s important to remember that alarms will only work when your computer is awake, so you’ll need to disable sleep mode for your computer and ensure that you don’t manually put your computer to sleep if you want to use alarms.
Leave a Reply
Leave a Reply


