How to Enable or Disable Network Discovery on Windows 11

If you want to easily share your files on a Windows PC, you’ll want to use network discovery to help you. Here’s how to enable (or disable) the feature.
On my home network, I’ve got more than just a Windows PC. I have a Mac, gaming consoles, a printer, and a NAS drive, not to mention several other PCs, laptops, and mobile devices. To help devices on my network find my Windows PC (and vice versa), I use something called network discovery.
This is a helpful networking feature on Windows, but you’ll need to make sure to switch it on for it to work. Alternatively, if you want to make your PC harder to find, you can switch it off. I’ll explain how to do both below.
What Is Network Discovery on Windows?
As the name might suggest, network discovery helps other devices on your network to see and access your Windows PC. It also allows you to see other devices connected to the same network.
When this feature is enabled, you’ll be able to share devices, files, and other content across your network. If you want to share a folder, network discovery makes it easy to do. You can also share entire drives or devices like printers for other devices to use and control.
To help with this, you can set your network as either private or public. On a private network, turning on network discovery makes your device discoverable to other network computers. With the public network setting enabled, network discovery is usually switched off by default, making your device hidden to others.
How to Enable or Disable Network Discovery Using Windows Settings
You can enable or disable the network discovery feature in your Windows Settings menu using these steps.
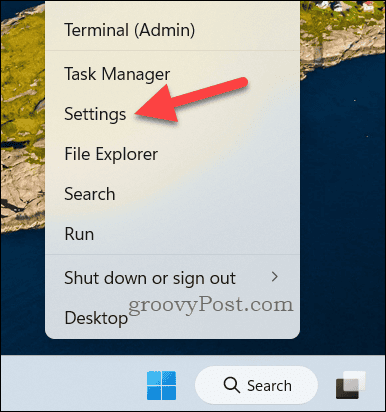
- Right-click the Start menu and select Settings.


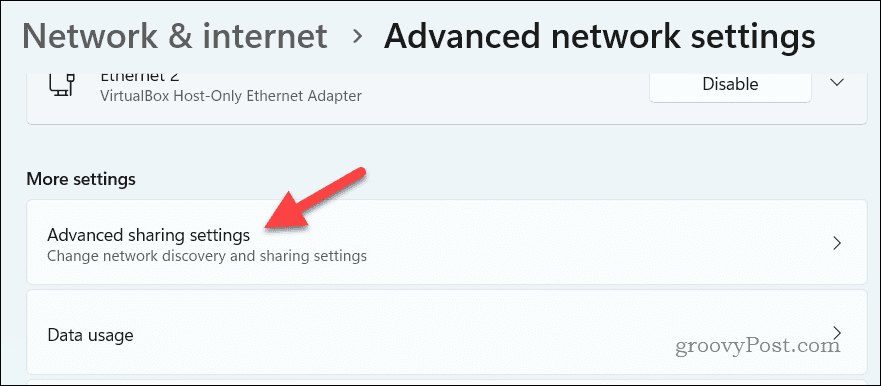
- In Settings, click Network & internet > Advanced network settings > Advanced sharing settings.


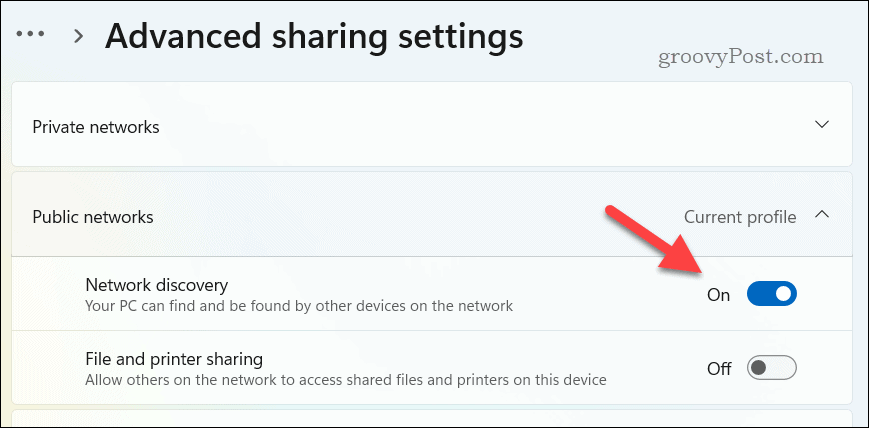
- The settings category for your current profile (either public or private) will be open. To enable network discovery, click the Network discovery slider and place it in the On position.


- Likewise, to switch off network discovery, click the Network discovery slider to place it in the Off position.


- To change this setting for other network types, click to open the other category and repeat these steps to switch network discovery on or off. For a public network, it’s recommended to keep network discovery set to Off, but you’re free to switch it on, if you’d prefer.
How to Enable or Disable Network Discovery Using Windows Terminal
You can also quickly enable or disable network discovery on a Windows PC using Windows Terminal. With a simple command, you can switch the feature on or off, but you’ll need administrator privileges to do so.
However, this will configure your settings for both public and private networks, so use with caution.
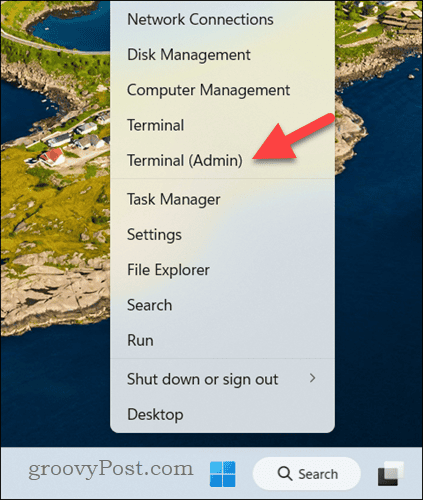
- To start, right-click the Start menu and select Terminal (Admin).


- To enable network discovery, type netsh advfirewall firewall set rule group=”network discovery” new enable=yes into the terminal window and press Enter.


- To disable network discovery, type netsh advfirewall firewall set rule group=”network discovery” new enable=no into the terminal window and press Enter.


The change will apply immediately. You can also change these settings afterwards via the Settings menu using the steps I outlined above.
Managing Network Access on a Windows PC
Network discovery is a useful tool on a Windows PC, helping to grease the wheels and make it easier to connect with other devices on your local network. If you don’t want to use it, however, you don’t have to—you’ll still be able to make connections to your devices manually.
If you’re worried about your security, it might be a good idea to run a quick security audit on your PC. You can start by checking your current network profile—if you’re set to private, but you’re using a public network, you might want to switch settings like network discovery off.
1 Comment
Leave a Reply
Leave a Reply


dan
May 16, 2024 at 4:18 pm
I don’t see a NETWORK DISCOVERY setting in Windows 10 PRO 22H2.
Is there an addon available?
Dan