How to Clear Your Update Cache on Windows 11
If Windows Update is not working properly or using up too much space, you might need to clear your update cache. Here’s how.
I try to keep my Windows PC as well-maintained as possible. That means clearing out old junk files and keeping my computer up to date. Your junk can even impact your updates, with failed downloads or update installations taking up disk space or preventing you from keeping your PC in working order. When this happens to me, I usually run through a few troubleshooting steps first to see if it fixes the problem. That includes making sure to clear my update cache on Windows 11 using the steps I’ll outline below.
Using Disk Cleanup
Disk Cleanup is an old tool in the toolbox for Windows PC users, but it’s still useful in Windows 11. It’ll help you to free up storage space on your computer by removing unnecessary files, such as the temporary files and outdated Windows Update files that could fill up your update cache.
To clear the Windows Update cache using Disk Cleanup, follow these steps.
- In the Start menu, type Disk Cleanup and select the Best Match result.

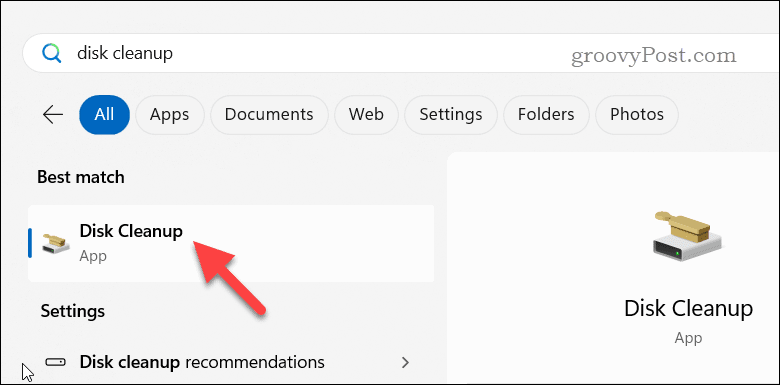
- When the Disk Cleanup window opens, click Clean up system files.

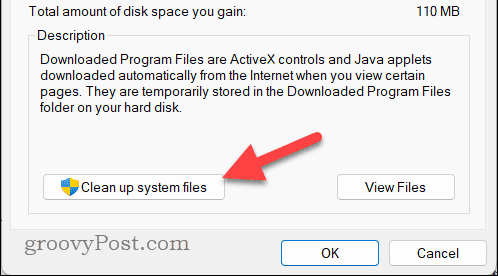
- Disk Cleanup will re-calculate the amount of space you can free up. Check the box next to Windows Update Cleanup as well as any other files you wish to remove such as Temporary files.
- Click OK to begin.

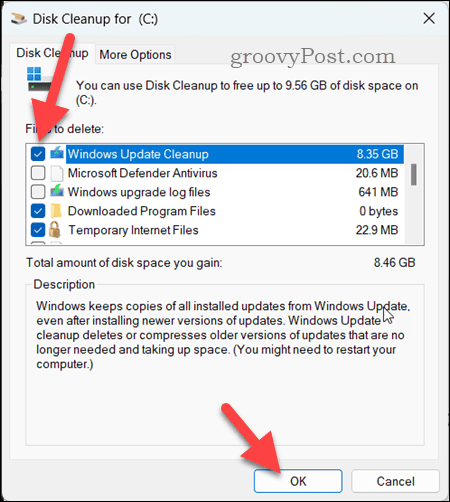
- If prompted, click Delete Files to confirm you want to remove the temporary files.
Deleting Windows Update Cache Files Manually
There’s another way you can delete your update cache files on Windows. You can do this by disabling the Windows service (temporarily) and manually removing any downloaded update files in File Explorer.
To clear your Windows Update cache manually, follow these steps.
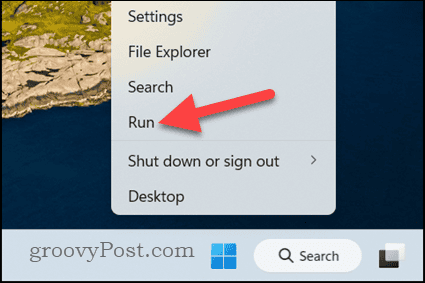
- Right-click the Start menu and select Run.

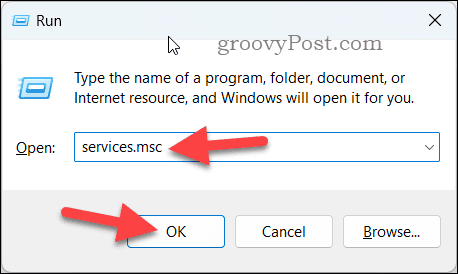
- Type services.msc and press OK to access the Services menu.

- In the Services list, scroll down to find Windows Update and double-click it.
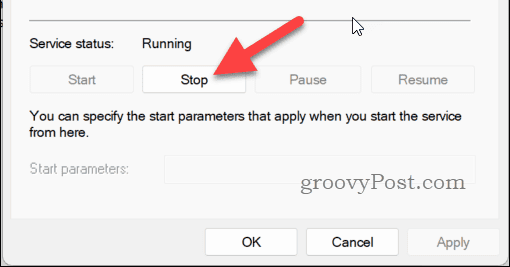
- Click Stop to stop the Windows Update service manually. Keep the window open — you’ll need to return to it shortly.

- Next, right-click the Start menu and select Run again.


- In Run, type C:\Windows\SoftwareDistribution\Download and click OK to open the folder in File Explorer.

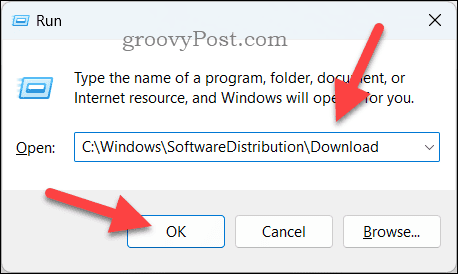
- Press Ctrl + A to select all of the items in the folder.
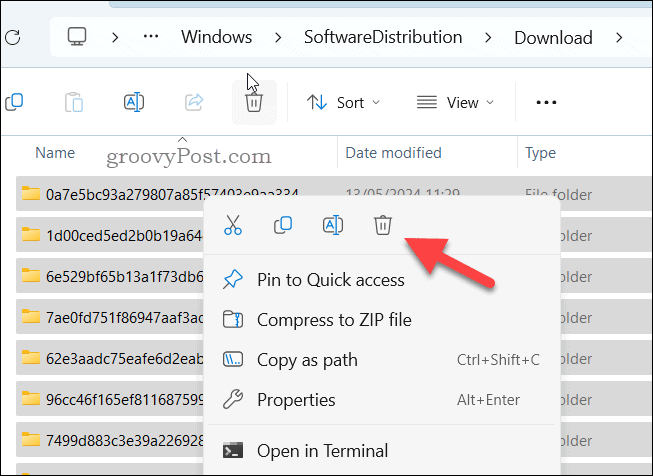
- Right-click any of the selected items and click Delete to clear the cache.

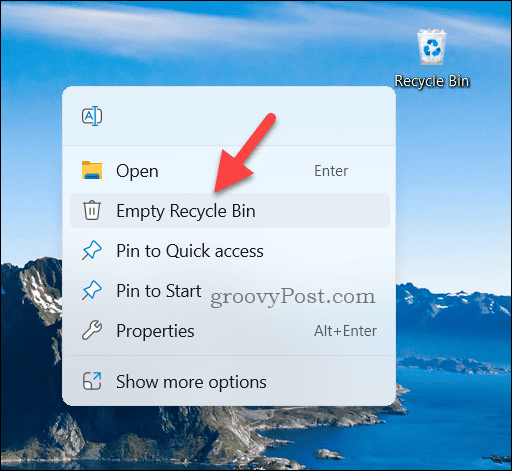
- Make sure to open your Recycle Bin folder afterward (either via the Desktop or Start menu) and permanently remove the files by clicking Empty Recycle Bin.

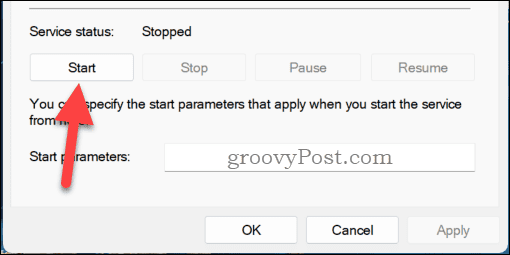
- Once this is complete, return to the Services window where the Windows Update service is paused, right-click Windows Update, and then select Start.

Using Windows Terminal
An alternative method for manually clearing your update cache is to use Windows Terminal, PowerShell, or the older Command Prompt to do so. Here’s how.
To clear your Windows Update cache using Windows Terminal, follow these steps.
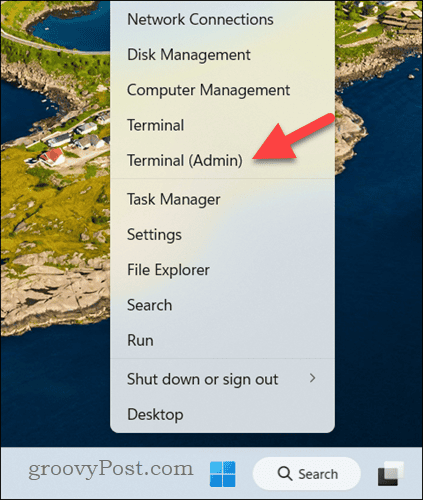
- Right-click the Start menu and select Terminal (Admin).

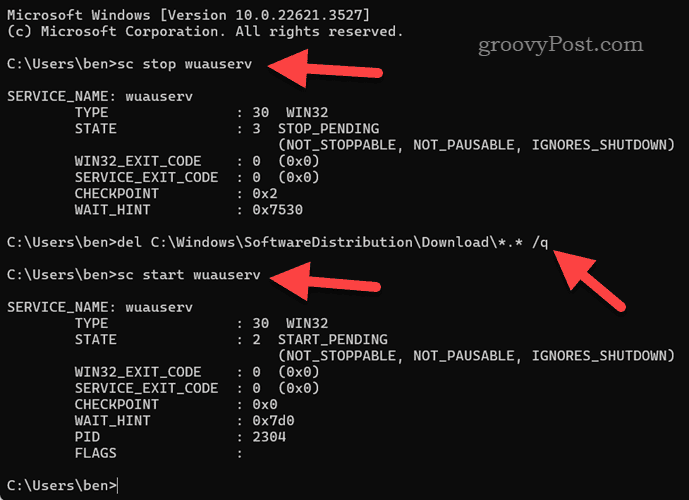
- In the terminal window, type sc stop wuauserv and press Enter. This will temporarily disable the Windows Update service on your PC.
- Next, type del C:\Windows\SoftwareDistribution\Download\*.* /q and press Enter.
- Finally, type sc start wuauserv and press Enter to restart the Windows Service.

Managing Windows Updates
By clearing the update cache on your Windows 11, you should be able to fix any temporary update problems you’re having. This is especially true if you’ve just had a failed update. Clear the cache, download the update again, and try and install it — in most cases, this should be enough to fix the problem.
Keep these steps in mind as part of your regular Windows PC maintenance checklist. If your updates still aren’t working, it’ll point to a deeper problem that you’ll need to troubleshoot next, whether it’s corrupted system files, a connection issue, or a hardware problem.
Leave a Reply
Leave a Reply


