How to Use Hidden Text in Microsoft Word on Windows and Mac

Want to keep certain text in your document invisible to your reader? Here’s how to use hidden text in Microsoft Word on Windows and Mac.
Have you ever wanted to hide certain parts of text in a document? We don’t all have access to invisible ink, but what we do have is an option to hide text in Microsoft Word.
Here, we’ll show you some ways to use hidden text in Microsoft Word, how to view it yourself once you hide it, and how to print the document with and without that invisible text. And whether you use Word on Windows or Mac, we’ve got you covered on both.
Why Use Hidden Text?
You might already have an idea in your head about when hidden text would come in handy. But just in case, here are some great examples of when you can take advantage of the feature.
Test or quiz: If you create a test or quiz in Word, you don’t have to use a separate answer key or two versions of the document. Just hide the answers from the students.
Presenting a document with notes: If you’re presenting a document like a report or a proposal, you can include your notes right in the document next to the points. Print the hidden version for your audience and keep the visible one for yourself.
Sharing a document: Similar to the example above, you may have text that you want to reference if you get questions on a shared document.
How to Hide Text in Microsoft Word on Windows
Hidden text is a formatting feature of Microsoft Word. So just like you can select text and apply bold formatting, for instance, you can apply hidden formatting.
- Select the text you want to hide by dragging through it with your cursor.
- Either right-click and choose Font or click the arrow on the bottom right of the Font section of the ribbon on the Home
- Check the box for Hidden.
- Click OK.
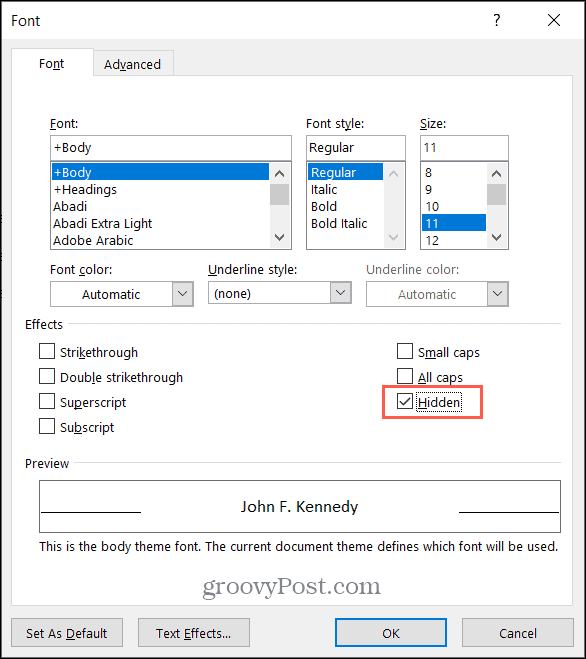
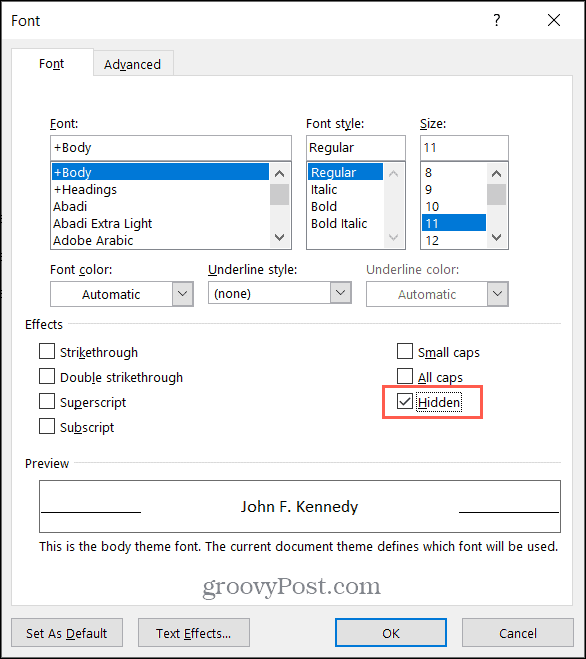
Once you apply the Hidden font format option, your text will disappear from your document.


View Hidden Text on Windows
To view hidden text, go to the Home tab and click the Show/Hide button in the Paragraph section of the ribbon. This action displays your hidden text as well as formatting symbols.
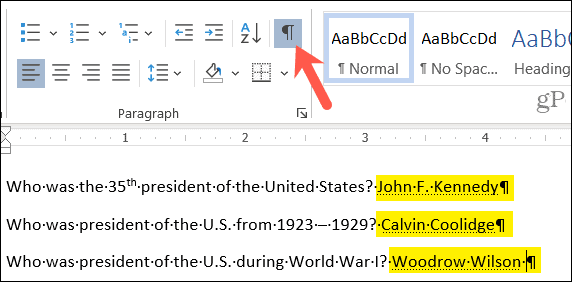
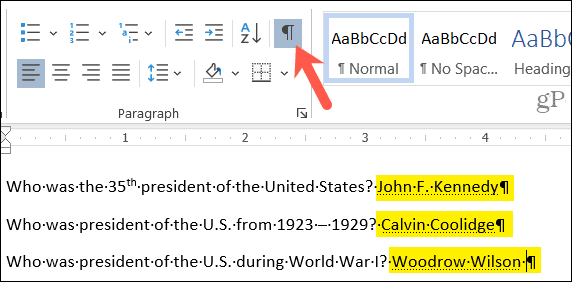
If you prefer to see your hidden text only, without displaying formatting symbols, you can adjust a setting in Word.
- Click the File tab and select Options.
- Choose the Display option on the left.
- Check the box for Hidden text under Always show these formatting marks on the screen.
- Click OK.

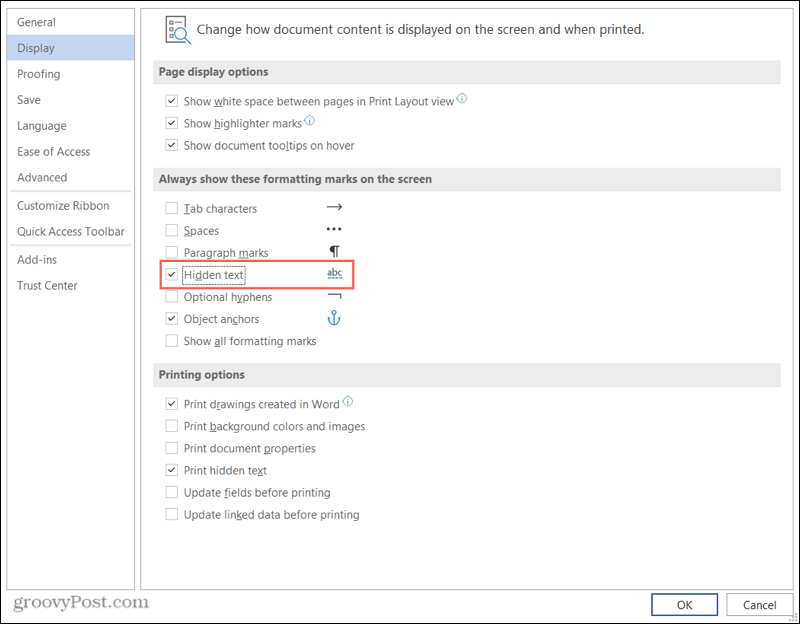
If you use this second method to always display the hidden text, be sure to go back in and uncheck the box before presenting or sharing.
Print a Document with Hidden Text on Windows
If you want to print two versions of your document, one with the hidden text and one with the text shown, follow these steps.
- Click the File tab and select Options.
- Choose the Display option on the left.
- Check the box for Print hidden text under Printing options. Click OK and continue to print your document.
- Uncheck that box to print the next version of your document with the text hidden. Click OK and print your document.

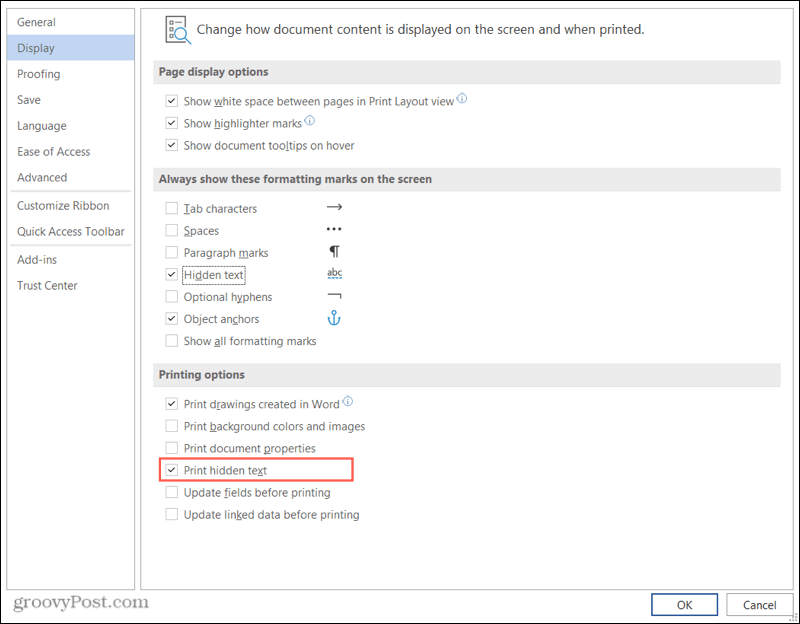
You’ll see the preview of your document before you hit the Print button. So you can be sure you’re printing with or without the hidden text per your preference.
How to Hide Text in Microsoft Word on Mac
The steps for hiding text in Word on Mac are pretty similar to those for Word on Windows.
- Select the text you want to hide.
- Either right-click and choose Font or click Format from the menu bar and choose Font.
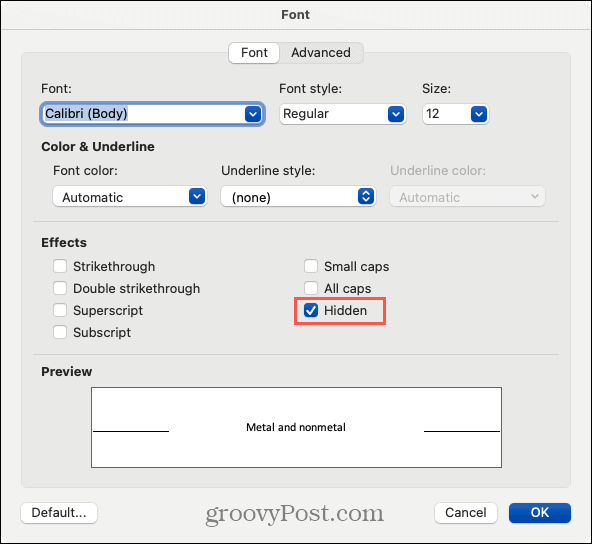
- Check the box for Hidden.
- Click OK.
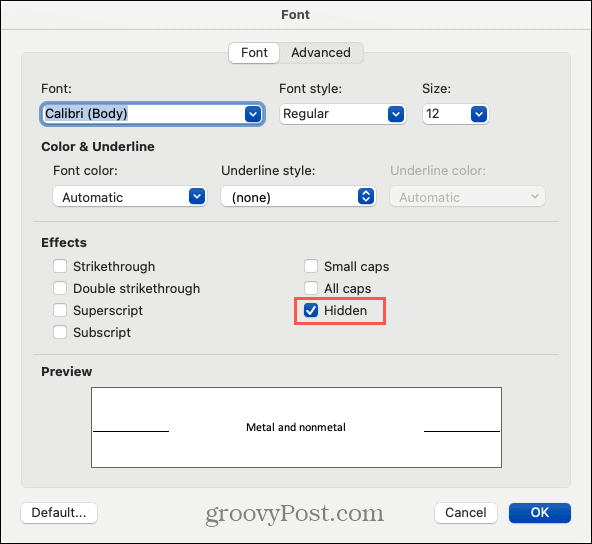
View Hidden Text on Mac
Also like on Windows, you can view hidden text from the Home tab. Click the Show/Hide button in the ribbon. This action displays your hidden text along with any formatting symbols.


To see your hidden text without the formatting symbols, you can simply check a box in the settings.
- Click Word > Preferences from the menu bar.
- Choose View.
- Check the box for Hidden text under Show Non-Printing Characters.
- Close the preferences window.
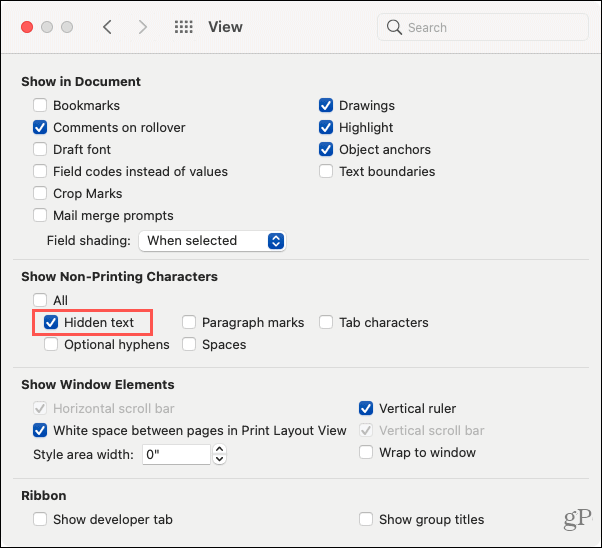
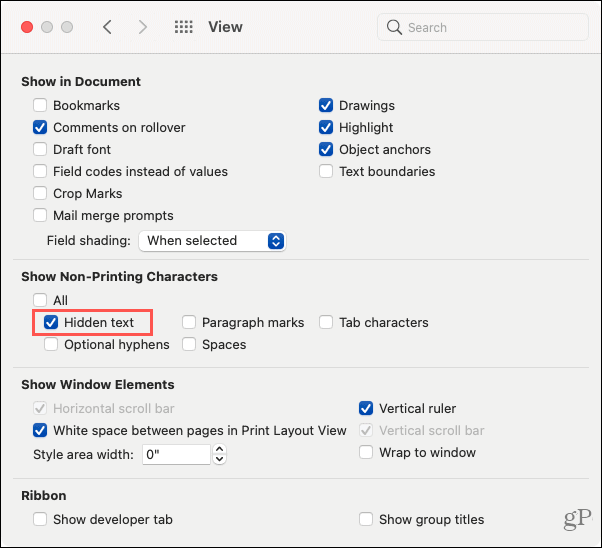
Again, make sure that you uncheck this box when you’re ready to present or share your document.
Print a Document with Hidden Text on Mac
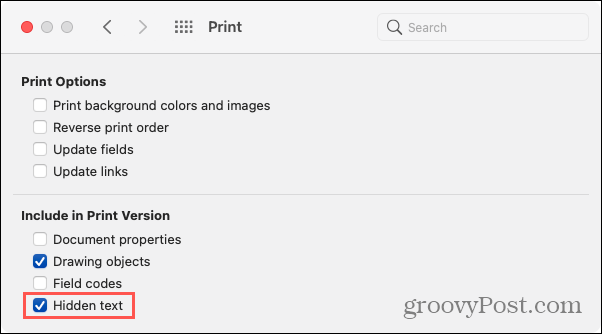
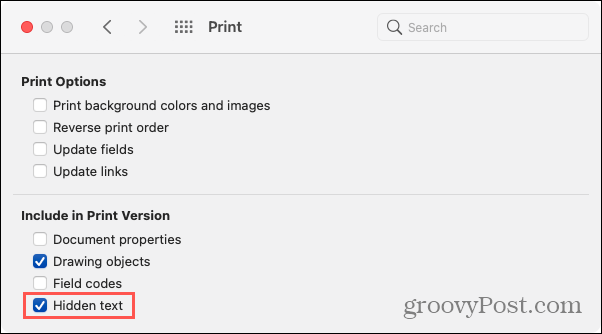
You can print the hidden text for yourself and then print a separate copy for others without it.
- Click Word > Preferences from the menu bar.
- Choose Print.
- Check the box for Hidden text under Include in Print Version. Close the preferences and print your document.
- Uncheck that box to print the next version of your document with the text hidden. Close the window and print your document.
Important Notes on Hidden Text in Word
Using hidden text in Word is ideal when you’re printing a document. There is no way for your audience to see what you hid. However, if you share your document electronically, your recipient or audience can view the hidden text using the methods above you would use to see it yourself.
Hiding text does not make it secure. So you probably don’t want to use it for confidential or personally identifiable information because of the reason above.
With these things in mind, hidden text in Microsoft Word is still a good time-saving option compared to creating separate instances of the same document, as long as it’s beneficial and safe for your circumstance.
Do You Have Something to Hide?
Hopefully, this tutorial will help you the next time you want to make certain text in a Word document invisible.
For more help on this topic, take a look at how to find and replace formatting as well as how to clear all formatting in Word.


