Connect Windows 10 to Wired, Wireless and P2P Networks

In this article we take a look at the many options for connecting to Networks, whether it is a peer to peer network, wireless network, or business network.
One of the many activities we use computers for is accessing and consuming information, whether on the Internet or local networks such as an Intranet. This article looks at the many options for connecting to Networks, whether it is a peer-to-peer network, a wireless network, or a business network.
Connecting to Networks in Windows 10
Connecting to the Internet: Wireless & Ethernet
There are many ways to connect to the Internet. Using a wireless network is one of the common ways. Most Wi-Fi networks are secured, meaning you need to have a password to join. Some networks might be unsecured (open) and allow anyone to connect to them (like at a Coffee Shop.) But for secured networks, you’ll need to contact the Network Admin, or at a coffee shop or hotel, the person at the desk – to give you a password.
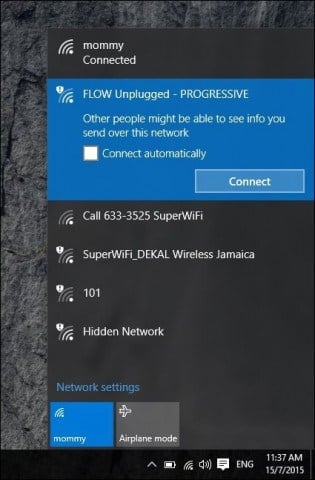
You can quickly identify a secure network by a shield emblem on the wireless signal, which is also used to indicate its strength. The stronger the signal (defined by brighter radio wave bars), the better. Fewer bars mean a weaker signal. Once you identify a network, you can connect to, select Connect, and enter a password if needed.

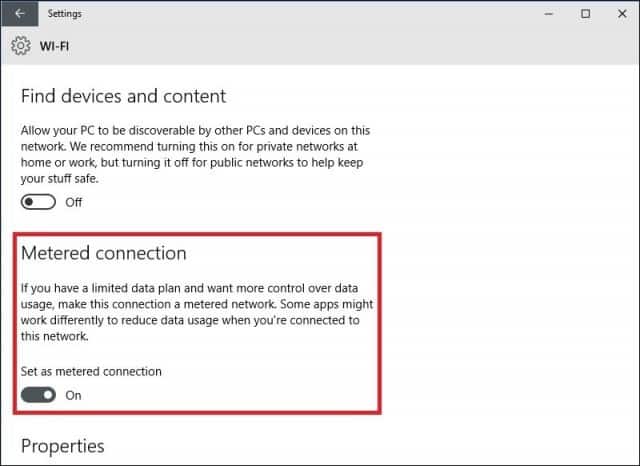
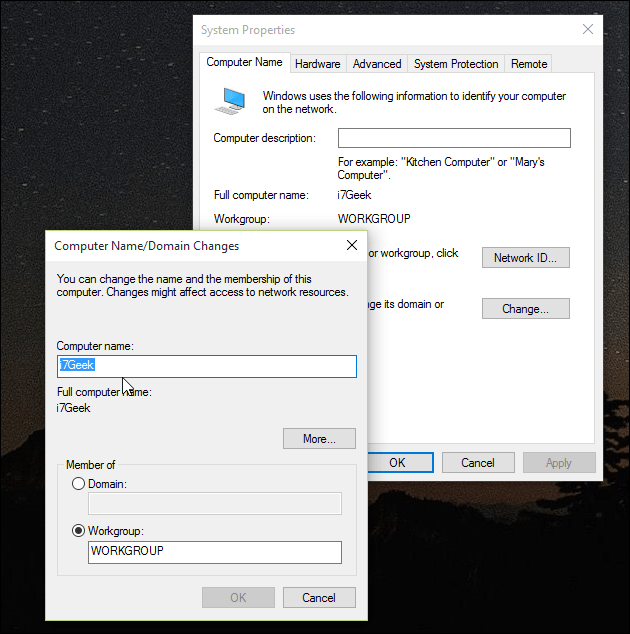
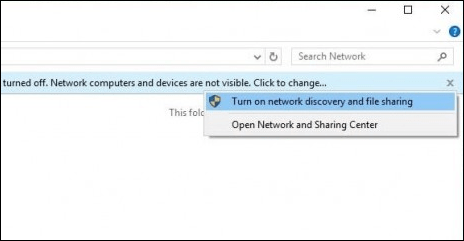
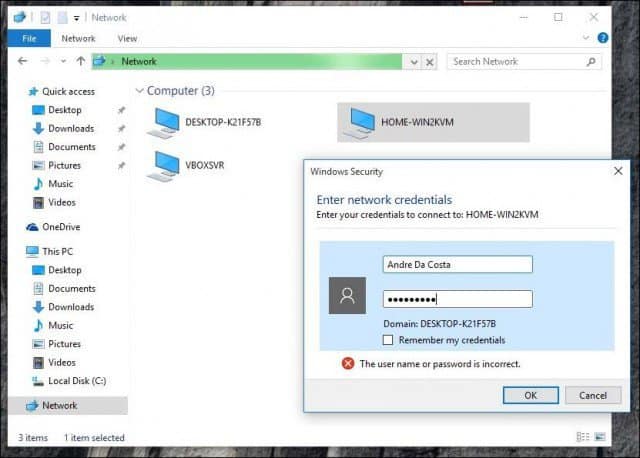
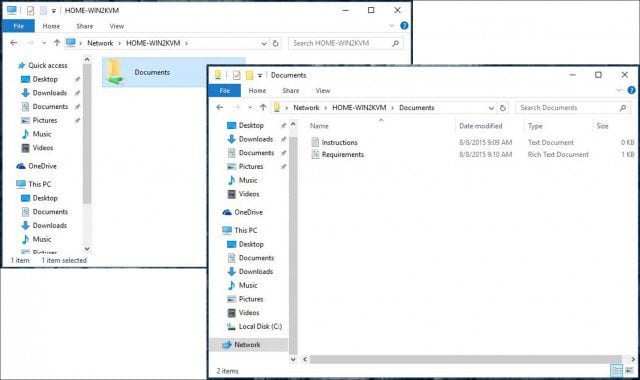
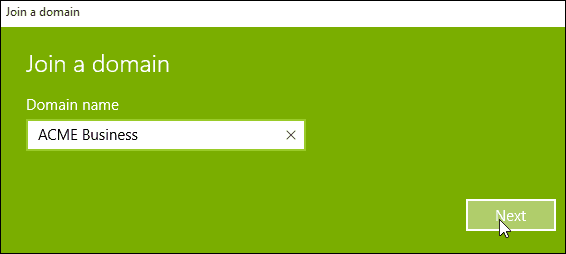
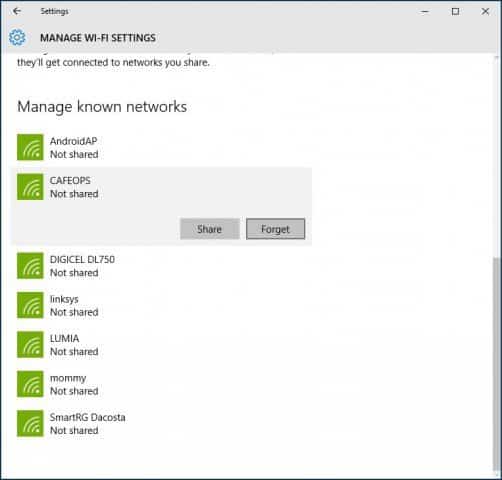
Here are some Windows 10 networking status icons and their meaning: Depending on the type of network you are connecting to, you might want to manage it. For instance, if you connect to mobile broadband, such as a cellular connection shared as Wi-Fi, you might choose to set it as Metered. Setting as Metered will ensure that an allotted data plan does not get used up immediately. For instance, some network carriers will allow a certain amount of data per month, 2, 3, or 5 GBs. If you are not careful, you can use it up in no time! Setting it as Metered will let Windows 10 disable downloading Windows Updates or app updates which can be quite large. To do that, click Start > Settings > Network & Internet > Wi-Fi > Advanced Options > enable the Set as Metered Connection on/off switch. It would be best if you also controlled which background apps have access to your data. I discovered that these could also use up a significant amount of data. Windows 10, by default, runs a lot of apps in the background that sips data, especially notifications used by Action Center. Select Settings > Privacy > Background Apps. Turn off any app you don’t want running in the background. This action will reduce data usage considerably. For more about that, make sure to read our article: How to Limit Windows 10 Data Over a Metered Connection. If you want to set up a P2P network between two or more machines, Windows 10 makes it easy. Setting up a P2P network makes it possible to share data with other PCs or printers via the Internet. In this case, I am using a CAT5 (Ethernet) connection between two computers. To ensure both machines can see each other, you need to ensure both machines are in the same Workgroup. To do that: Press Windows key+X to bring up the hidden quick access menu, and select System then the Change button. Enter your workgroup name. Repeat the same step on all the computers you intend to network together. Restart when prompted. Make sure both machines are connected. Launch File Explorer on the Taskbar and click Network. You should see the other computer(s) appear in Network Explorer. If not, you’ll get prompted to Turn on network discovery and file sharing. Depending on the type of network connection, click the appropriate option. Press F5 on your keyboard or the refresh button in the Address bar for the window to populate with available computers and resources. To access resources on another computer, double-click it. You might be prompted to enter credentials to access the resources of that computer. Once you have authenticated, you should see all the resources available. In this case, I have a shared folder available called Documents which I can browse. A Domain-based network provides centralized administration of an entire network from a single computer called a server. Domains provide single-user login from any networked computer. Users can access resources for which they have permission. For more, please read our article: How to Join a Windows 10 PC to a Domain. If you cannot connect to a computer on a network, ensure that appropriate sharing settings are enabled. To do that, right-click your network connection in the Notification Area and click Open Network and Sharing Center. Click Change advanced sharing setting. Make sure to enable these settings for each of the following: Private – Guest or Public – All Networks – Once these are enabled, try browsing again. Keeping a network secure is important. Windows 10 includes a new Setting called Wi-Fi Sense, which lets you share and access networks without any required credentials. Wi‑Fi Sense automatically connects you to Wi‑Fi if one is available so that you can get online quickly in more places. It can connect you to open Wi‑Fi hotspots it knows about through crowdsourcing or to Wi‑Fi networks your contacts have shared with you by using Wi‑Fi Sense. Here are a few things to know before you get started: Learn more: https://windows.microsoft.com/en-us/windows-10/wi-fi-sense-faq If you have previously connected to networks but would like to forget, you can do so from within Network & Internet (Start > Settings > Manage Wi-Fi Settings.) Click a network and click Forget. Further reading: https://support.microsoft.com/kb/811259 Sometimes, there might be a conflict on the network; you may need to renew your IP Address because a lease has ended. An IP Address is the name suggested as an address for your computer networks. It provides an easy way for your computer to access the Internet and other computers/resources. Basics you can try: Press Windows key + X Click Command Prompt (Admin). At the command prompt, enter the following command, then hit Enter ipconfig/release then ipconfig/renew then ipconfig/flushdns exit the command prompt If you continue experiencing problems connecting networks or the Internet: Press Windows key + X click Command Prompt (Admin). At the command prompt, enter the following command, then hit Enter netsh winsock reset Hit Enter Exit command prompt, then restart your computer and try reaccessing resources.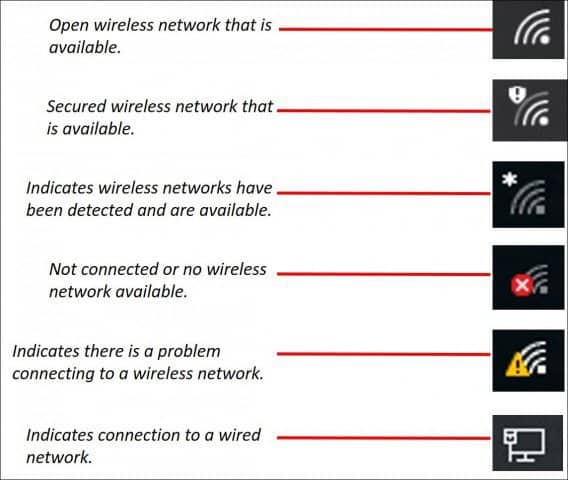
Manage Networks
Peer-to-Peer (P2P) Networks
Connecting to a Business Network: Domains
Troubleshoot Networking Issues in Windows 10

Security and Privacy
How to forget a Wi-Fi Network:
Unable to access a computer even though you are connected
Advanced troubleshooting:
8 Comments
Leave a Reply
![]()
Recommended for you


Thomas
September 17, 2015 at 6:47 am
Exactly what do you mean by ” I am using a CAT5 (Ethernet) connection between two computers.”
John
September 19, 2015 at 7:45 am
Cat 5 generally refers to a type of cable used in networking; “category 5” indicates a specific characteristic relating to the speed of data transfer, and electrical characteristics of the physical wire. That being said, I would hardly consider a cat5 connection between 2 computers as an “internet” connection. Peer to peer yes, but more of an “INTRAnet”. If you have a wifi router, in my humble opinion, you can do just as well setting up your home group through it.
Thomas
September 19, 2015 at 2:15 pm
John, you explained a CAT5 cable but you didn’t explain to what the cable(s) is attached. Is the cable connected between two computers? Router to each computer?
Rakesh
October 6, 2016 at 7:15 am
i have purchased Dell all in one and facing network issues, but thanks now i feel i can make my local peer networks with help your article. Thanks
Frank Terry
November 2, 2016 at 8:54 pm
I suppose this is great for two or more computers, but it doesn’t help me connect to my printer using the 802.11g wireless connection on an ad hoc network. Windows 10 sucks, and makes what used to be a very simple task far too complex. And I’m not a novice, I started out writing my own programs in dos because there were precious few available to purcase.
Newton Wallen
November 3, 2016 at 2:26 pm
I’m retired IT (10 years ago), so is it safe to assume that P2P no longer requires a Crossover cable because of Auto-MDI-X autoswitching? I’ve done some reading on it, and that’s the way it looks. Any opinions?
-Newton
Sean
January 26, 2018 at 4:32 am
Ahh yeah. First problem here is after hitting the Win key-x then System. There is no place on the window that comes up to hit “Change”. I keep seeing this instruction on diff internet sites all saying hit Change. is my machine broken? Has a virus taken control? or am i blind?
David Levinson
January 24, 2020 at 3:37 pm
God Microsoft sucks. Too bad they are a monopoly. I can’t believe they removed peer to peer networking. So lame.