How to Use Clipboard History on Windows 11

You can save multiple items to your clipboard if you enable and use the Clipboard history feature on Windows 11. Here’s how.
Microsoft introduced the Clipboard history feature with Windows 10. It’s since been carried over to Windows 11 and still offers the same excellent functionality, making it easy to track different snippets of text that you’re copying.
For example, you might need to copy multiple items for easy access when creating a document or filling out a form. Microsoft doesn’t enable it by default, so you’ll need to turn it on to use Clipboard history on Windows 11. The following guide will show you how to use Clipboard history on Windows 11 and get the most out of the feature.
How to Enable Clipboard History on Windows 11
The first thing you need to do is turn on the Clipboard history feature on Windows 11 by using the following steps.
- Click on Start or hit the Windows key and select Settings from the menu.

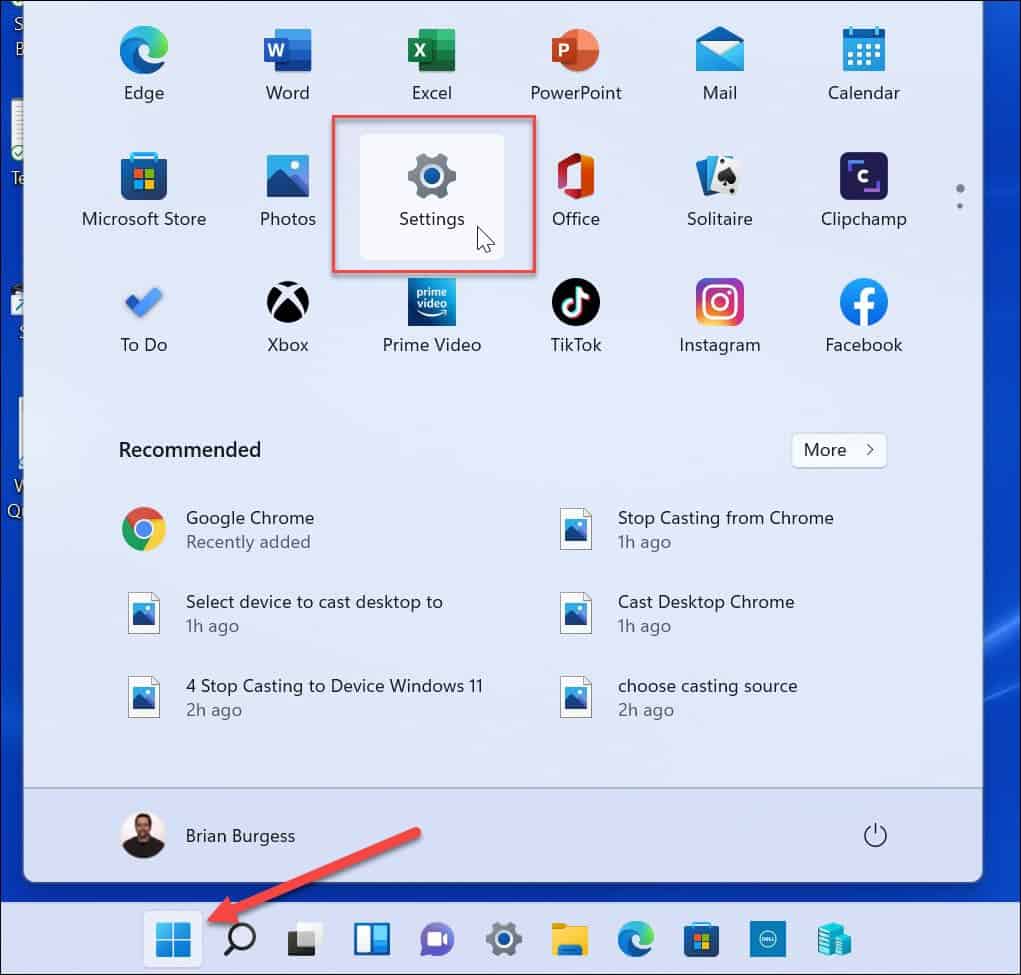
- When Settings opens, click on System from the left-hand side.
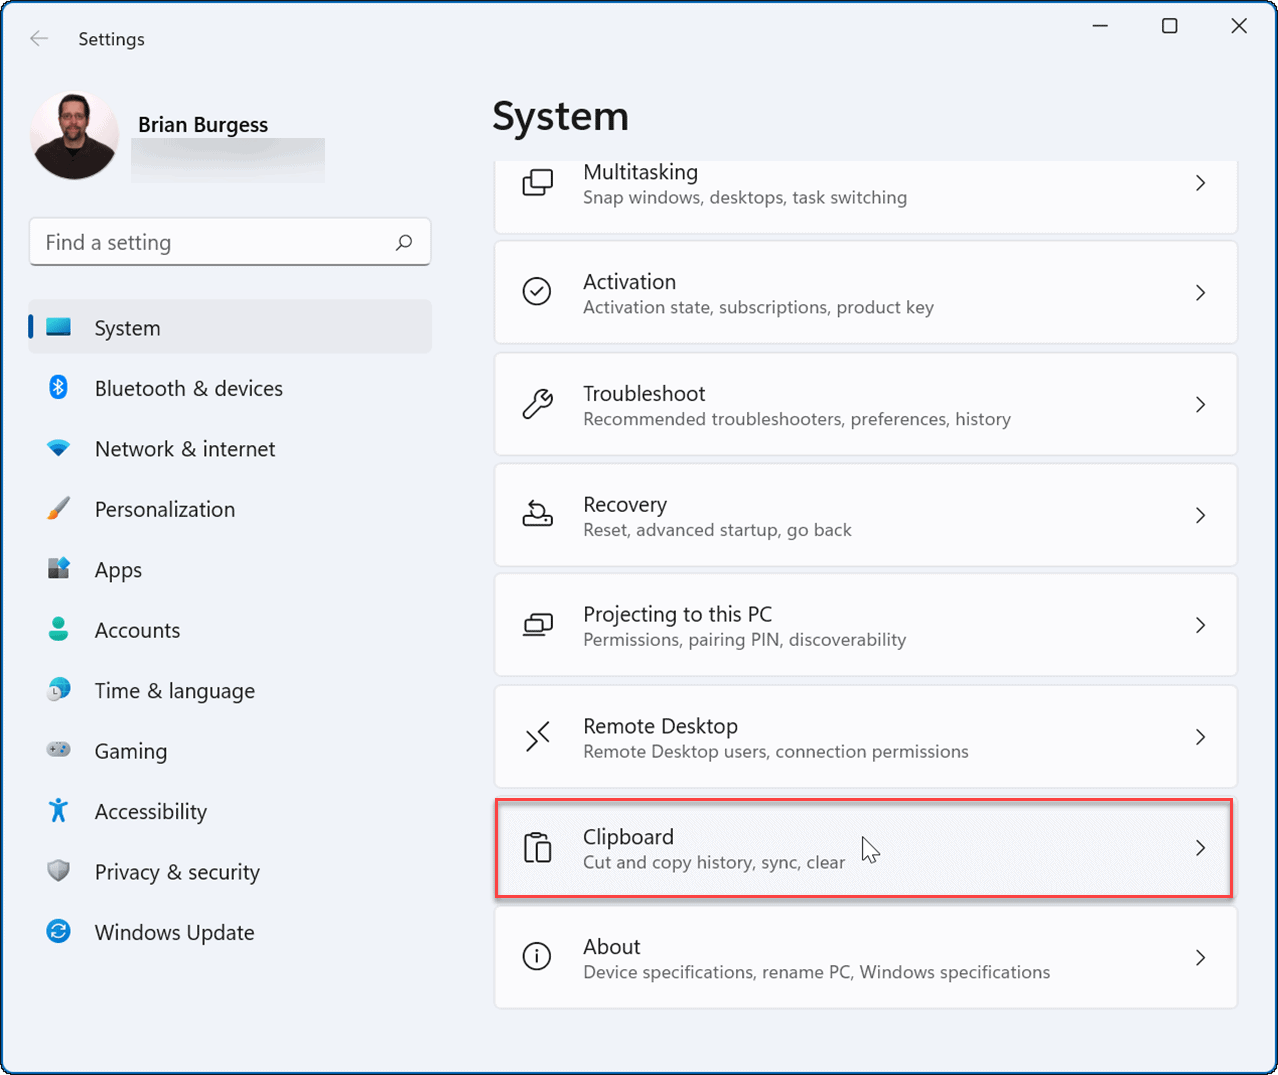
- Scroll down the list on the right side and select Clipboard.

- Next, toggle the Clipboard history option to the On position.
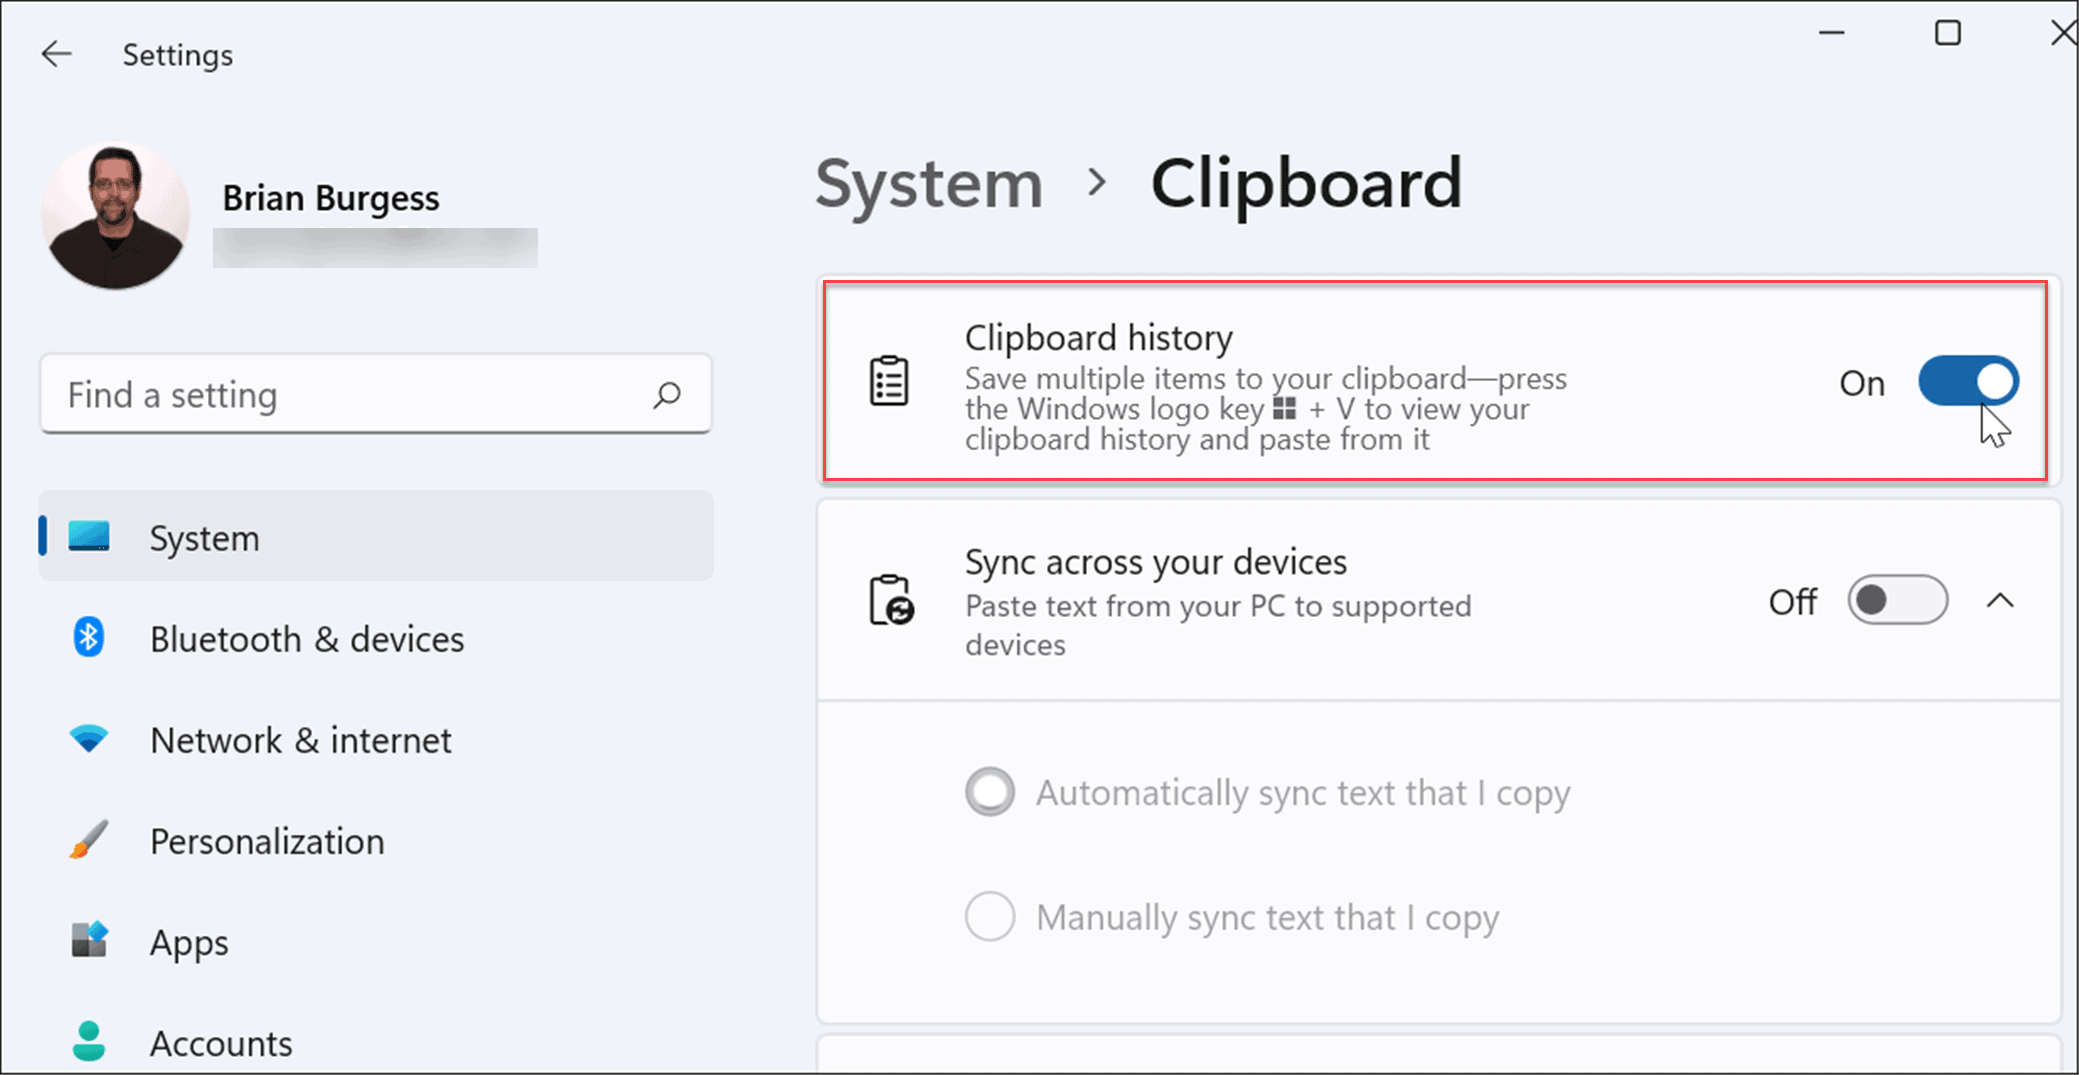

Once you follow the steps above, the Clipboard history feature is enabled on your PC. With Clipboard history, you can now copy multiple blocks of text, images, or links to the clipboard and access them later.
Using Clipboard History on Windows 11
You can still use right-click > Copy and right-click > paste or use Ctrl + C to copy and use Ctrl + V to paste one item at a time. However, you want to access the history of items saved to the Clipboard.
Note: Clipboard history only supports copying images from select apps like your browser or the Snipping Tool, for example. As usual, you can copy and paste pictures, but they won’t save to the Clipboard history UI.
To Use Clipboard History
- Launch the document, website, or app to paste the copied text.
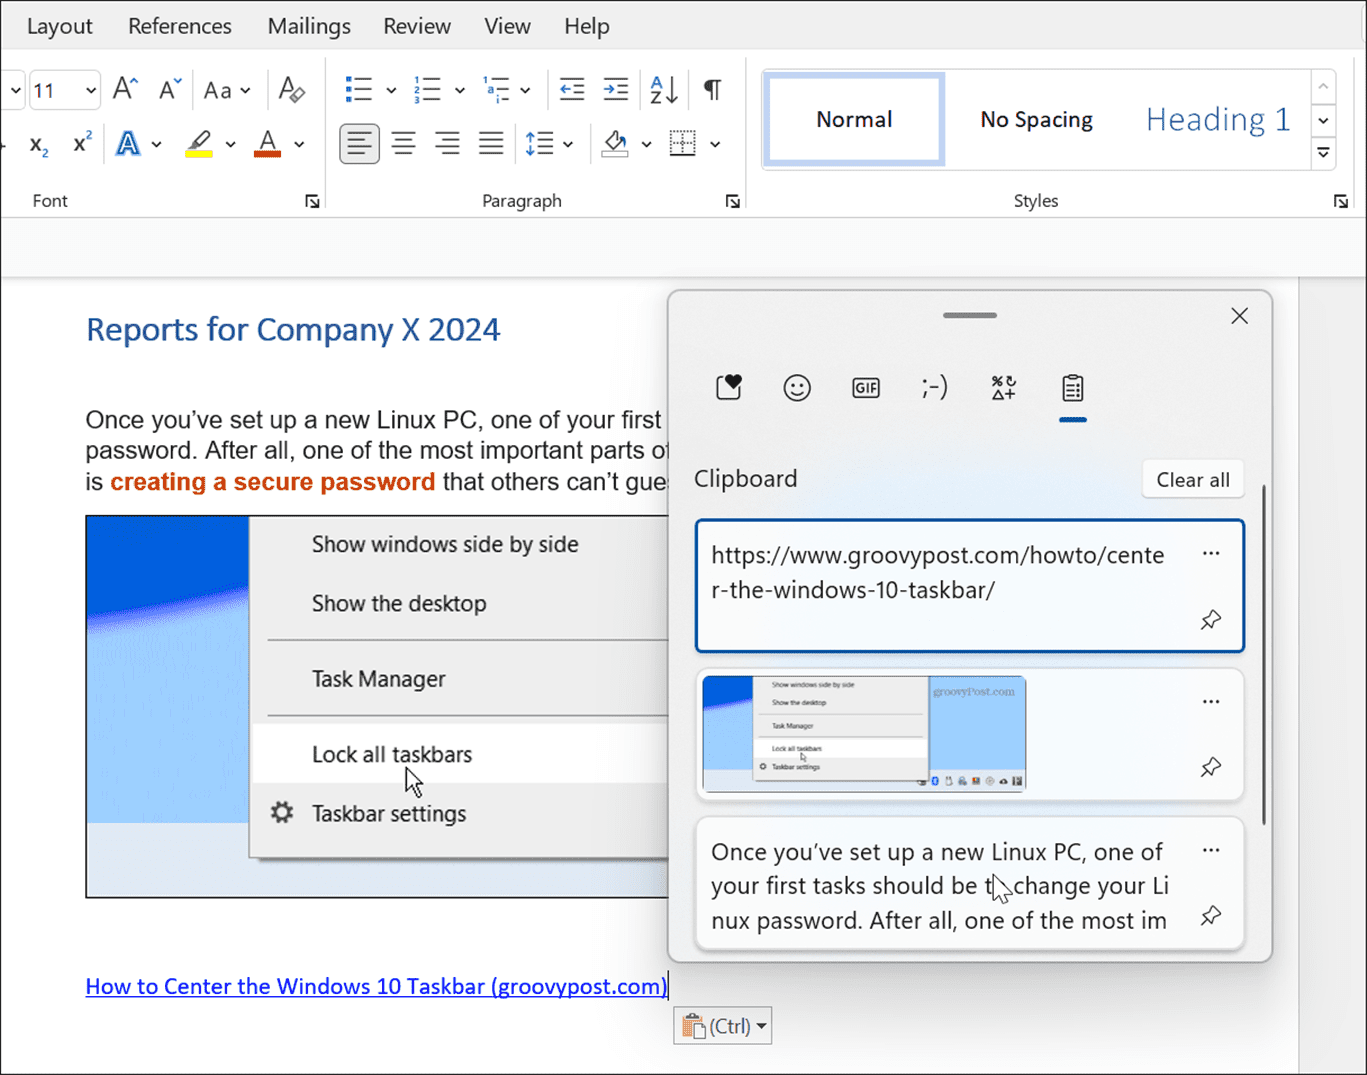
- Now, use the keyboard shortcut Windows key + V to bring up the emoji panel that opens to the Clipboard history tab.
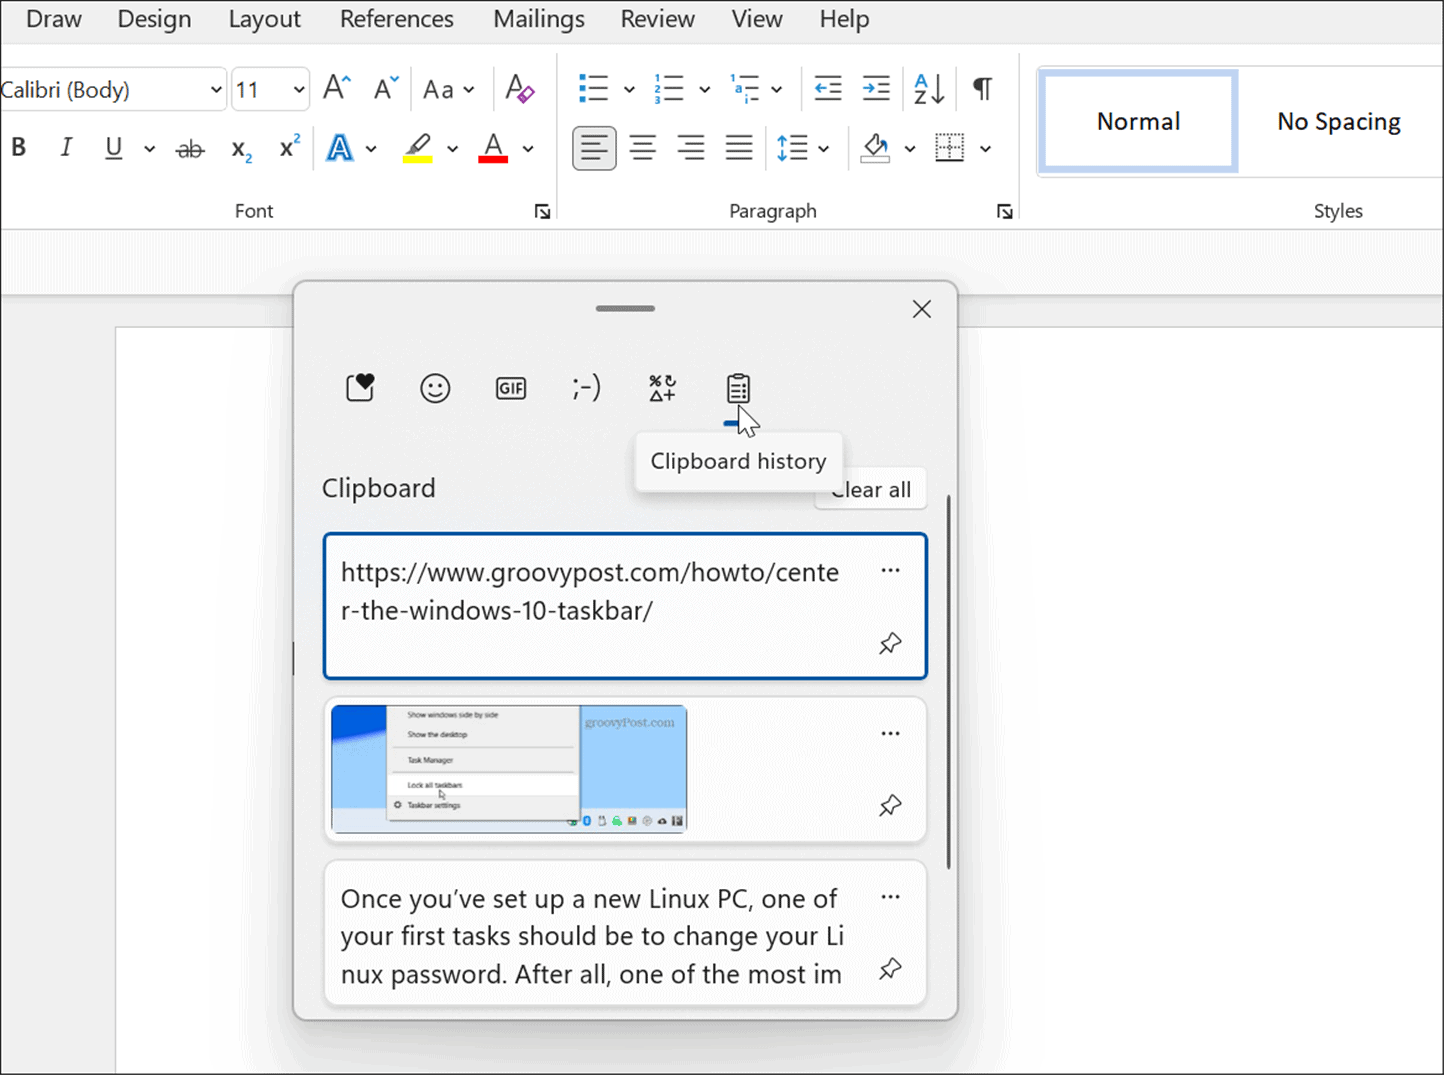

- Choose the item you want to paste from the Clipboard history menu, and it will paste into the document.

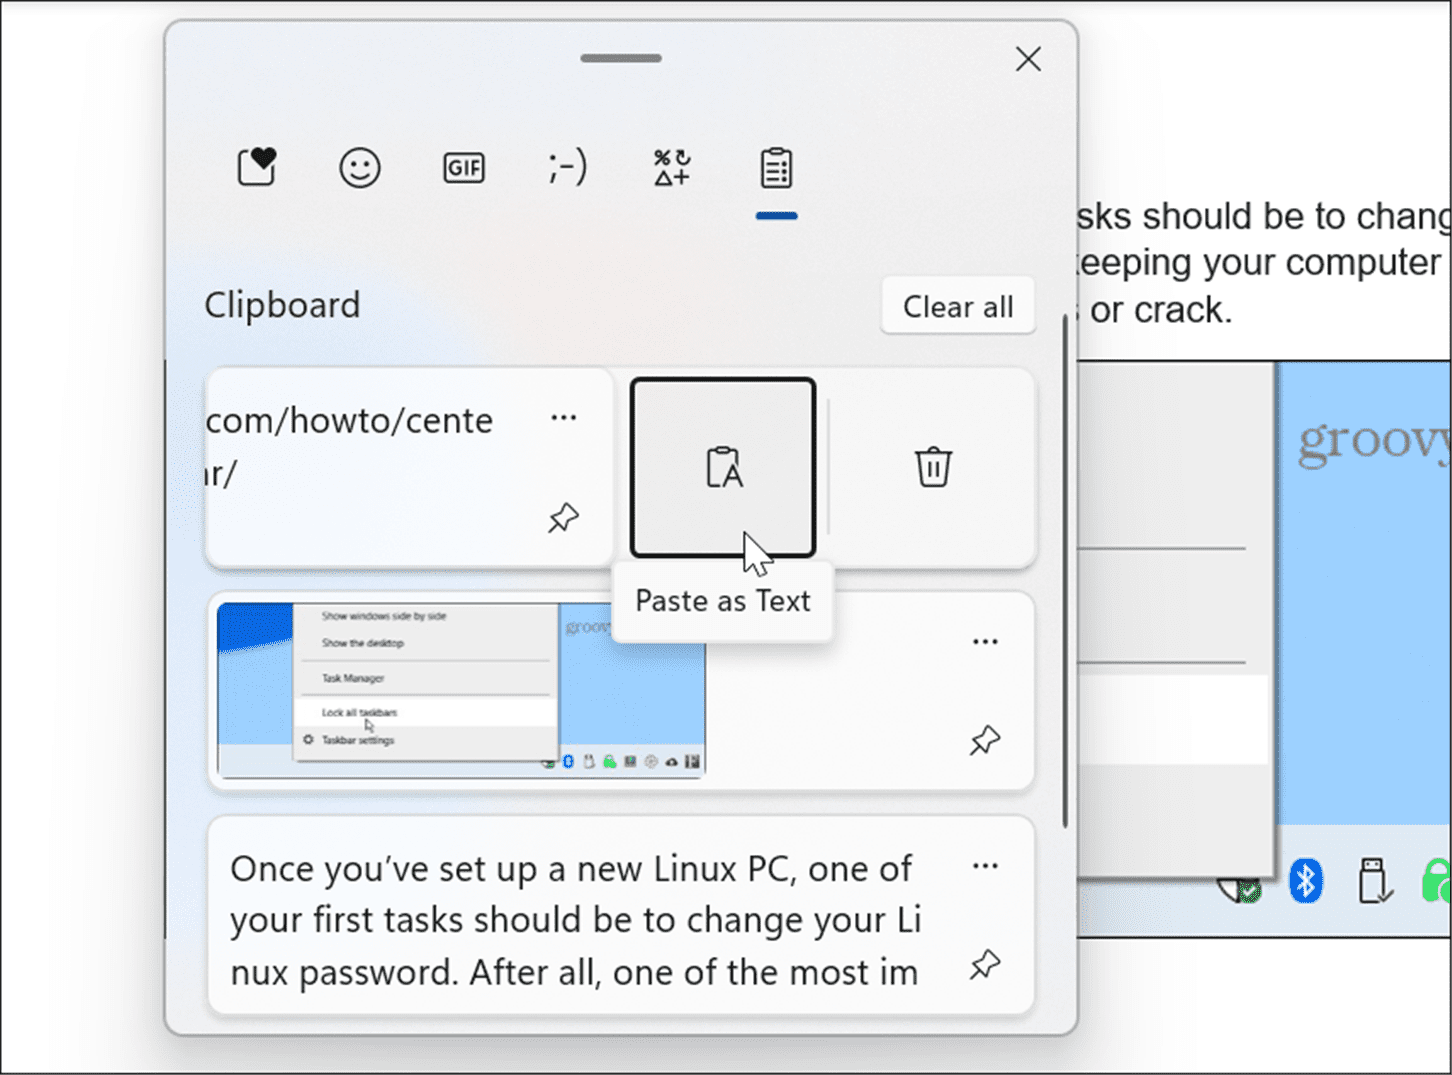
- To paste text without the source formatting, click the See more (three dots) menu and select the Paste as Text option.

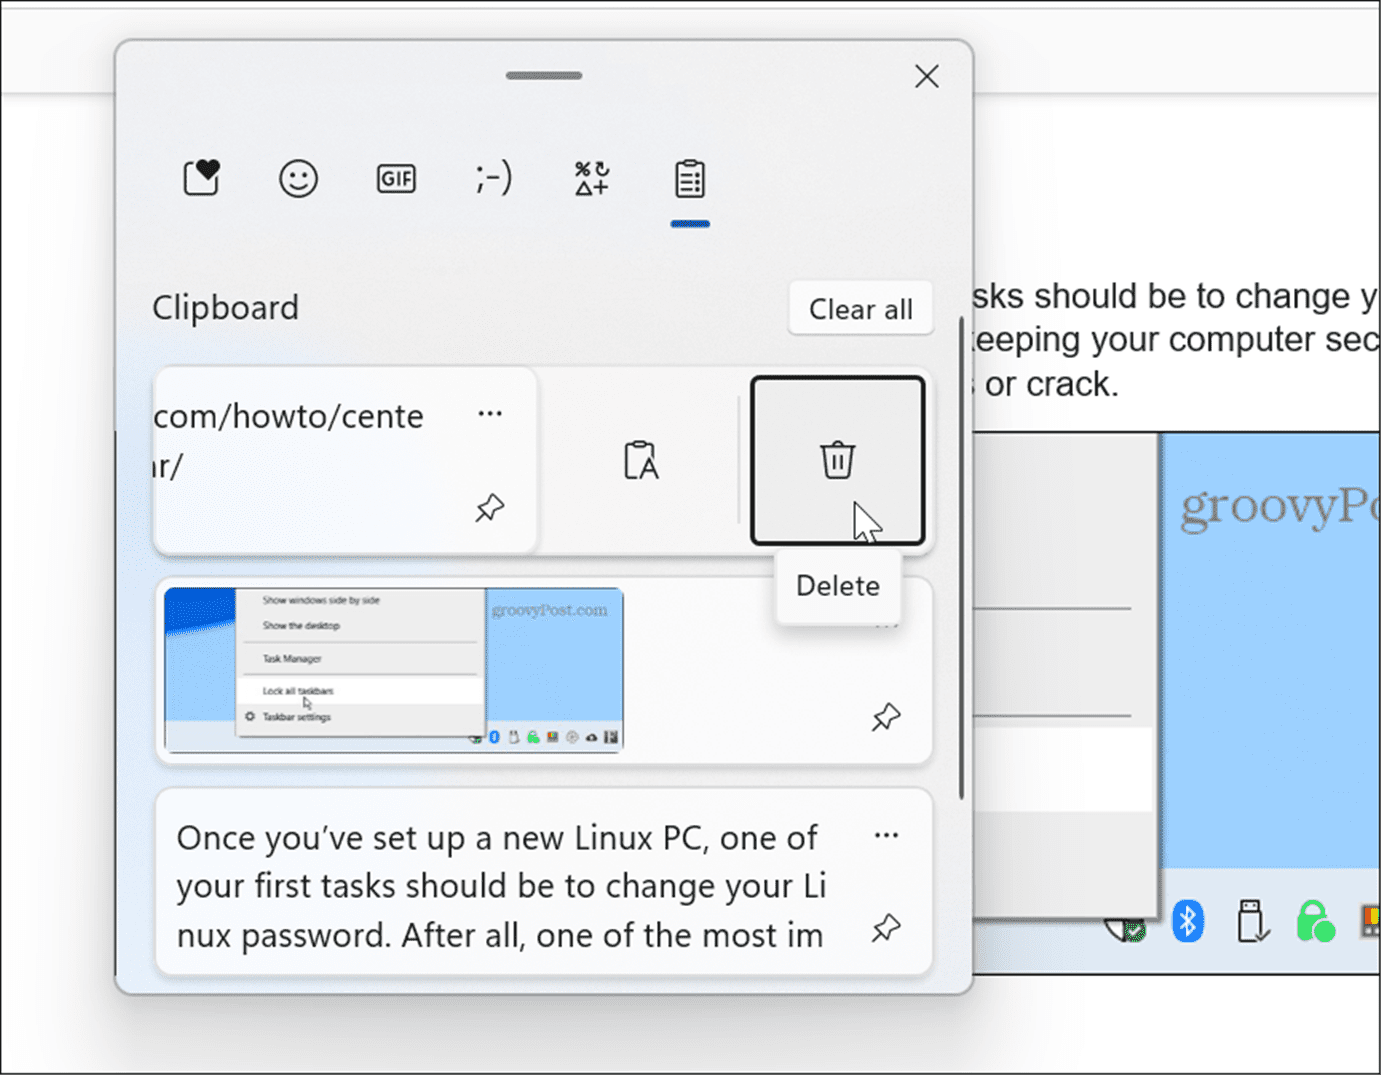
- To delete an item from Clipboard history, click the See more (three dots) menu and select the Delete button.

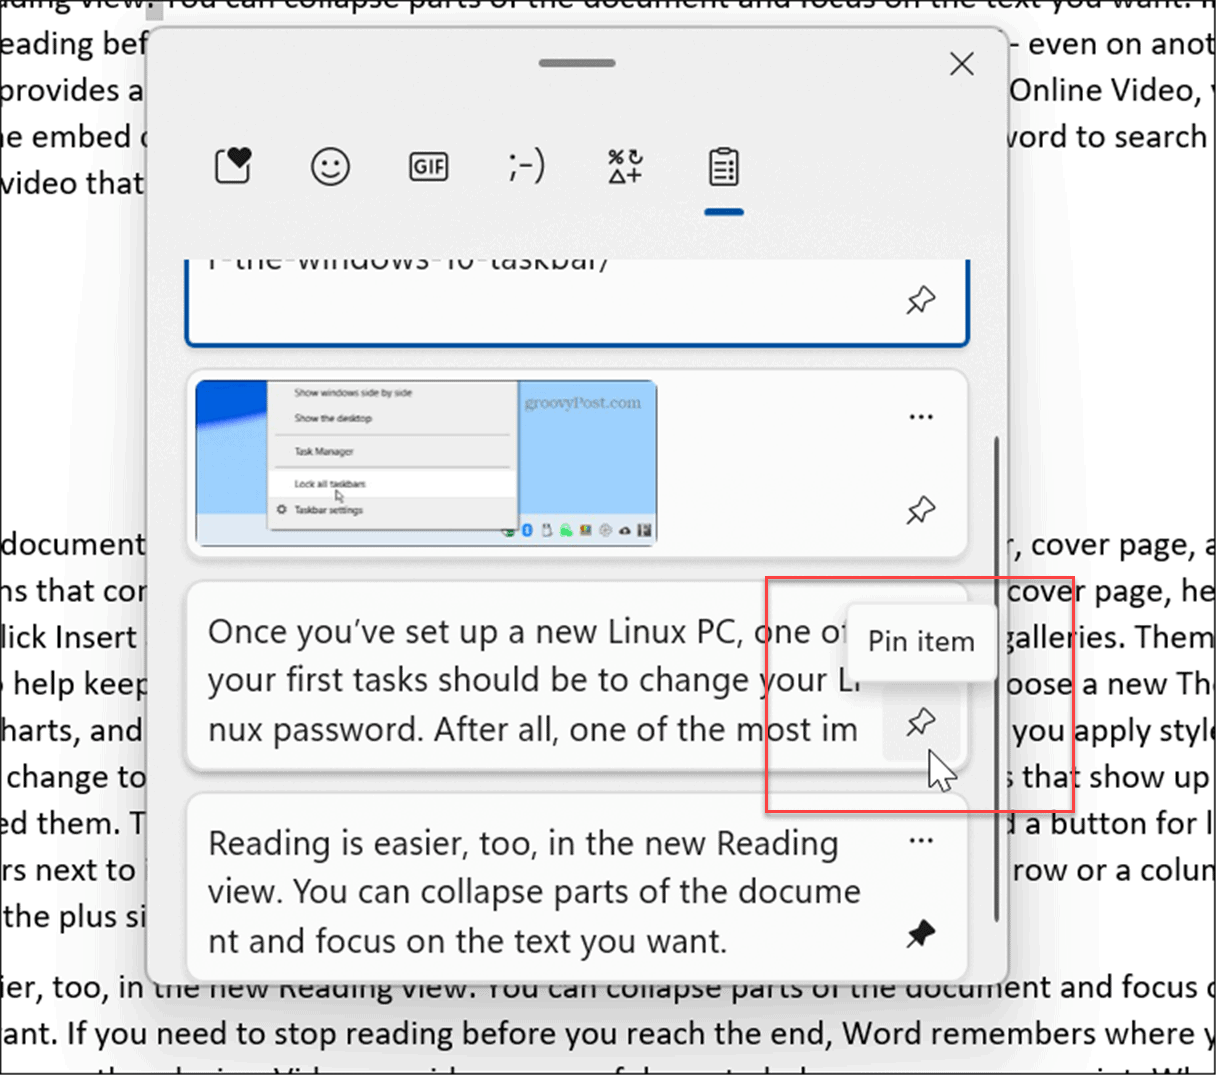
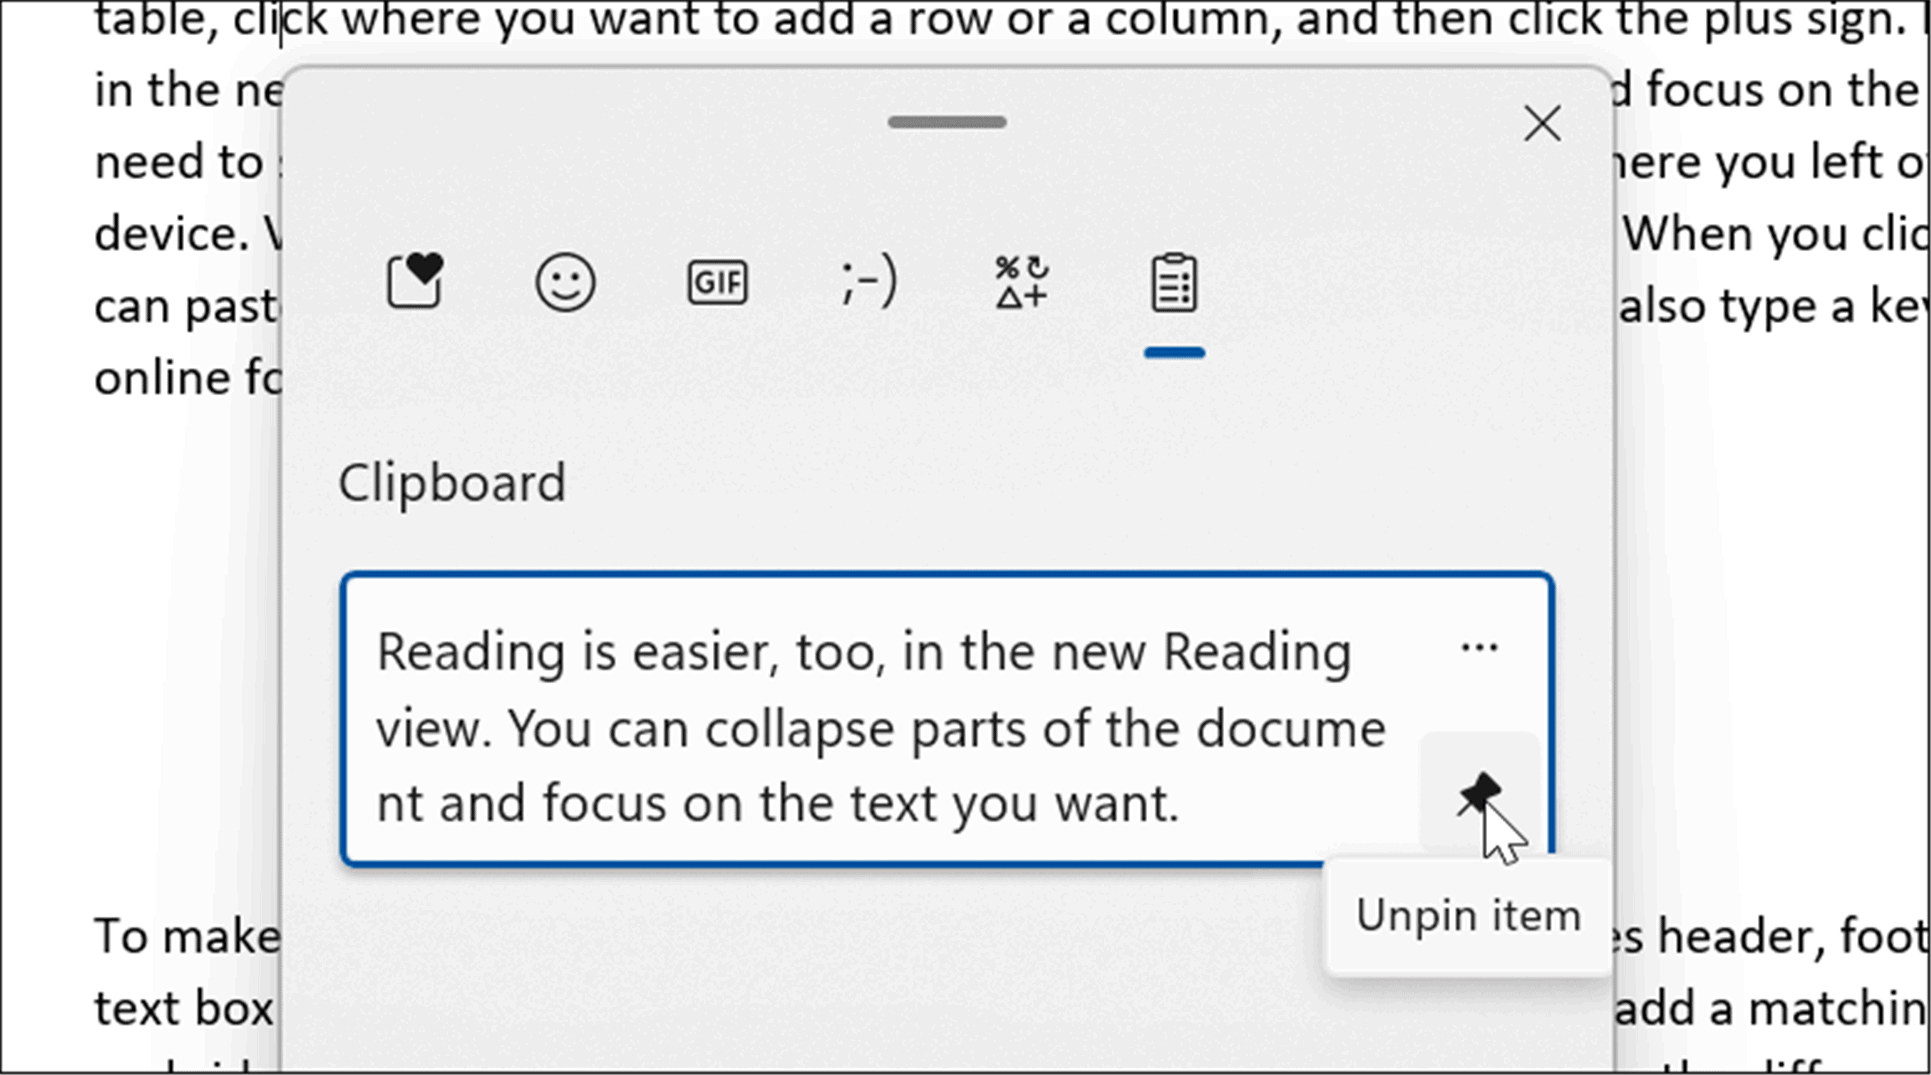
- If there’s specific text or image you use a lot, you can pin the item to the clipboard. Open Clipboard history with Windows key + V and click the Pin item icon.

Clear Clipboard History
When using the Clipboard history feature, it can get full after time, and you might want to clear it.
- Click the Start button or hit the Windows key and click the Settings option.
- When Settings opens, click on System > Clipboard.


- Next, click the Clear button for the Clear clipboard history option.
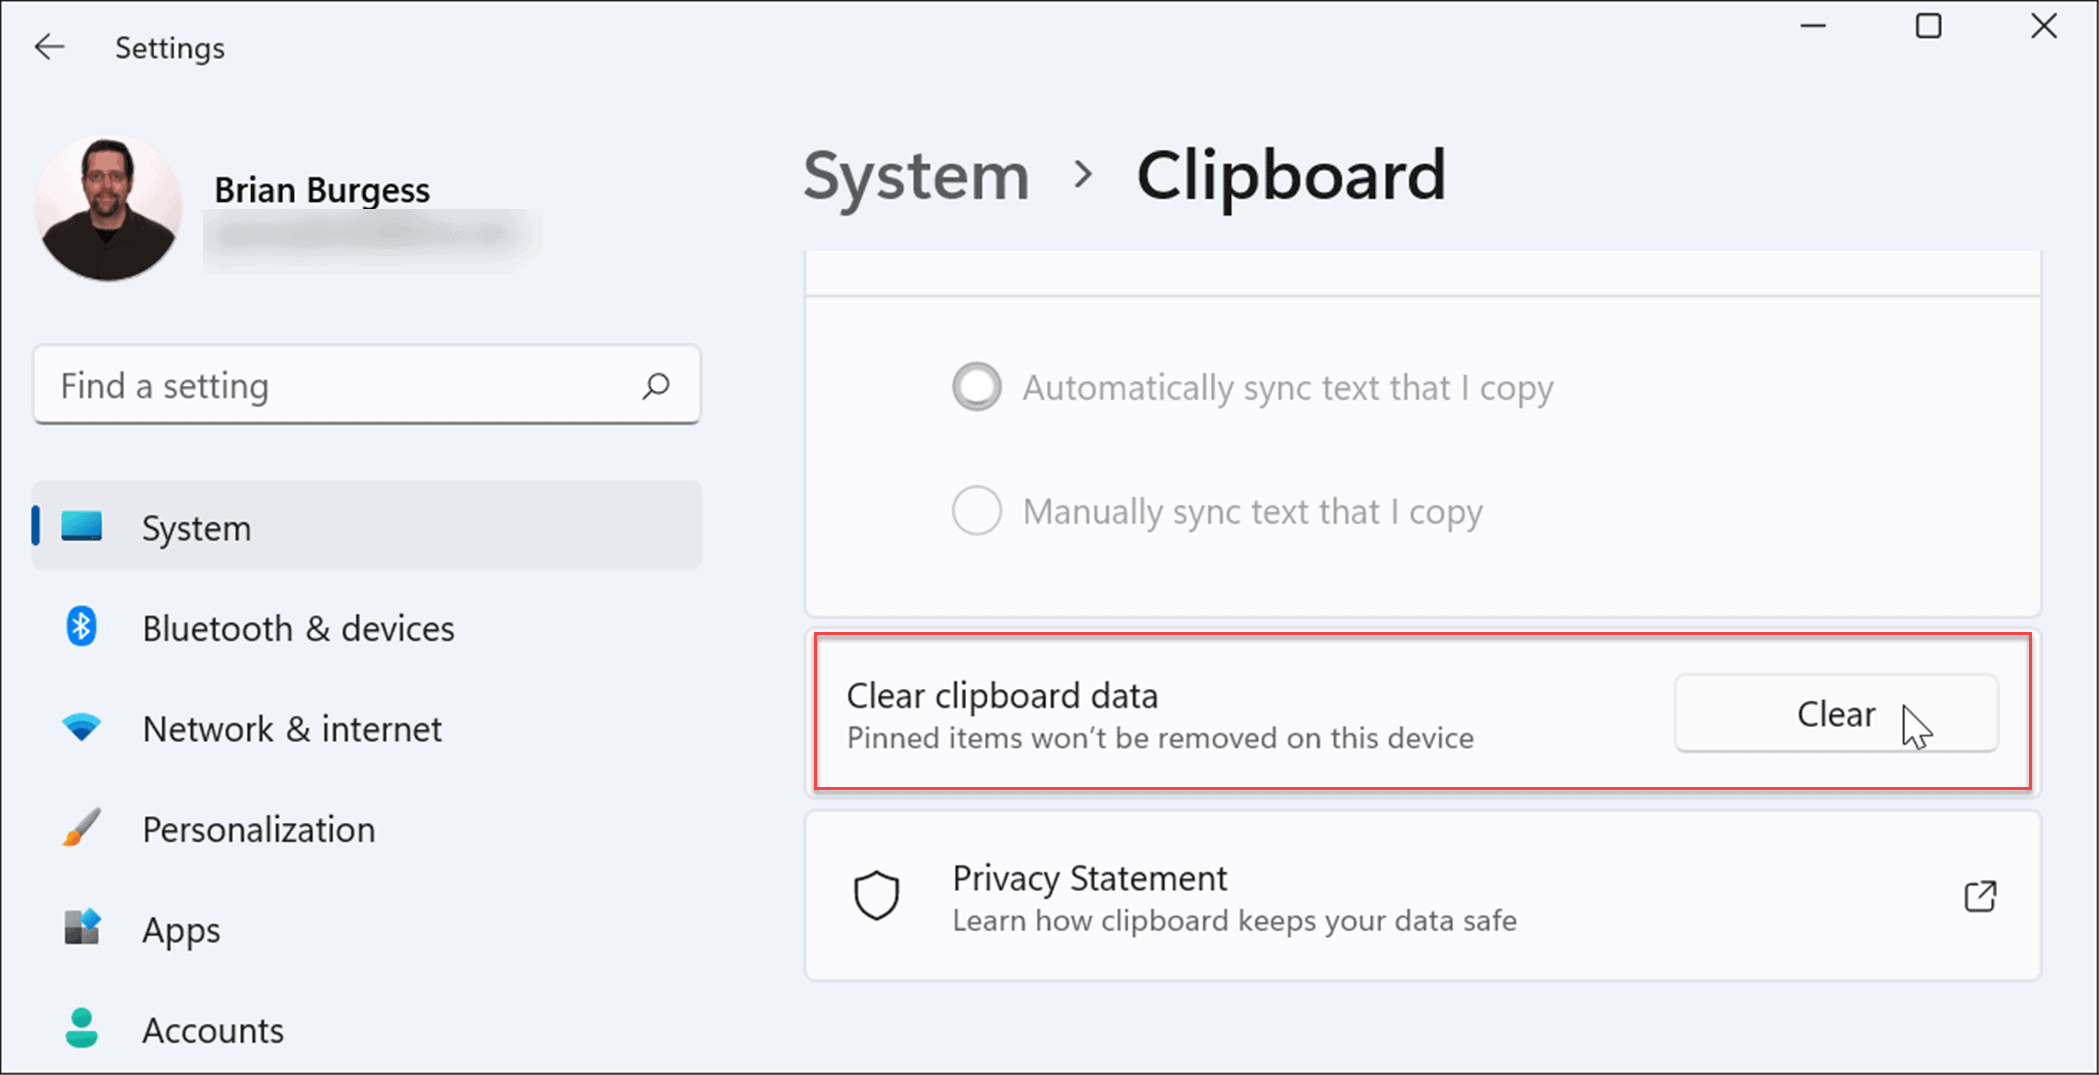

- Everything will be removed from your Clipboard history except for pinned items. To clear pinned items, you’ll need to unpin them and select the Delete option.

Sync Clipboard History on Windows 11
Windows 11 allows you to sync your Clipboard history with your Microsoft account to other PCs you’re logged into.
To enable Clipboard history between devices, use the following steps:
- Click the Start button or hit the Windows key and open Settings.
- When Settings opens, navigate to System > Clipboard.


- Next, toggle on the Sync across your devices option.
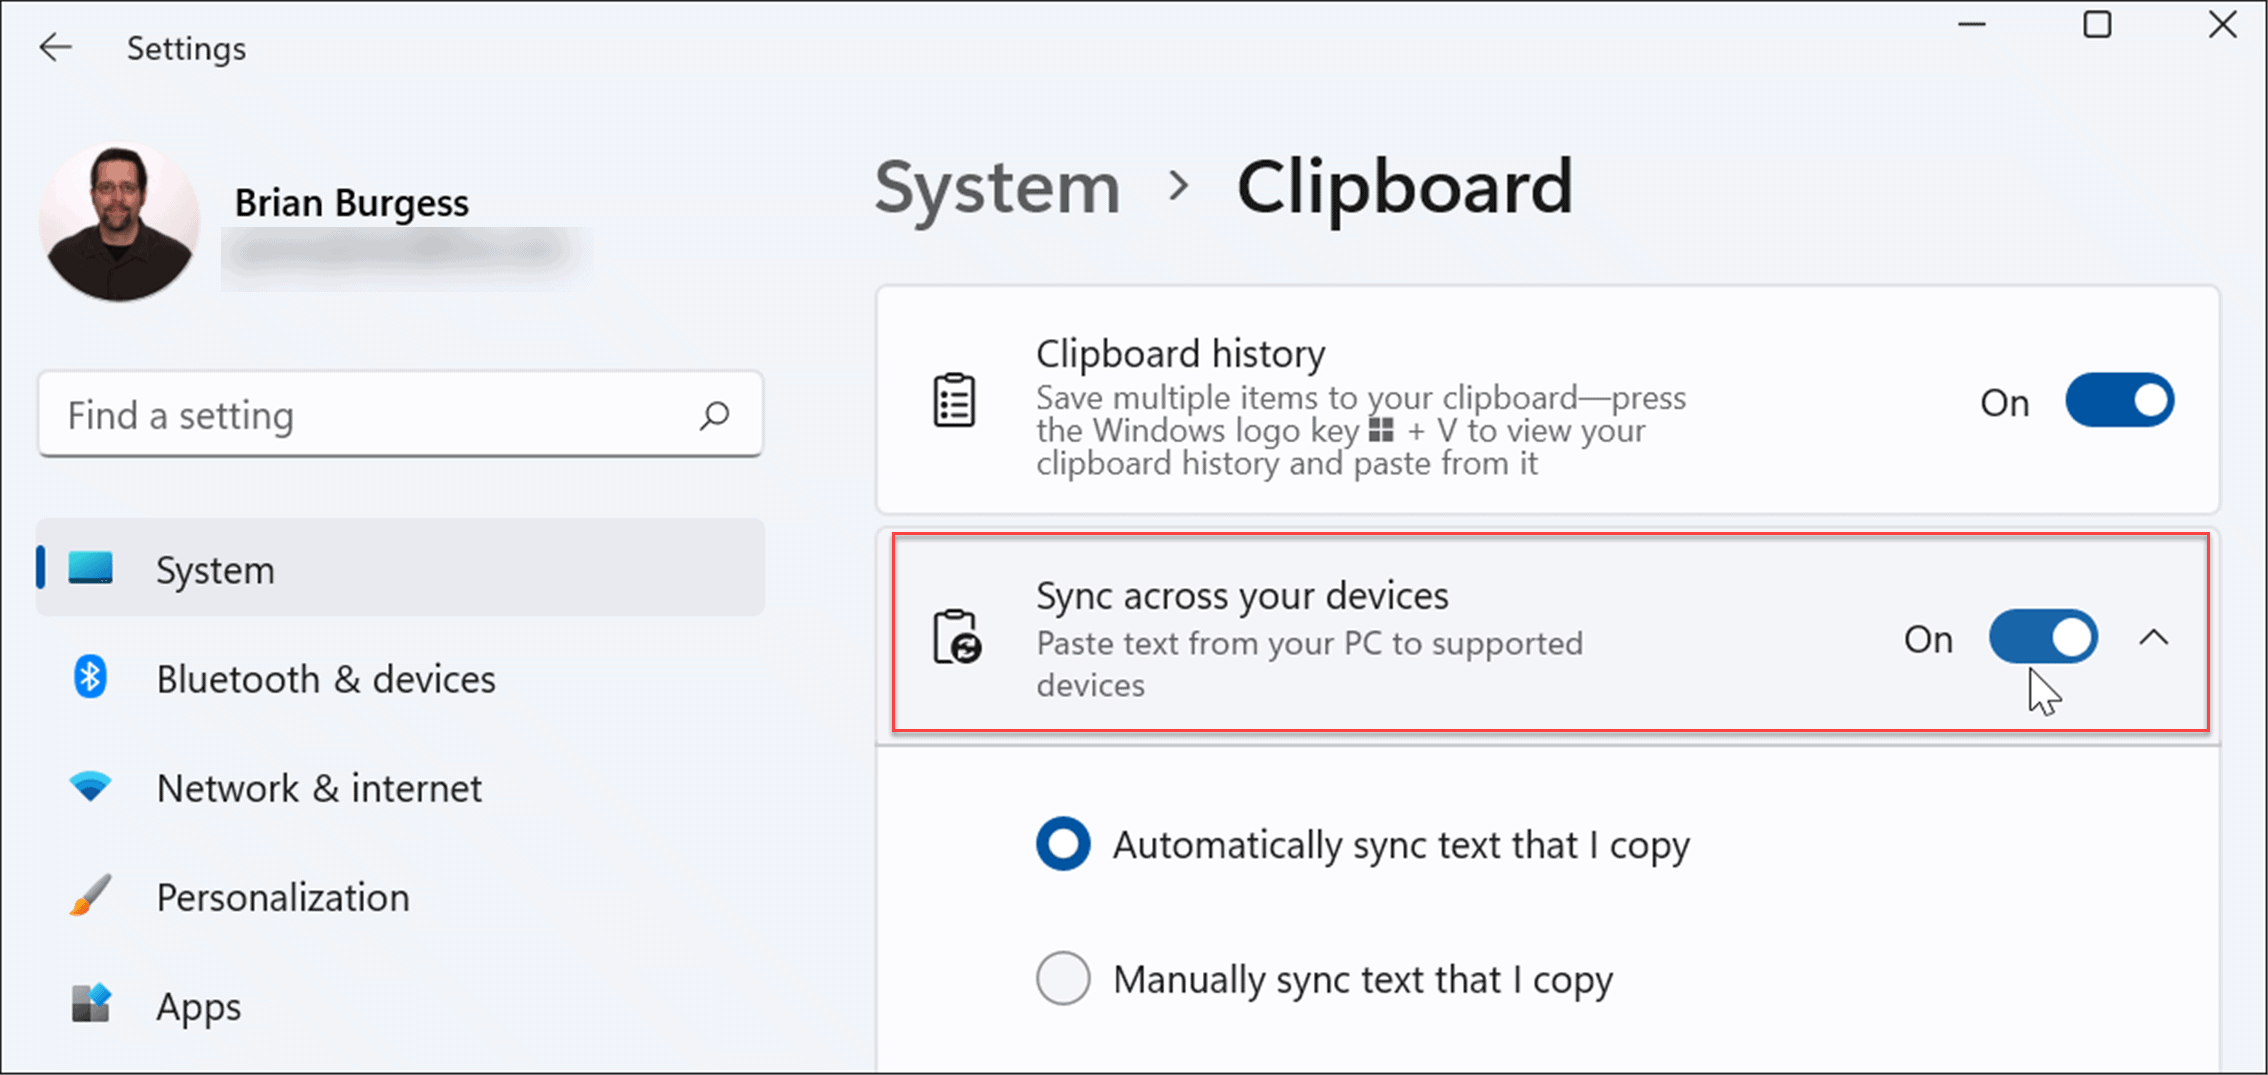

There are two sync options you can use, which include the following:
- Automatically sync text that I copy: Syncs Clipboard history to the cloud for access between PCs linked with the same Microsoft account.
- Never automatically sync text that I copy: If you select this option, you’ll need to choose the available content across PCs manually.
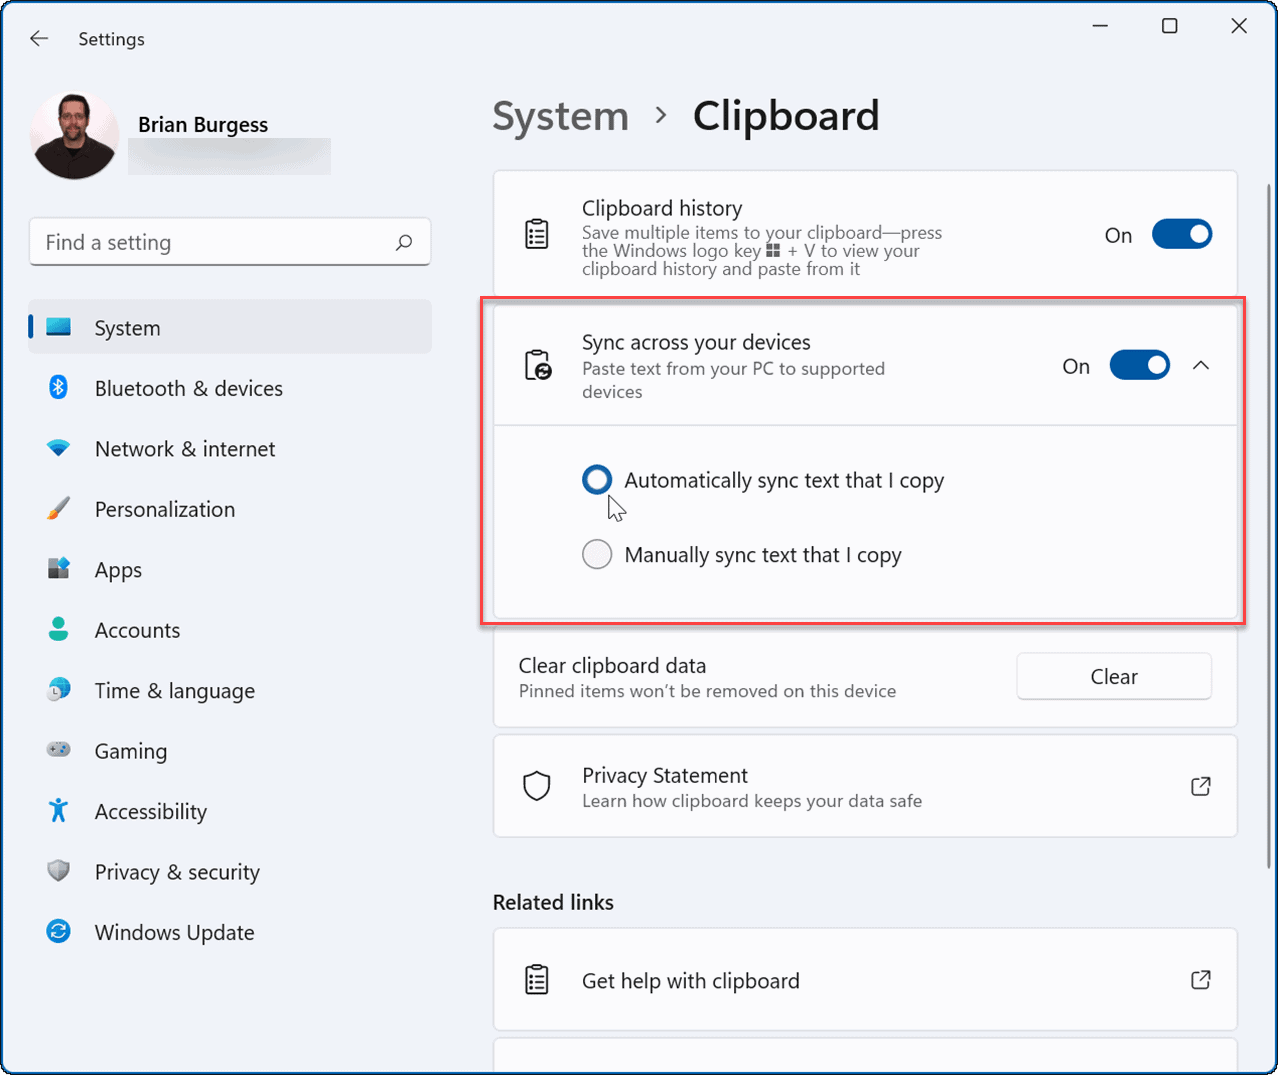

With sync enabled, items stored to Clipboard history will be available on other devices. This includes Windows 10, so you can sync Clipboard history between Windows 10 and 11 systems.
Enabling Windows 11 Features
If you’re using Clipboard history on Windows 11, there may be some other features that might interest you. For example, Windows 11 allows you to install Android apps and even run Linux alongside them.
If you want to test an app but not go through the hassle of enabling virtualization and creating a virtual machine, check out the Windows Sandbox option.
Leave a Reply
Leave a Reply


