Delete Old Windows Restore Points for Extra Hard Disk Space
A lesser known method for creating more hard disk space is deleting old Windows Restore Points. Here’s how to delete all but the most recent, or all of them for advanced users.
You already know that using the Disk Cleanup utility in Windows, either manually or set as a scheduled task, will clear files to provide more disk space. A lesser-known method for creating space is deleting old Windows Restore Points.
Delete All But Most Recent Restore Point
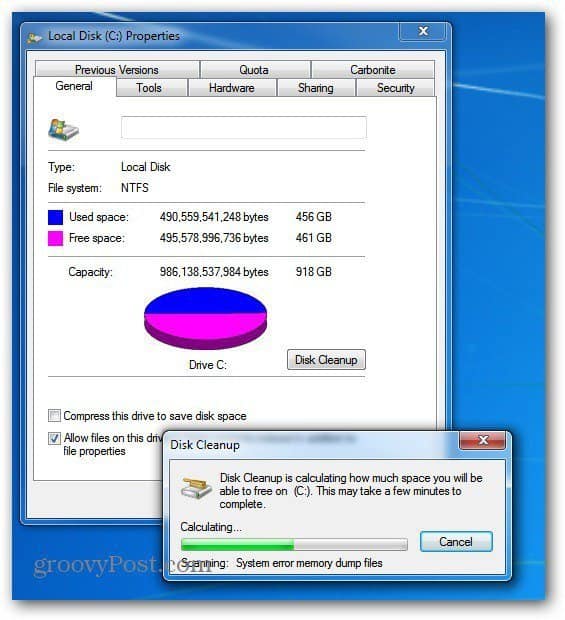
Right-click on your local drive and select Properties. Then start the Disk Cleanup utility.

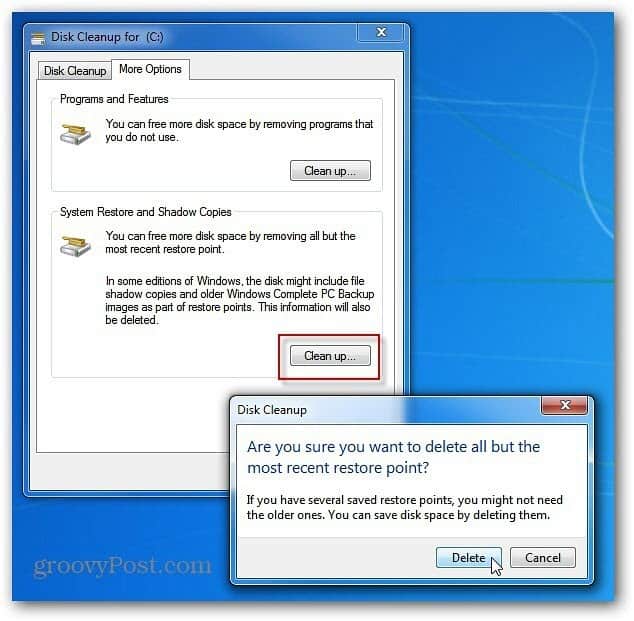
Then select More Options and under System Restore and Shadow Copies, click Clean Up. Then click the Delete button to delete all but the most recent saved Restore Point.

Delete All System Restore Points (Advanced)
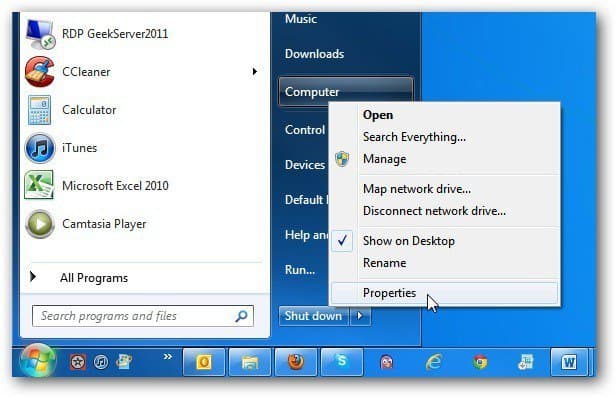
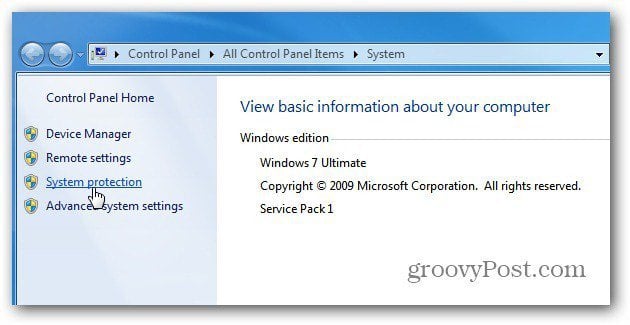
If you want to delete all Restore Points – which will clear up the most space, click Start and right-click Computer. Select Properties.

Next click System Protection in the left column.

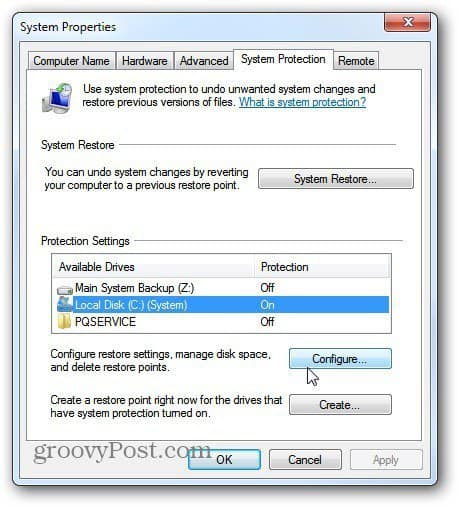
The System Properties dialog comes up. Select the System Protection tab, highlight Local Disk then Configure.

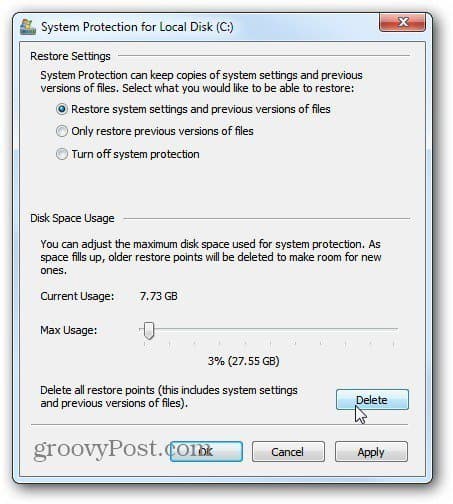
Click Delete. This will delete all System Restore Points. In this example, I’ll be getting back about 8GB of space.

Unless you’re an advanced user, I recommend you use the first method so you have at least the most recent Restore Point to fall back on if needed. Or, after deleting them all, create a new Restore Point for good measure.
2 Comments
Leave a Reply
Leave a Reply


Ziggy
April 4, 2012 at 12:15 am
Ccleaner gives you the option to delete one or more Restore points. It also leaves the last Restore point just in case you need one.
Creating a shortcut on your desktop (C:\Windows\System32\control.exe sysdm.cpl @0,4) allows for quick access to Windows System Restore and/or Create a Restore Point.
Brian Burgess
April 10, 2012 at 10:03 pm
@Ziggy: Nice suggestion!