How to Enable Enhanced Phishing Protection on Windows 11

Protecting against phishing attempts is important and Microsoft makes it easier in Windows 11. Here’s how to enable phishing protection on a Windows 11 PC.
Microsoft now includes phishing protection as part of Windows 11 from version 2022 and above. The enhanced SmartScreen technology can determine when you type your password in an untrusted app or website. You’ll then receive a warning message about the risk if it detects a security problem.
In addition, you’ll receive a warning to change your password. Once enabled, it can warn about malicious sites while using Chrome or Microsoft Edge. The updated phishing protection feature works with a Microsoft Active Directory, Azure, or local PC account on your system.
When you want to turn on this extra security protection, here’s how to enable phishing protection on Windows 11.
How to Turn Off Windows Hello on Windows 11
Phishing protection on Windows 11 is only available when using a password or password to sign in. If you’re using Windows Hello (including fingerprint sign-ins), you’ll need to disable it and switch to password login.
Currently, only a typed password used to log in can be protected. You can turn off Windows Hello by going to Settings > Accounts > Sign-in options.
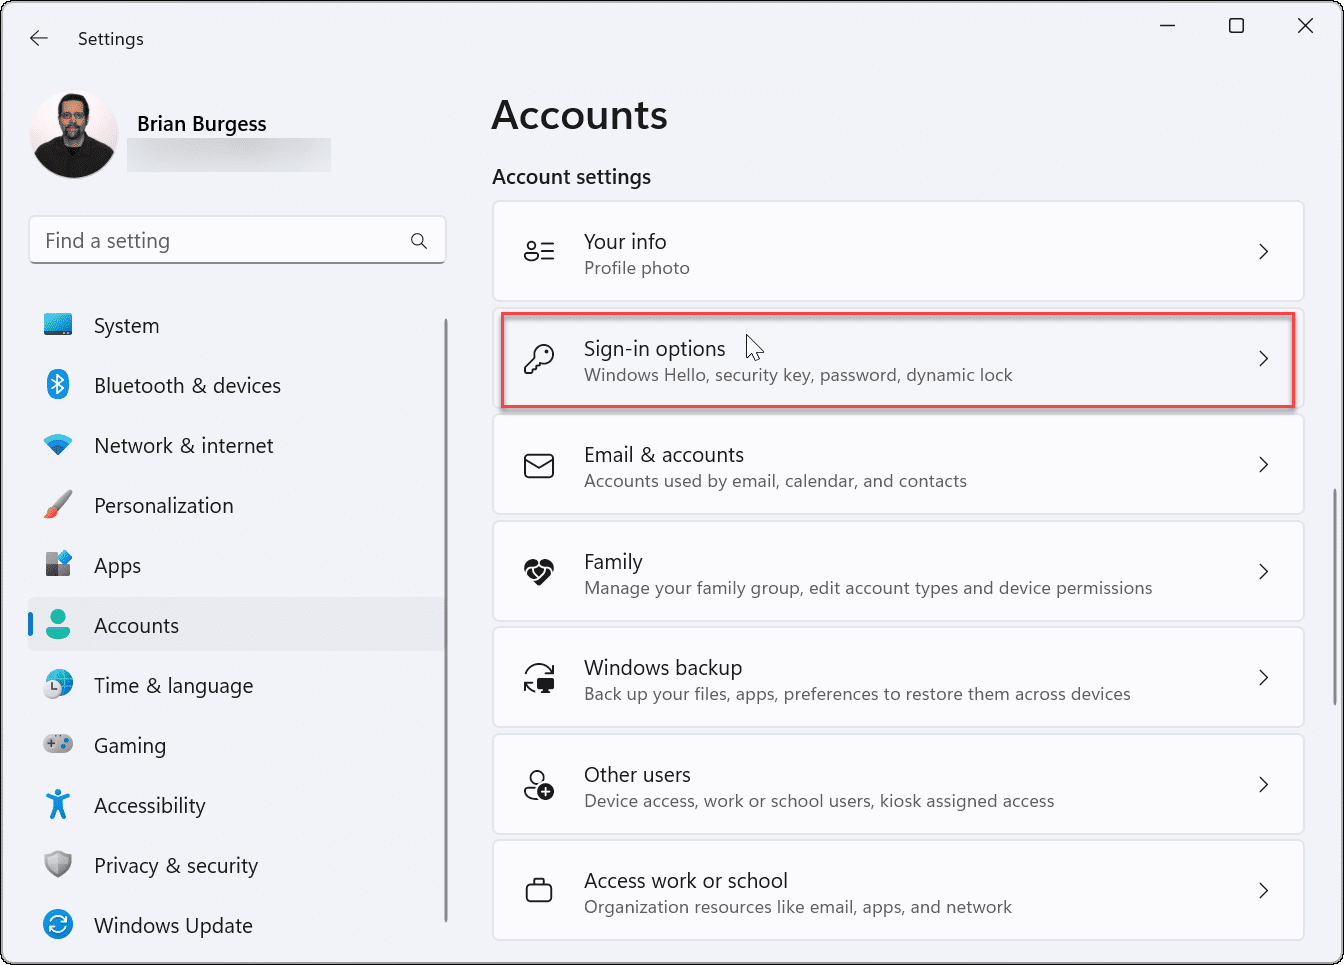

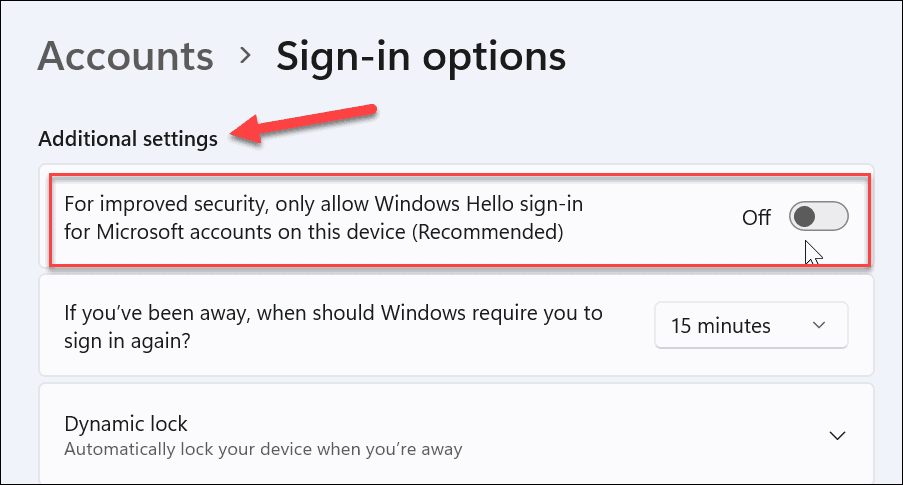
Scroll down to the Additional settings section and turn off the For improved security, only allow Windows Hello sign-in for Microsoft accounts on this device option.

Move back up the menu, expand the Windows Hello option you’re using (including PIN), and click the Remove button.
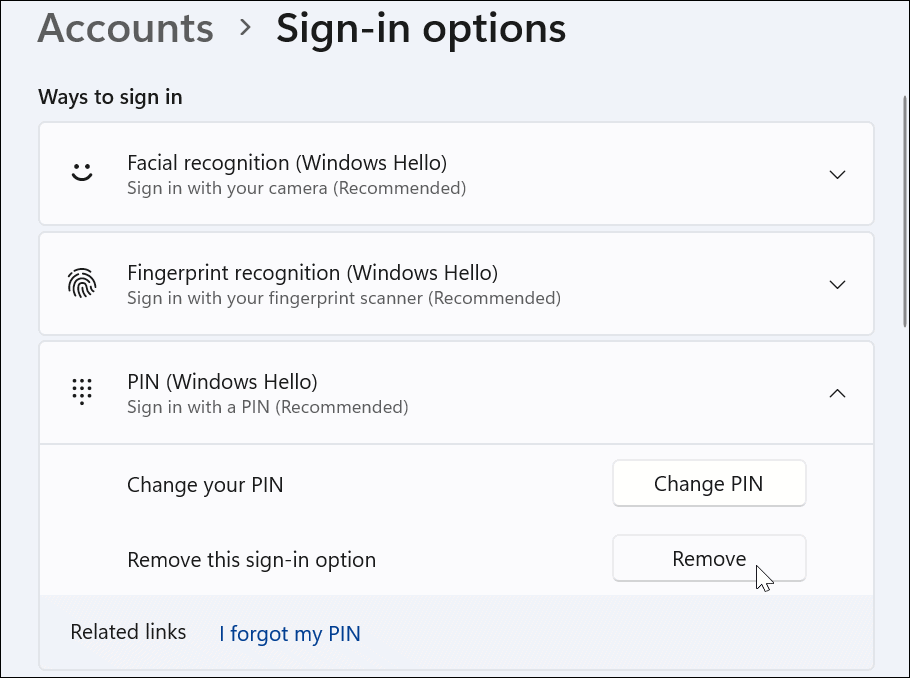

Note that you’ll need to sign in with your Microsoft account password to complete the removal process. Then, continue to the next section to turn on phishing protection when you’re done.


How to Enable Enhanced Phishing Protection on Windows 11
Once Windows Hello is switched off, you can proceed with enabling the enhanced phishing protection feature in Windows 11.
To enable phishing protection on Windows 11:
- Open the Start menu.
- Type windows security and click the Windows Security app from the top results.


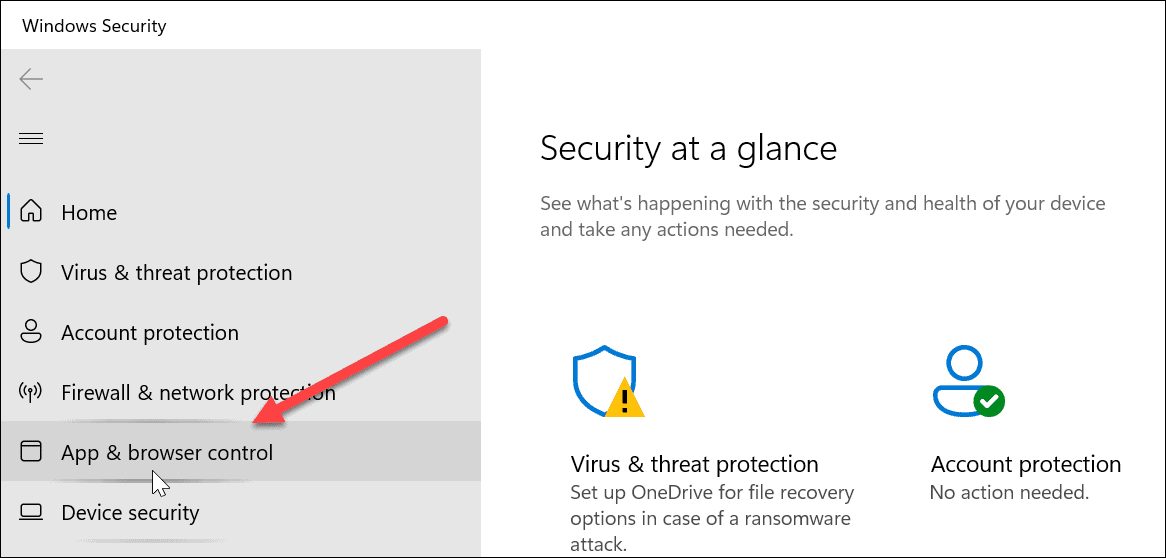
- When the Windows Security app opens, click on App & Browser Control in the left panel.

- On the right, click the Reputation-based protection settings option.

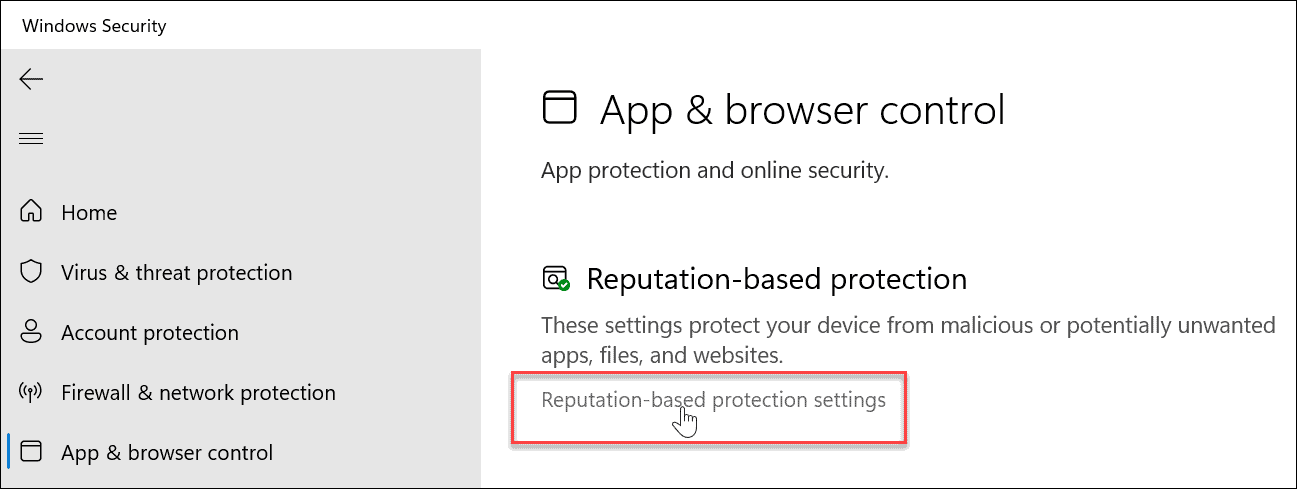
- Scroll down to the Phishing protection section and toggle it to the On position.


- After enabling it, confirm the options you want to be protected against by clicking the provided checkboxes. These include warnings about malicious apps and sites, password reuse, and unsafe password storage.


With phishing protection enabled, Windows 11 can warn you about malicious sites and apps. In addition, it could warn you when typing passwords in plain text in apps such as Notepad, Word (or other Office apps), and OneNote.
Using Phishing Protection on Windows 11
If you enable all available phishing protection options on Windows 11, you’ll be alerted when trying to reuse the same password on your accounts on multiple sites. It’s important not to reuse passwords, as an attacker can gain access to other accounts if your password is compromised.
It’s hard to keep track of different passwords on all your online accounts. However, that’s where password managers like LastPass, Bitwarden, 1Password, and other password managers come in handy.
Windows 11 includes more security than previous versions. In addition to biometrics like facial recognition via Windows Hello to keep others out of your PC, you’ll want to tweak Windows Security for max protection.
Also, enable BitLocker encryption on your system’s drive to keep your data secure. And while using Windows Security is a “no-brainer,” there may be times when you need to turn it off and back on again for various situations. Learn how to disable or enable Windows Security on Windows 11 for more.
1 Comment
Leave a Reply
Leave a Reply


Laura
October 19, 2022 at 8:05 am
“App and browser control” is not listed in Windows Security on my computer (Windows 11)