How to Clean Boot Windows 11
If something isn’t working correctly on your PC, an excellent place to start troubleshooting is to clean boot Windows 11 by following these steps.
Troubleshooting boot issues on a Windows 11 PC can be difficult. For example, you might be experiencing general instability, a hardware issue, or games and apps not working. Whatever the problem, a good troubleshooting step to consider is performing a clean boot.
Not to be confused with Safe Mode, a Windows clean boot clean uses only the bare minimal startup apps and drivers required to load the operating system. A clean boot provides more control over which services and apps run than Safe Mode. In turn, that allows you to better determine what’s causing the problem—and hopefully fix it.
Here’s how to clean boot Windows 11 so you can narrow down any problems you’re having.
How to Perform a Clean Boot of Windows 11
To perform a clean boot of Windows 11, do the following:
- Click the Start button or hit the Windows key to bring the Start menu up.
- Type in msconfig and select the top result.
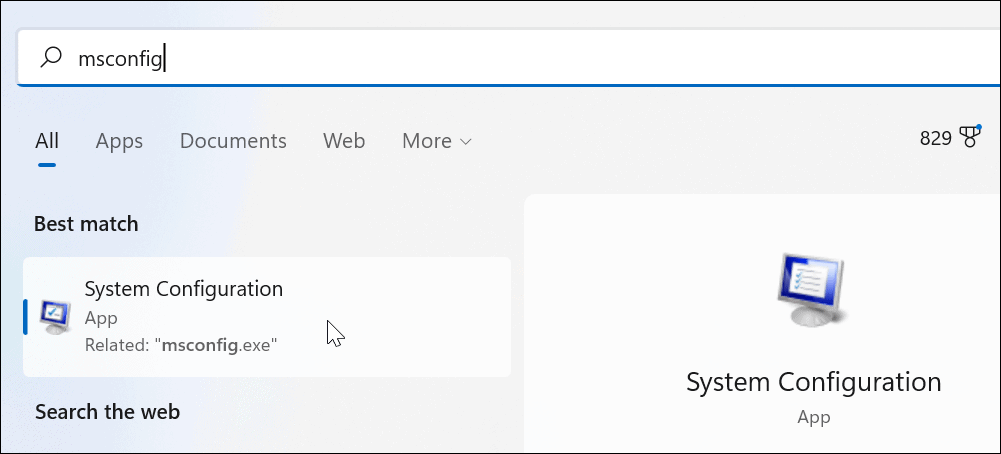

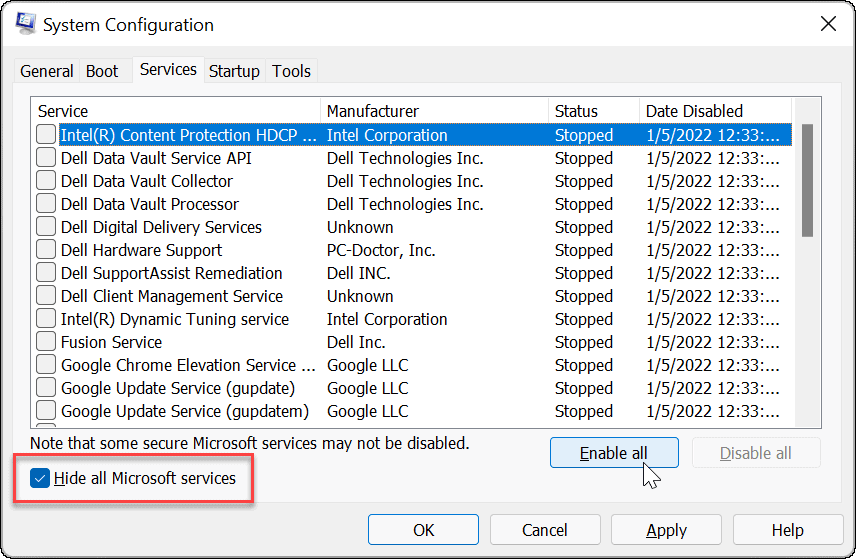
- When the System Configuration window comes up, click the Services tab at the top.


- Check the Hide all Microsoft services box and click the Disable all button.


- Click the Startup tab at the top, then click the Open Task Manager link.


- Click on the Startup tab at the top of Task Manager. Right-click each item that’s enabled and select Disable from the menu.
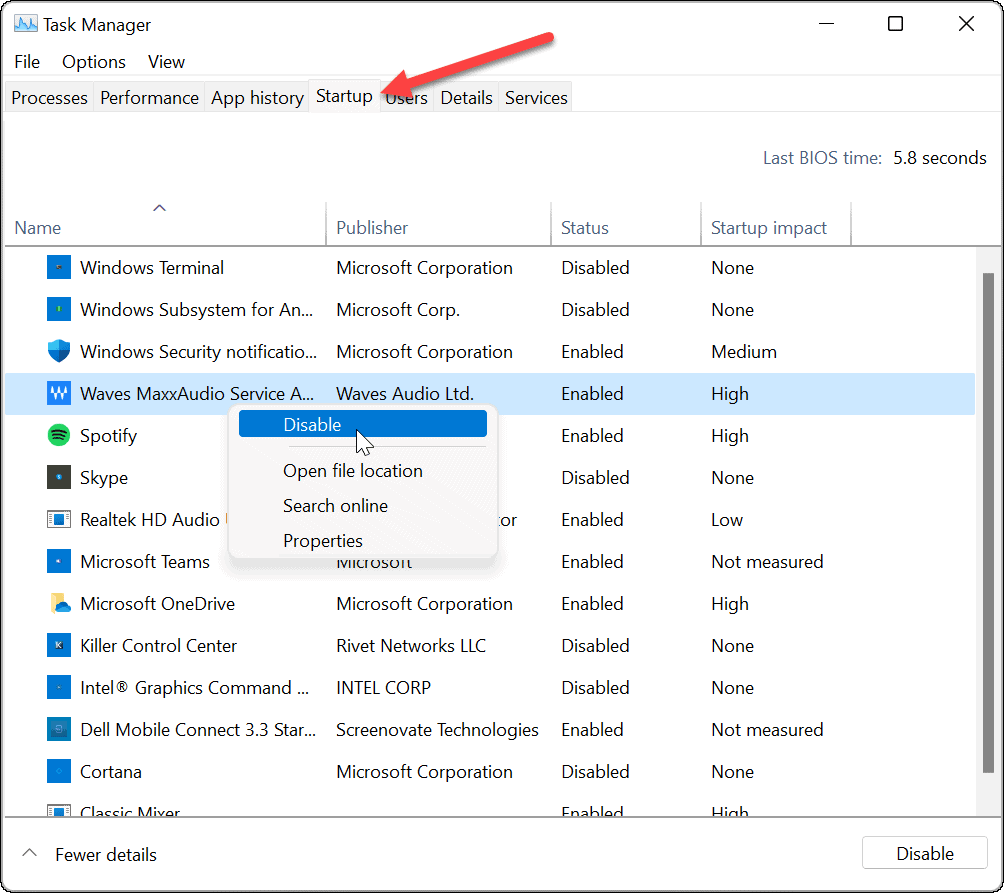

- When you finish, exit Task Manager, then click Apply and OK on the System Configuration window.
- Restart your PC to complete the process.
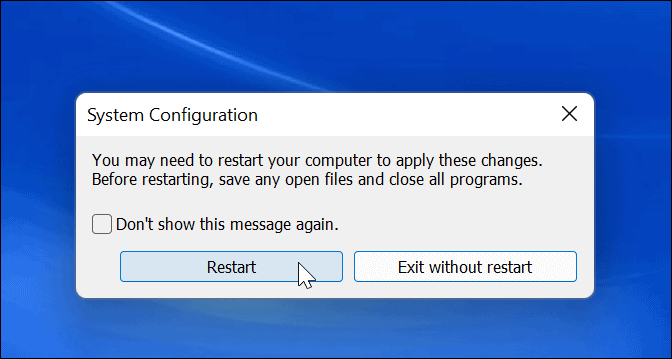

Windows 11 will perform a clean boot. When you get back from the restart, if the issue is no longer there, you’ll have an idea of where to start troubleshooting.
Whatever the cause of your issue, try doing it now to see if you can recreate it. For example, maybe you couldn’t install an app or driver because something was conflicting.
Depending on the issue, the troubleshooting can sometimes be tedious. For example, you might need to re-enable one app or one service at a time to find which one is causing the problem.
How to Disable Clean Boot
Once you’ve fixed the problem, you can restore the normal boot process on Windows 11 by following these steps:
- Open the Start menu, type msconfig, then select the top result.
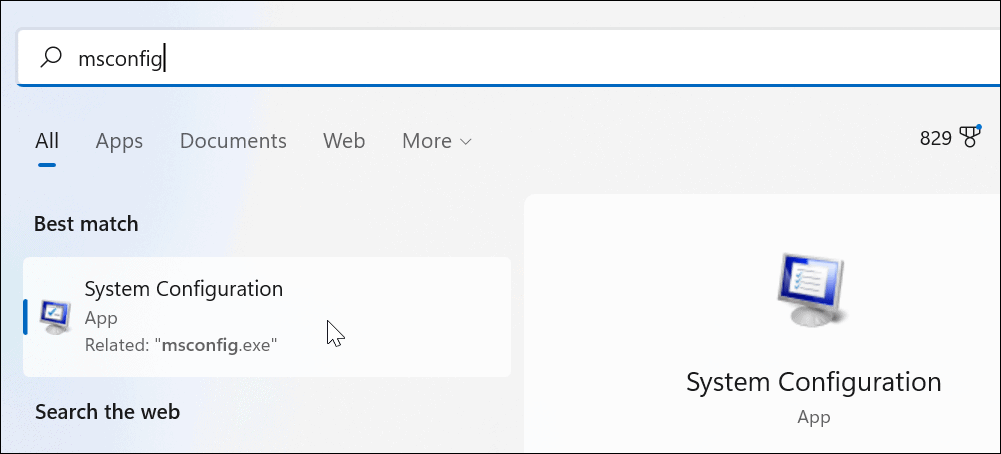

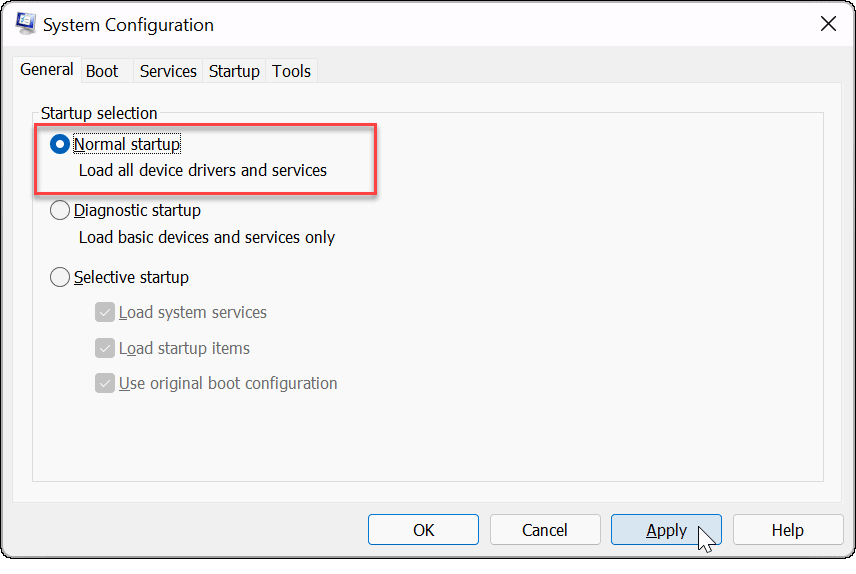
- When System Configuration opens, click the General tab, select Normal startup, and click the Apply button.

- Click the Services tab, check the Hide all Microsoft services box, then click the Enable all button.

- Select the Startup tab and click the Open Task Manager.
- When Task Manager launches, enable the apps you want to run during startup. You don’t need to enable all of them— disabling startup apps can often improve boot time.


- Exit Task Manager and click OK on the System Configuration window.
- Restart your PC when prompted.


Troubleshooting Windows 11
The steps above will help you to clean boot in Windows 11, but it’s up to you to fix any underlying issues you’re having. Once you do, your PC should be able to boot up normally with your regular apps, services, and drivers.
When you clean boot Windows 11, you’ll have more control over troubleshooting hardware issues, whether it’s your HDMI not working or your keyboard not working. You’ll be able to see if a problem is due to third-party software or a built-in driver, service, or app.
Experiencing issues getting Windows 11 to update? Take a look at some fixes to help resolve Windows 11 update issues.
Leave a Reply
Leave a Reply


