How to Fix Windows 11 Not Detecting Headphones

Having problems with your headphones? You can fix Windows 11 not detecting your headphones using this guide.
You can use headphones when you want to listen to audio on your PC without disturbing others. However, if it doesn’t work, you’ll need to fix Windows 11 not detecting headphones on your system.
Whether your headphones are hardwired in or connected via Bluetooth, if Windows doesn’t recognize them, it can be frustrating. The OS generally does an excellent job detecting accessories like headphones, but not always.
If you have a problem where the headphones are not detected, we’ll show you the steps to get them working in this guide.
Verify Wired Headphones are Connected
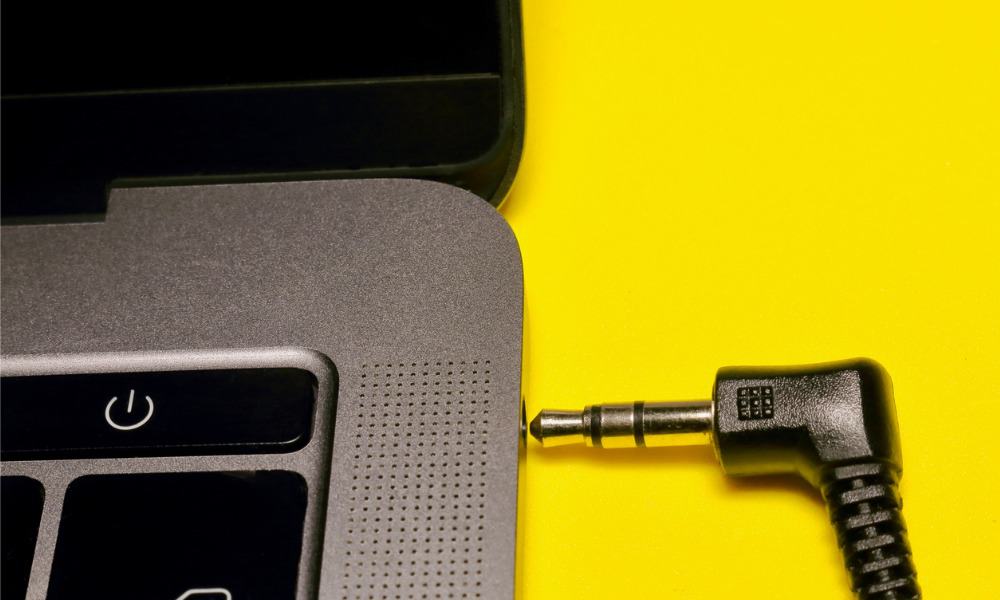
If you use a set of wired headphones that you plug in, ensure they are correctly connected. Unplug the headphones from the jack and reconnect it to ensure a proper connection. It might take an extra push to secure them properly. They can become disconnected after continued use.
Also, inspect the headphone jack on the PC for any damage or visible dust and debris that can affect the connection. If there is visible dust or debris, spray it out with canned air and use a soft bristle brush to remove stubborn debris.
In addition to the jack, inspect the wires connected to the headphones for physical damage that causes the connection issue. Try plugging them into a different device to check if they work.

Check the Audio Output Device
One of the reasons Windows isn’t giving you audio is due to the wrong output source selected. Windows might be recognizing them, but you’re not getting audio. Luckily, checking and changing the audio output device is straightforward.
To change the audio output on Windows 11:
- Press Windows key + A to launch the Quick Settings menu.
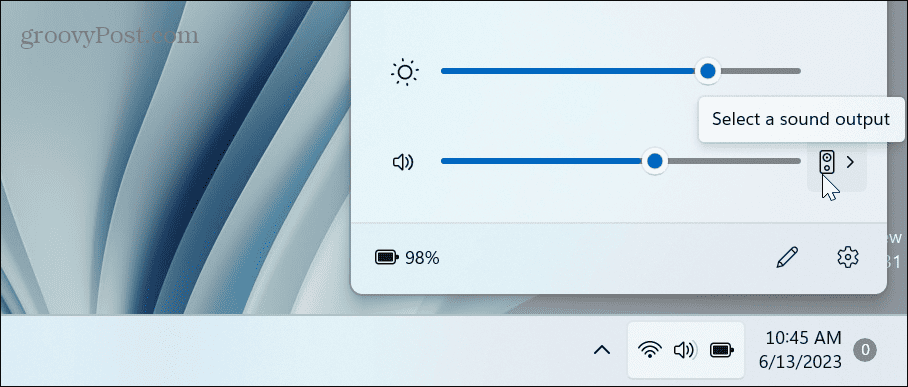
- Click the Select a sound output button—the speaker icon at the right of the volume slider.

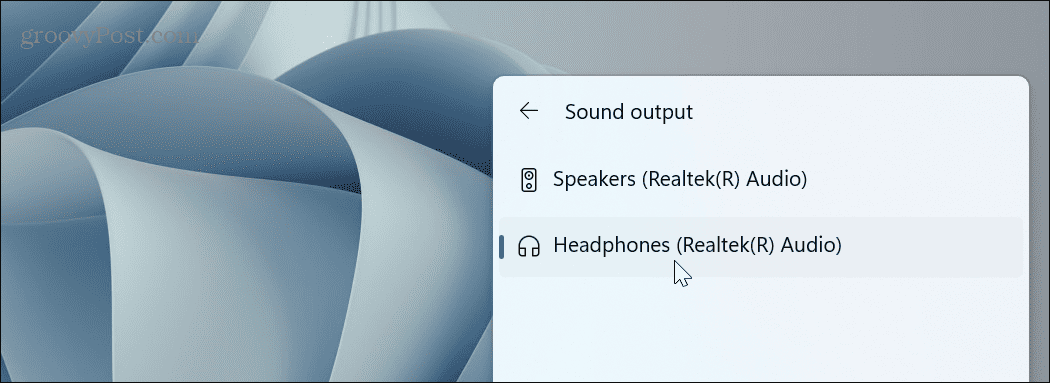
- Select your headphones from the audio output device list.

Reenable Bluetooth Headphones
If you are using a pair of Bluetooth headphones, you can re-pair them to your system. For example, we connected AirPods Pro to Windows 11 for testing.
To verify Bluetooth connection:
- Press Windows key + A to launch the Quick Settings menu.
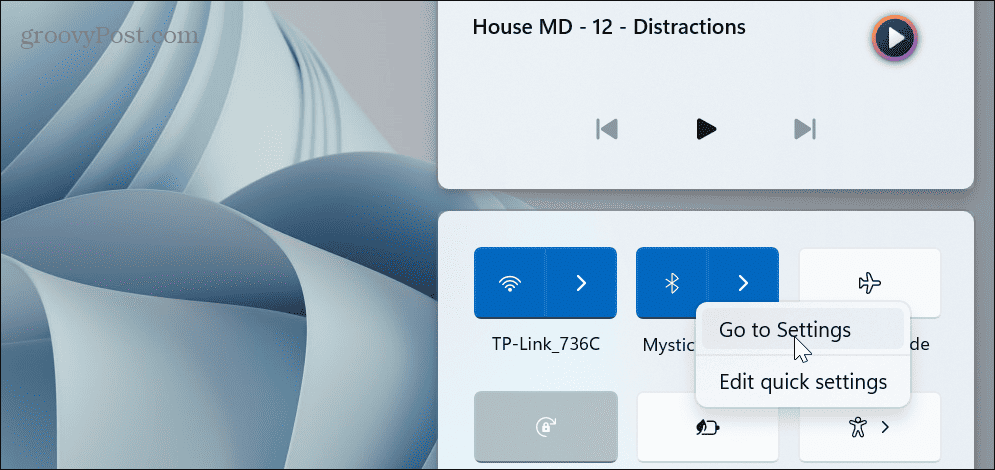
- Right-click the Bluetooth button and select the Go to settings option.
Note: If you don’t see the Bluetooth option, you can add it by customizing the Quick Settings menu.
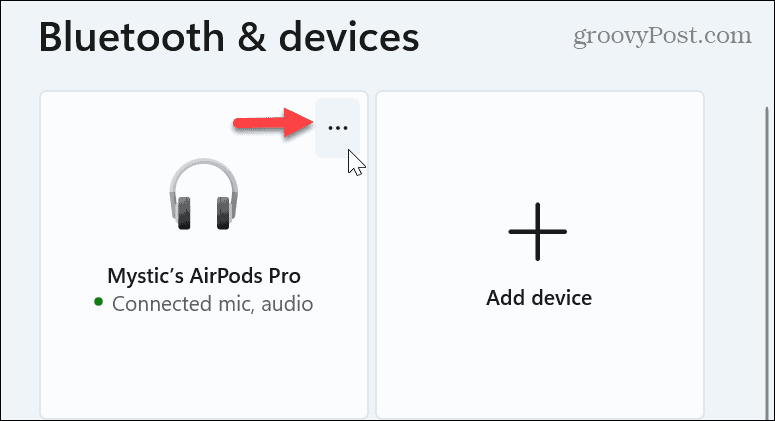
- Click the three-dot button next to your headphones.

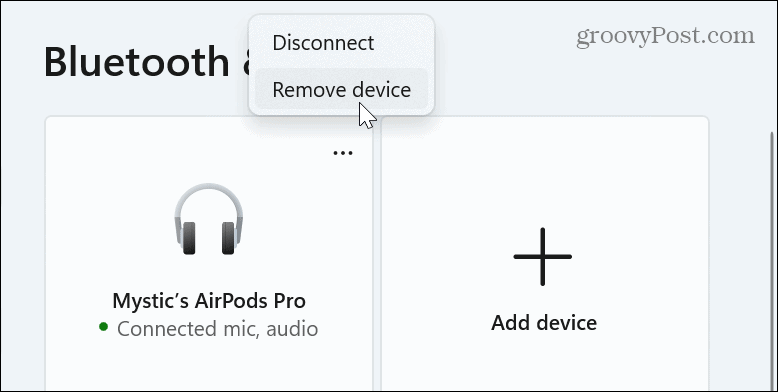
- Select the Remove device option from the menu that appears.

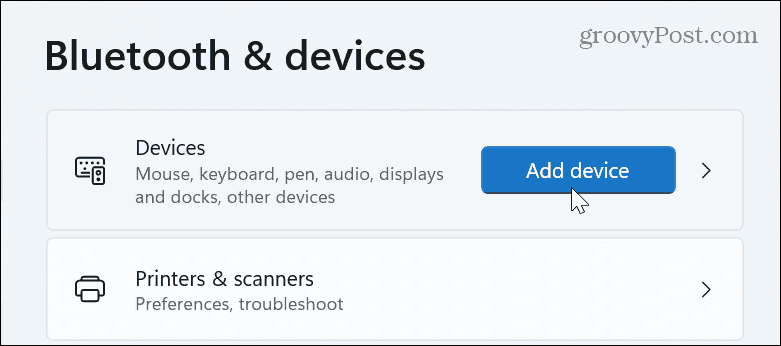
- Once the headphones are disconnected, click the Add device button next to the Devices option.

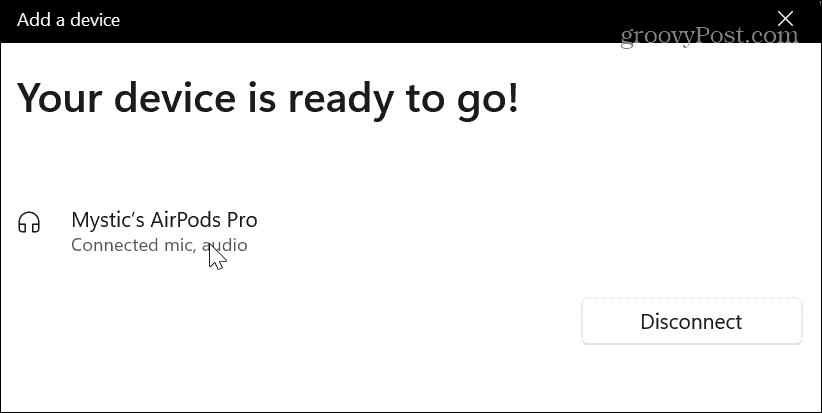
- Re-pair your headphones following the onscreen instructions.

Enable Headphones in Sound Settings
If Windows isn’t detecting your headphones, they may have been disabled inadvertently or by another audio app or device.
To enable headphones in Windows 11:
- Right-click the speaker icon in the notification section of the taskbar and choose Sound Settings when the menu appears.

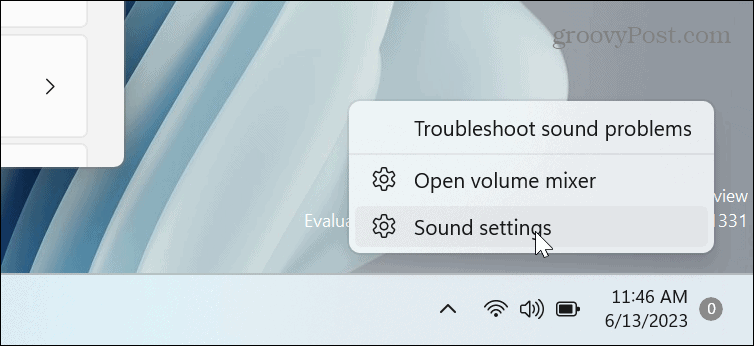
- Scroll down the right column and select the More sound settings option.


- Right-click an empty area if your headphones aren’t listed, and click Show Disabled Devices.

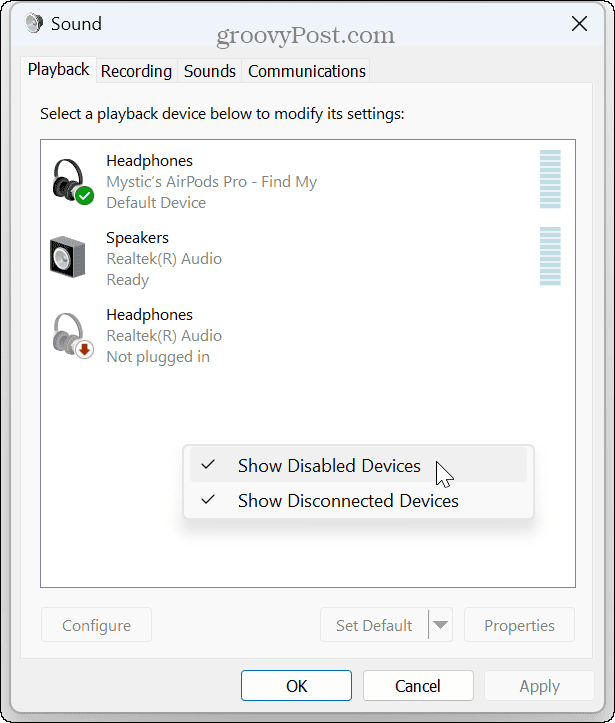
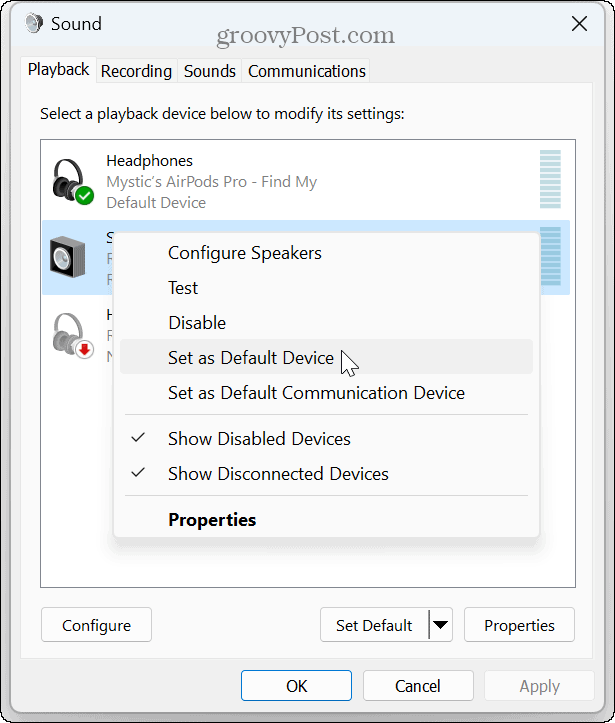
- Right-click the headphones and select Enable from the menu that appears.


- If more than one audio device is connected, right-click the headphones you want to use and click Set as Default Device.

Update or Reinstall Audio Drivers
If you are still having problems getting Windows 11 to detect headphones, updating audio drivers is a good idea. An outdated or corrupt driver could cause the problem.
To update or reinstall audio drivers:
- Press the Windows key, type device manager, and choose the top result.


- Expand the Sound, video and game controllers section.
- Right-click your device and select Update driver from the menu.


- Select the Search automatically for drivers option or choose Browse my computer for drivers to manually install the driver.


- To make Windows reinstall the driver, right-click the problematic audio driver and select Uninstall device.


- Follow the onscreen instructions to complete the uninstall process.


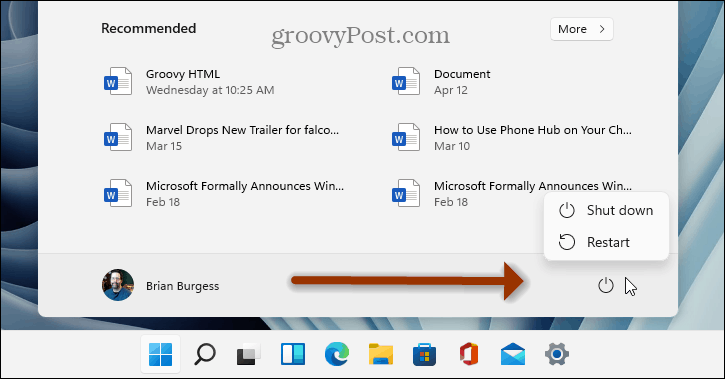
- Once the uninstall is complete, restart Windows 11, and Windows will reinstall the audio driver during the boot process.

Check In-App Audio Settings
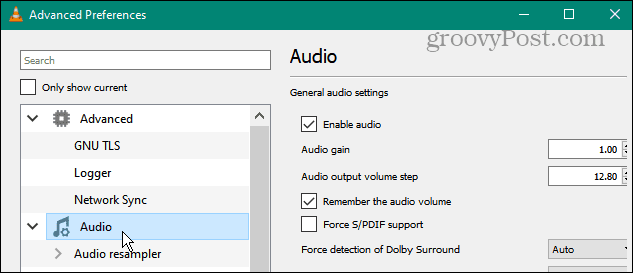
After checking your headphones and ensuring Window’s system audio settings are correct, you must check in-app audio settings. Most apps like Media Player, VLC, and Microsoft Teams may not have correctly set internal volume levels.
For example, you can make Spotify louder if you can’t hear it or fix audio problems with Zoom. So, ensure the apps you are using for audio have the correct volume levels.

Fixing Audio Issues on Windows 11
If you have a problem getting Windows to detect your headphones and produce sound, you should be able to fix the problem using the troubleshooting steps above.
Also, remember there could be a system bug causing the problem, so check for Windows updates during troubleshooting. A fix may be a few clicks away. And if you change audio settings a lot, it can be an issue. Check out how to reset audio settings on Windows 11 to fix your headphones issue.
Compared to earlier versions, Windows 11 has new sounds, and you’ll want to learn to manage system sounds on the OS. You may also be interested in learning how to test a microphone on your PC.
Leave a Reply
Leave a Reply


