7 Ways to Improve Battery Life on Windows 11
A laptop battery gives you power—for a limited time only. If you want to extend that time, try these tips to improve battery life on Windows 11.
Sometimes you need to unplug and take your laptop with you—if that’s the case, you’ll want to get the most out of your battery on a single charge.
Thankfully, there are several features that can help to improve battery life on Windows 11. It includes things like the battery saver feature that you can enable with a click. There are some other power options you can also try from older versions of Windows.
In this guide, we’ll show you seven ways to improve battery life on Windows 11.
Improve Battery Life on Windows 11 with Battery Saver
If you’re looking for a straightforward way to improve battery life on Windows 11, use the Battery saver feature.
To use Battery saver on Windows 11, use the following steps:
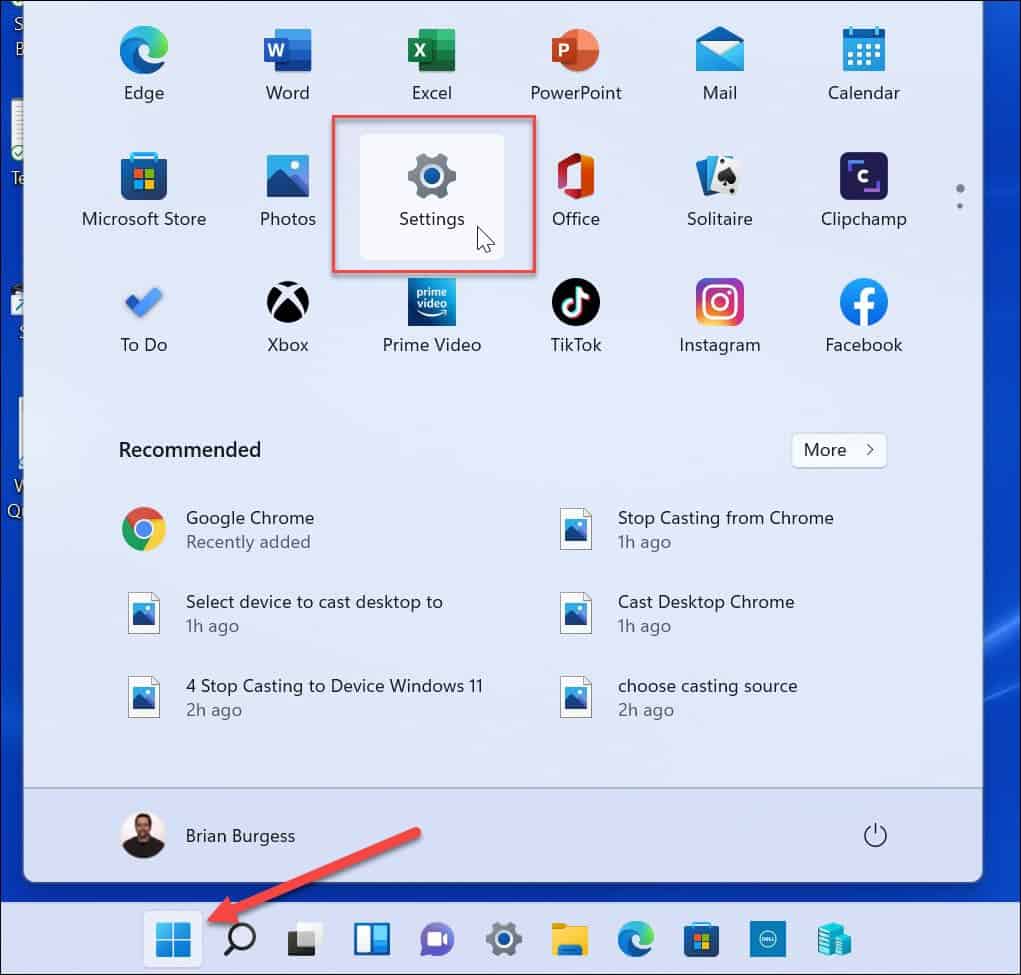
- Click Start or hit the Windows key to launch the Start menu and select Settings. Alternately, you can use the keyboard shortcut Windows key + I to open Settings directly.

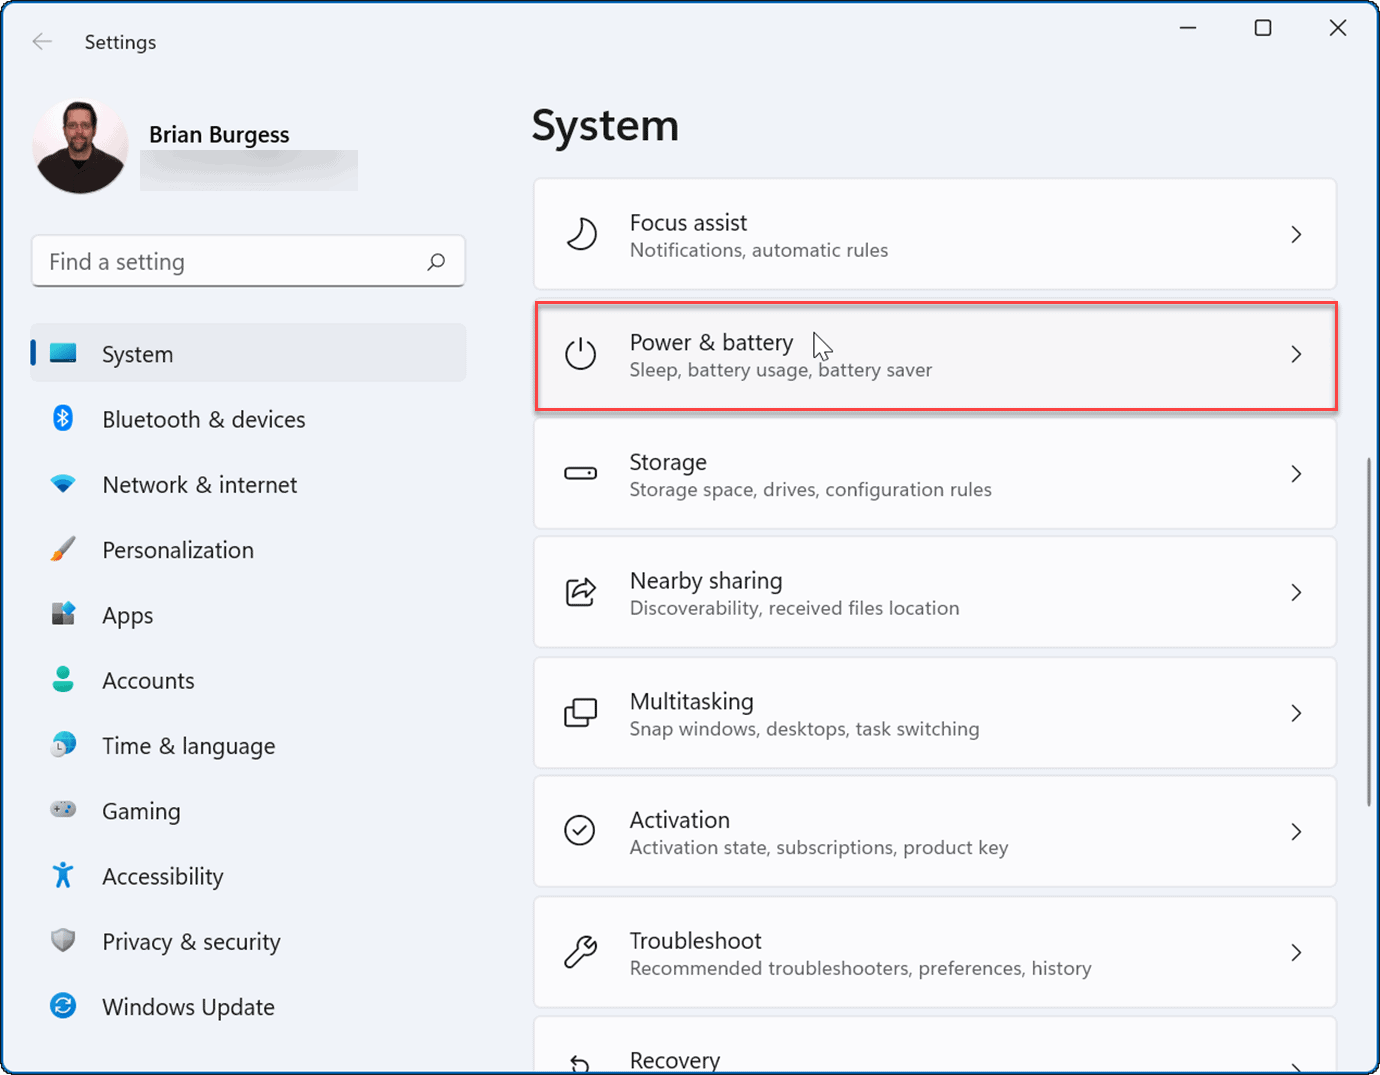
- When Settings opens, select System from the list on the left and the Power & battery option on the right.

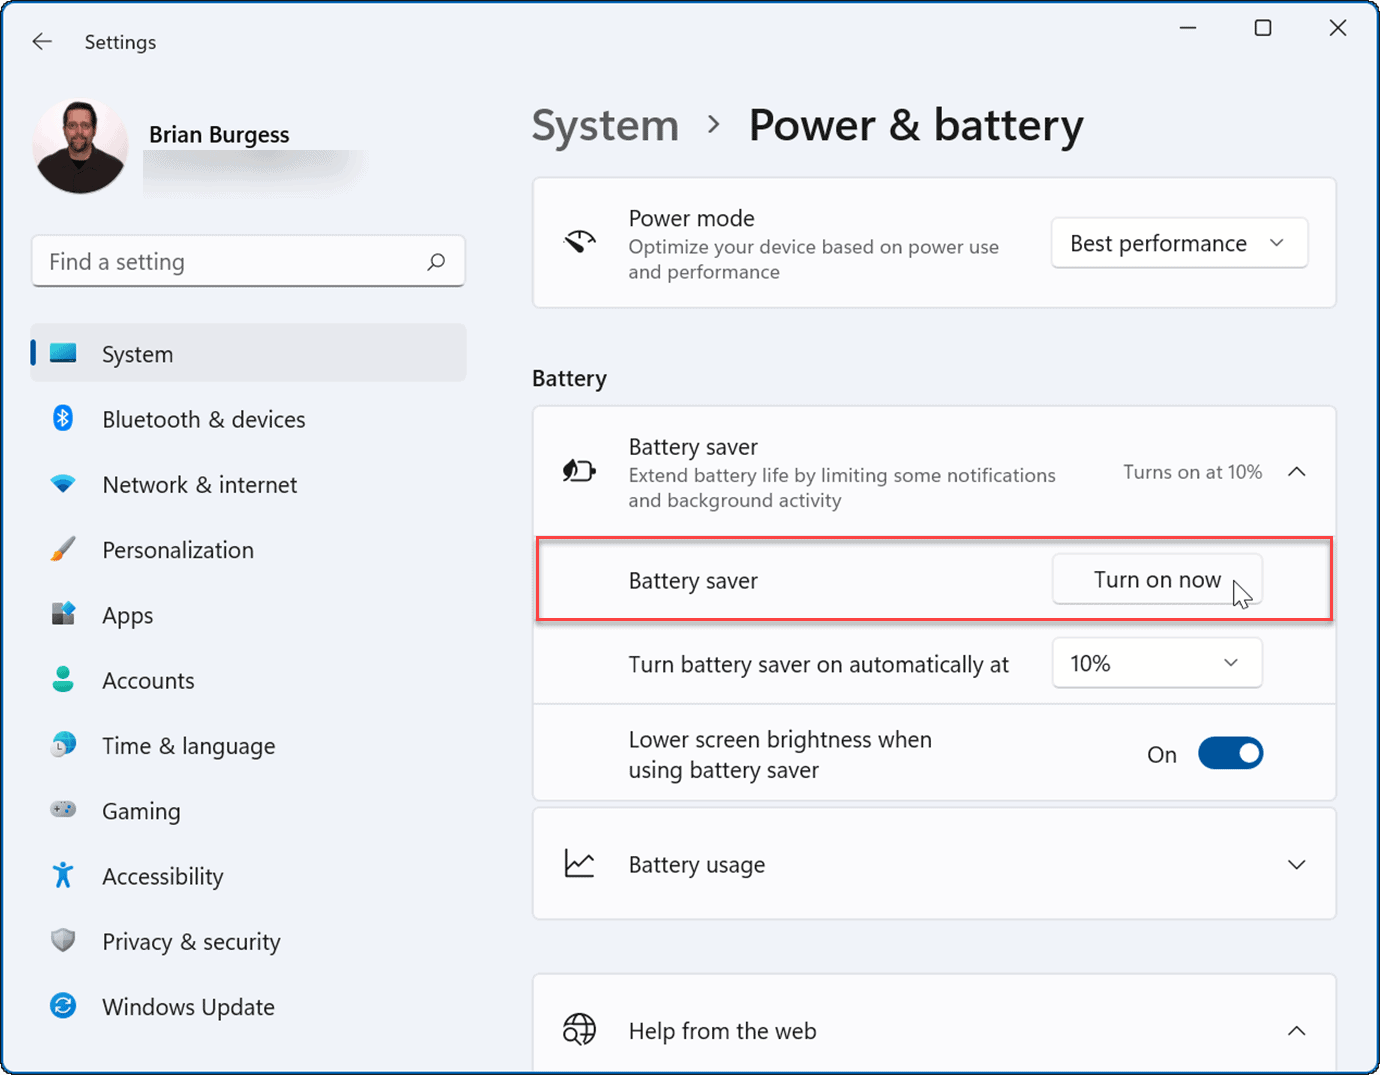
- Next, click on the Battery saver option to expand it and click the Turn on now button.

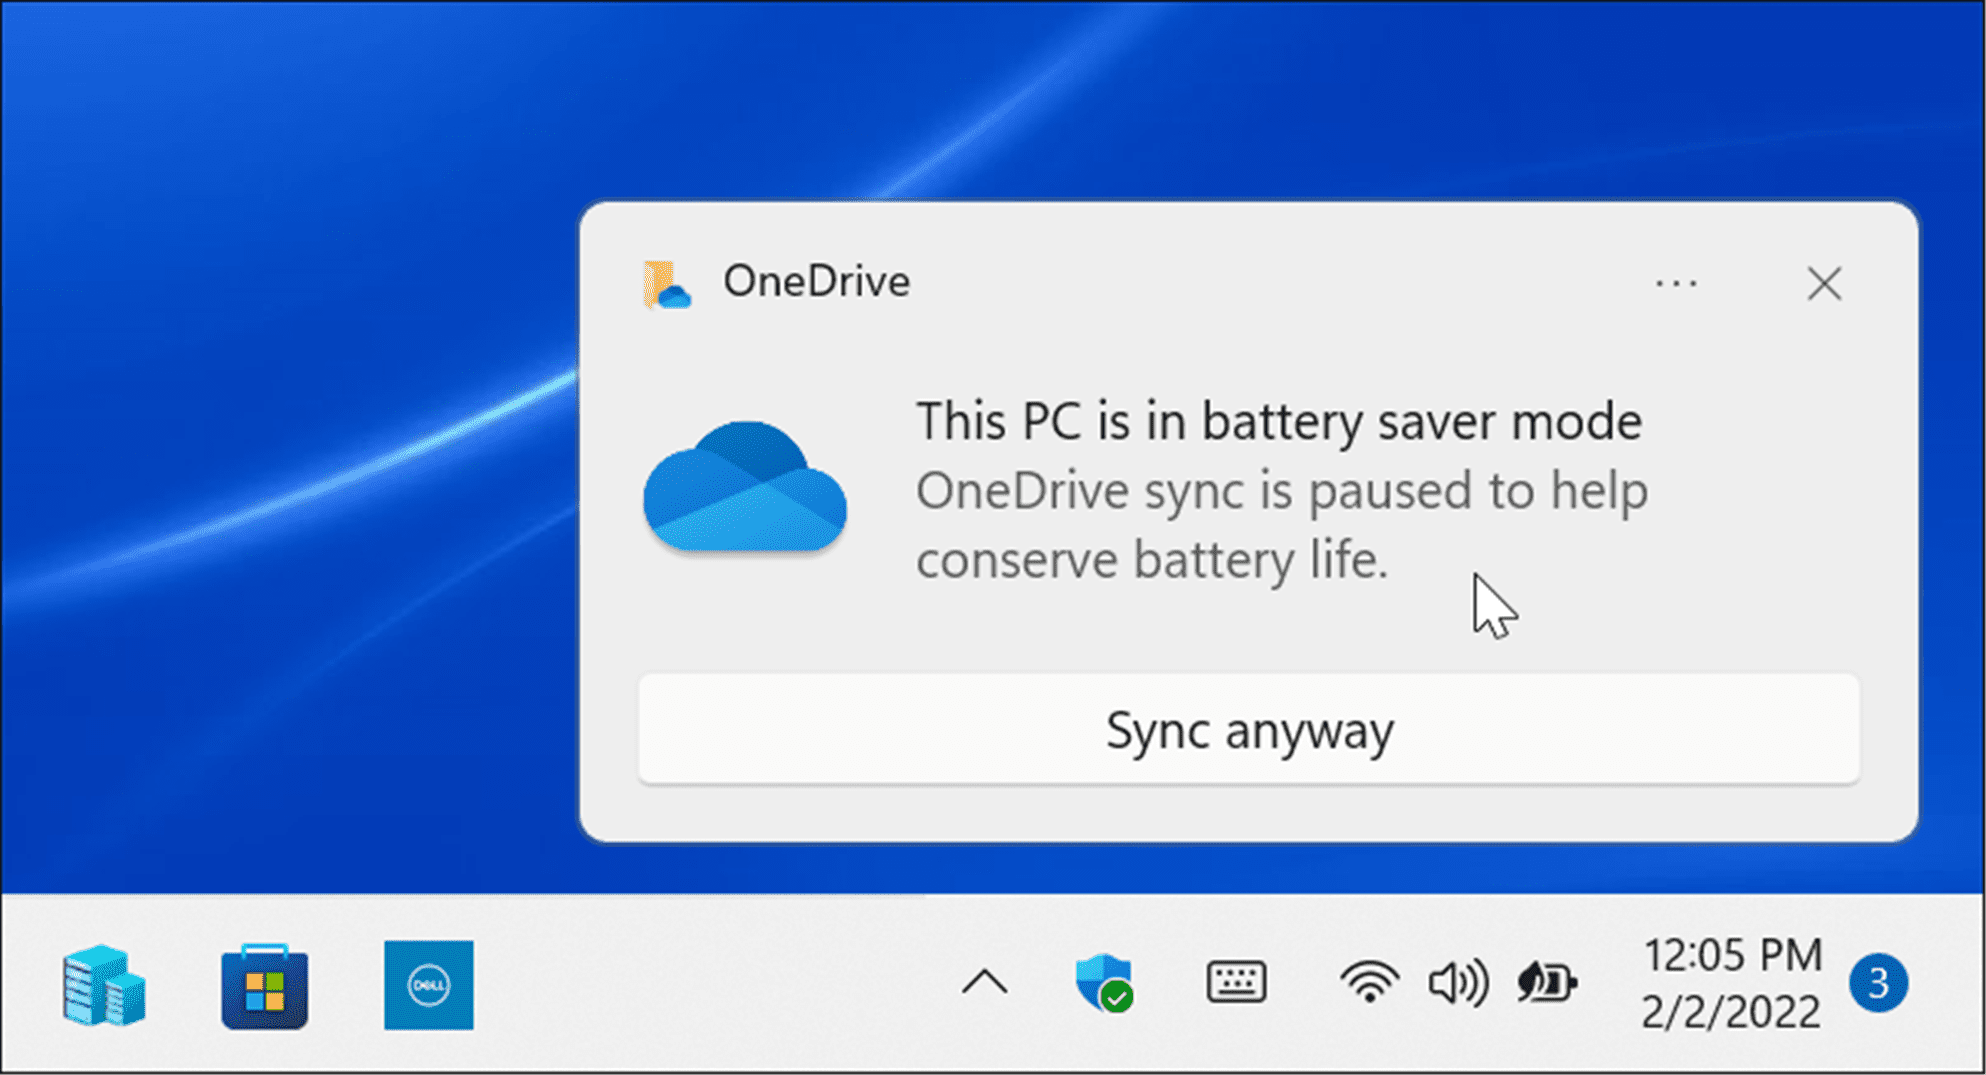
- When the Battery saver mode is on, the screen’ brightness will fade, and certain background processes will stop. For example, OneDrive sync will pause to help conserve battery life.

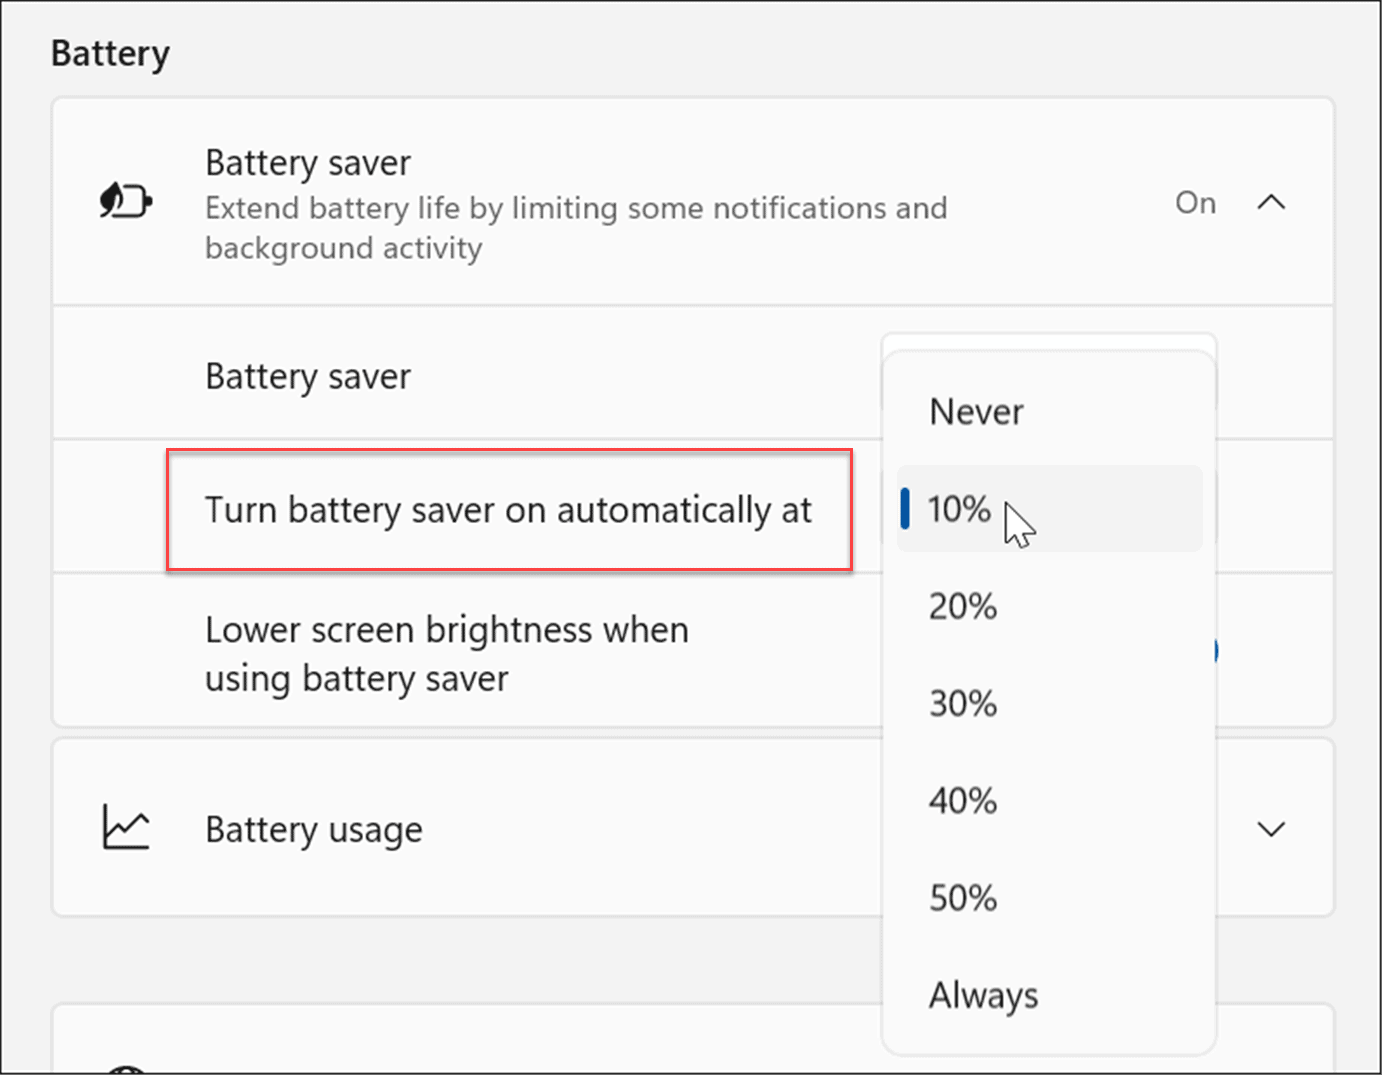
- You can set the Battery saver feature to turn on automatically, too. Click the menu next to the Turn battery saver on automatically at and select a battery percentage.

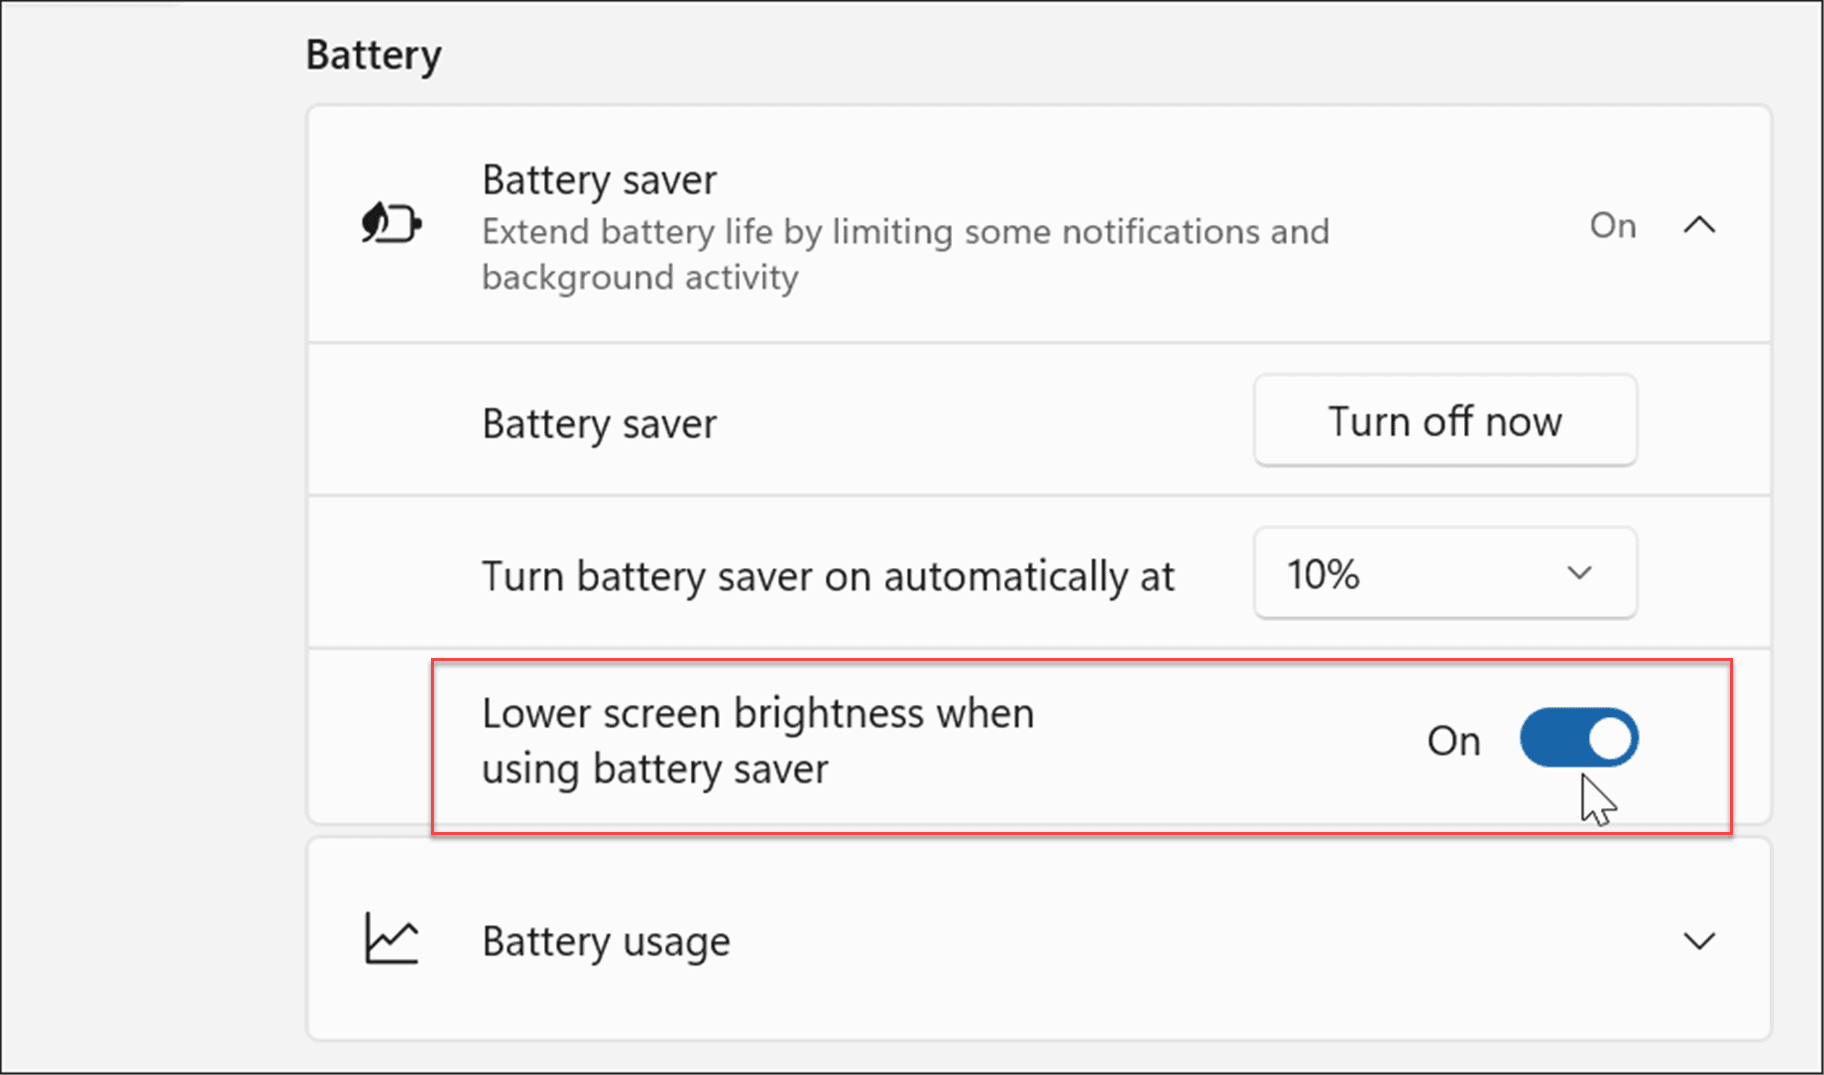
Note: Make sure to turn the Lower screen brightness when using battery saver switch to the On position. Bright screens can significantly impact battery life.

Tweak Display Settings
Another option you have is to lower the brightness and color of your display manually.
To tweak your laptop’s display brightness and color, use the following steps:
- Click Start or hit the Windows key to open the Start menu and click the Settings icon.


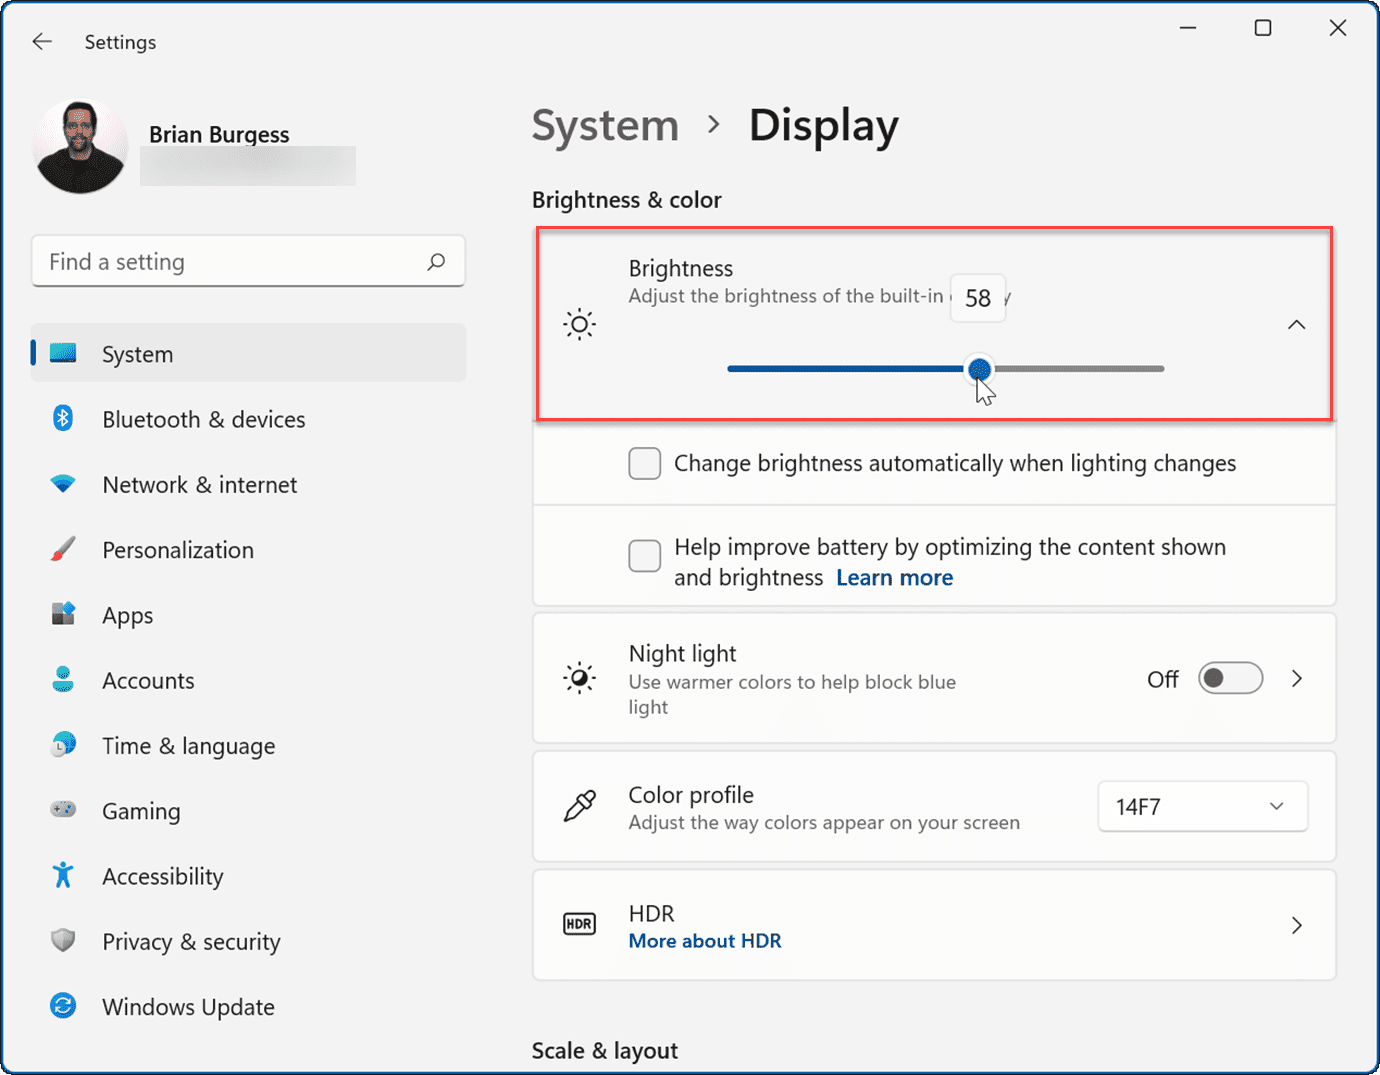
- When Settings opens, go to System > Display > Brightness and move the slider up or down to adjust the display’s brightness.

- If you don’t want to go through Settings, you can use the Quick Settings feature. Hit the keyboard shortcut Windows key + A to launch the menu and use the brightness slider.
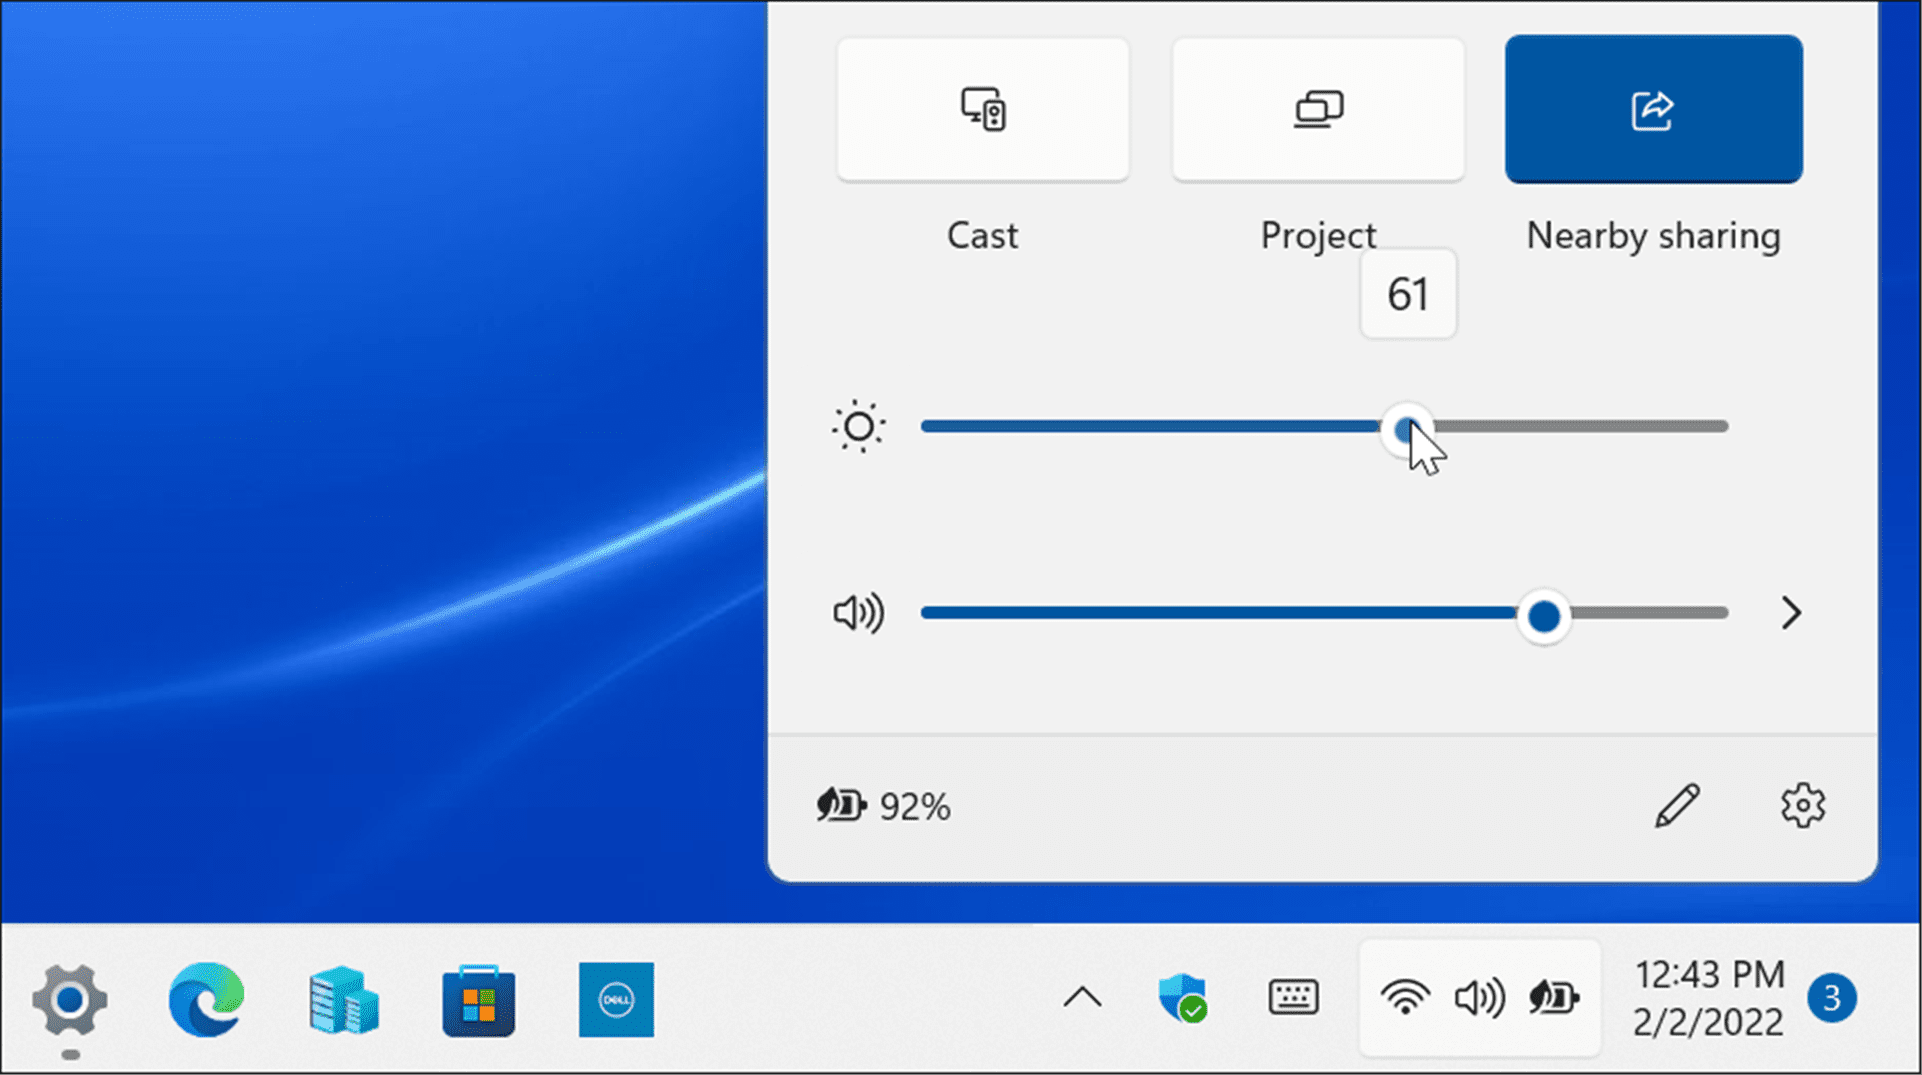

Lowering the screen’s brightness level will significantly improve battery life. You’ll want to set it to a percentage that allows you to see items on the screen. It’s a trial-and-error process.
Set Display to Turn Off Automatically
There are times when you walk away from your laptop and leave the screen on, which wastes battery life. So, you can adjust when the screen turns off.
To change when the display turns off automatically, use the following steps:
- Click the Start button or hit the Windows key or use Windows key + I and open Settings.


- When Settings opens, navigate to System > Power & battery and expand the Screen and sleep option under the Power section.
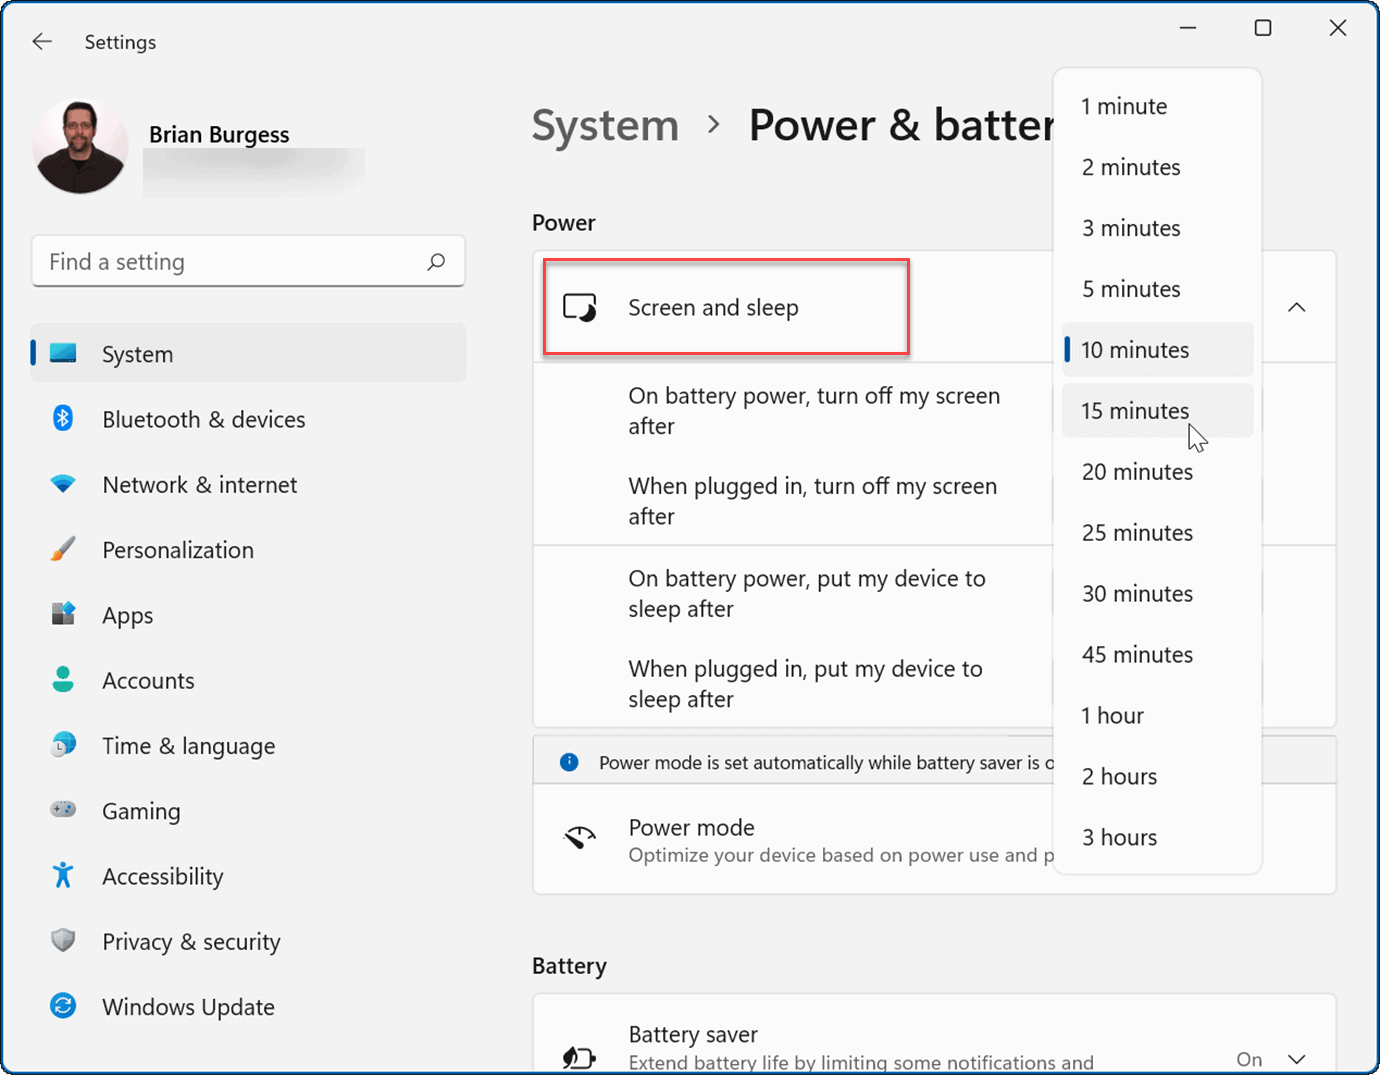

- Now, change the amount of time before the screen turns off on battery power. You can also set it to go into Sleep mode after a set amount of time.
Now your PC’s screen will turn off after the number of minutes you set it to save battery life. Note that you can also set it when it turns off or goes to sleep when plugged into a power outlet.
Change Power Modes
Changing the default power mode can improve battery life, too.
To change power modes on Windows 11, use the following steps.
- Open Start > Settings and go to System > Power & battery.


- Use the Power mode dropdown menu to select the best option. You can choose from the following:
- Best power efficiency: Lowers system performance and provides the best option to save energy and improve battery life
- Balanced: Allows Windows 11 to automatically balance energy and performance.
- Best performance: Improve system performance but uses the most power and reduces battery life.
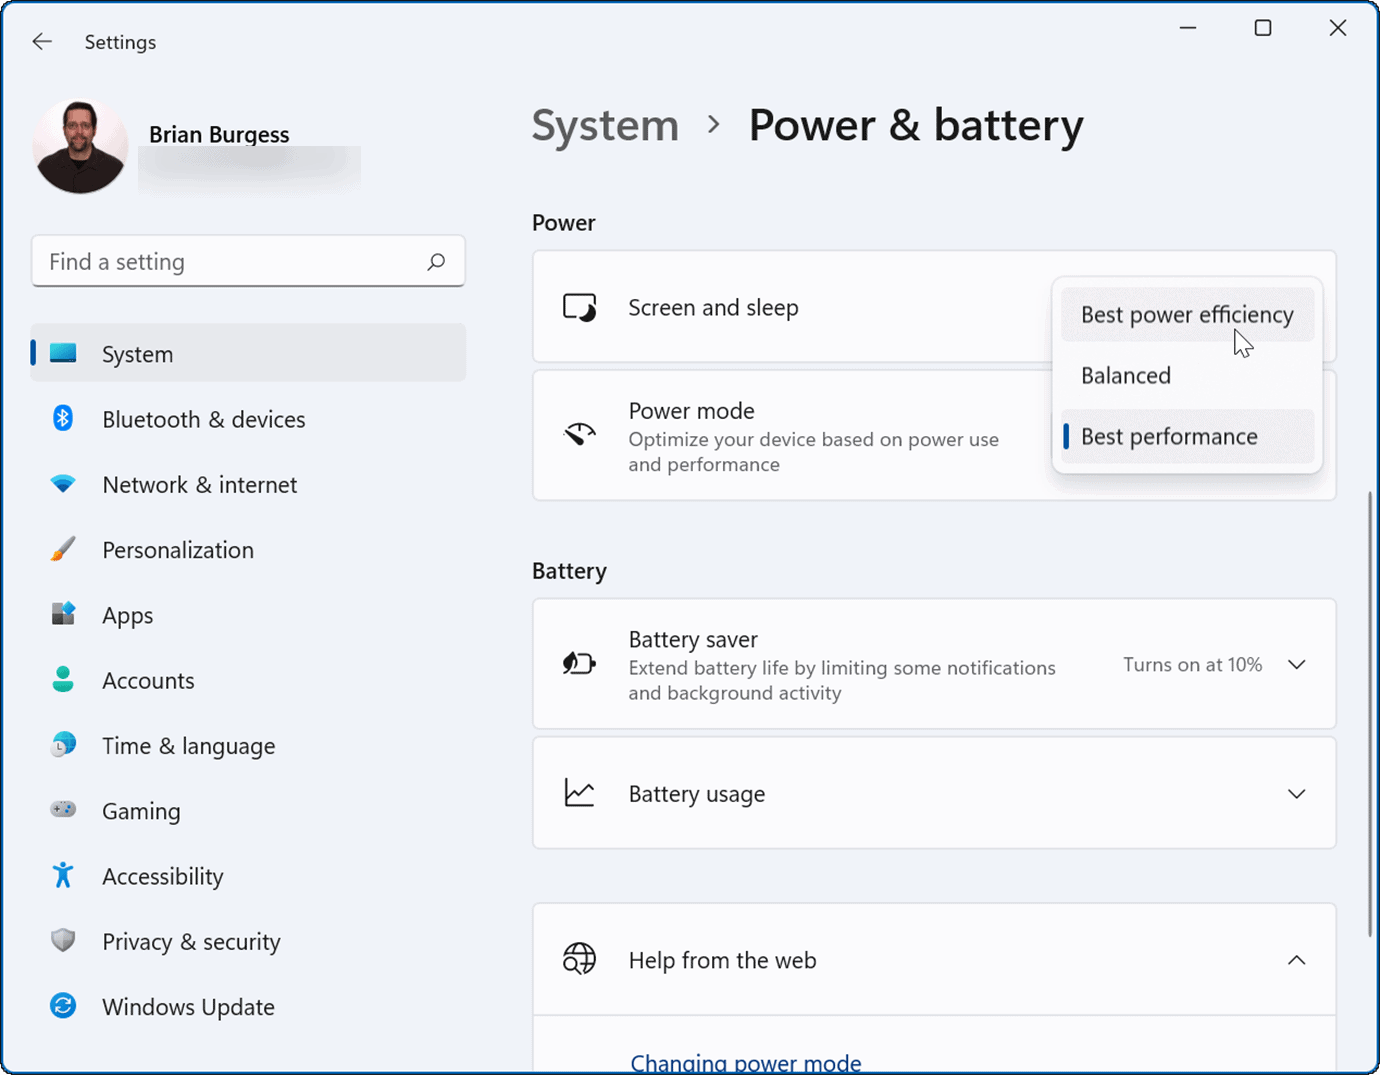

You may want to use Best power efficiency to use less energy and get the most from your laptop’s battery.
Manage App Background Activities
Many of your apps are running processes and exchanging information in the background. If you notice a drain on your battery while using a specific app, you can adjust its background activity to improve battery life.
To manage app background activities, use the following steps:
- Open Start > Settings and navigate to Apps > Apps & features.


- Next, scroll down and click the three-dot menu next to the offending app, and select Advanced options.
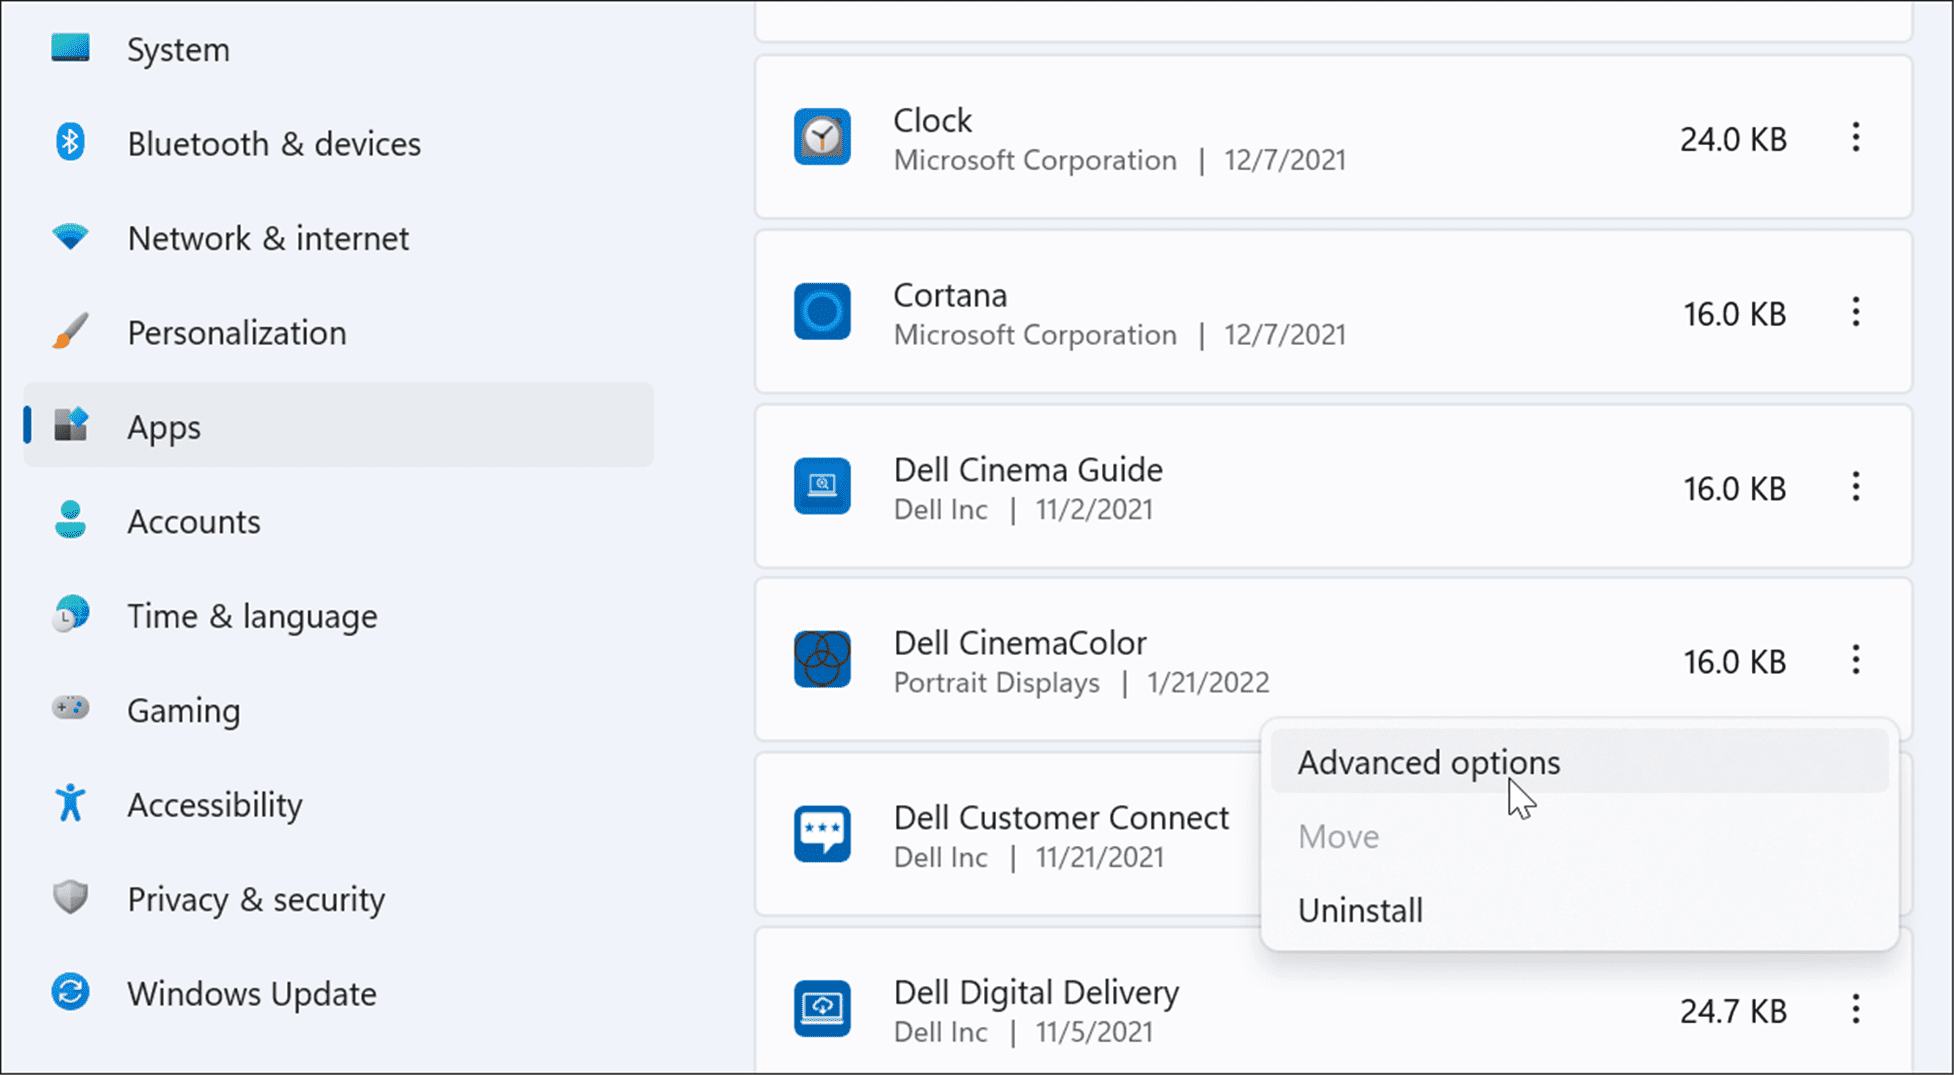

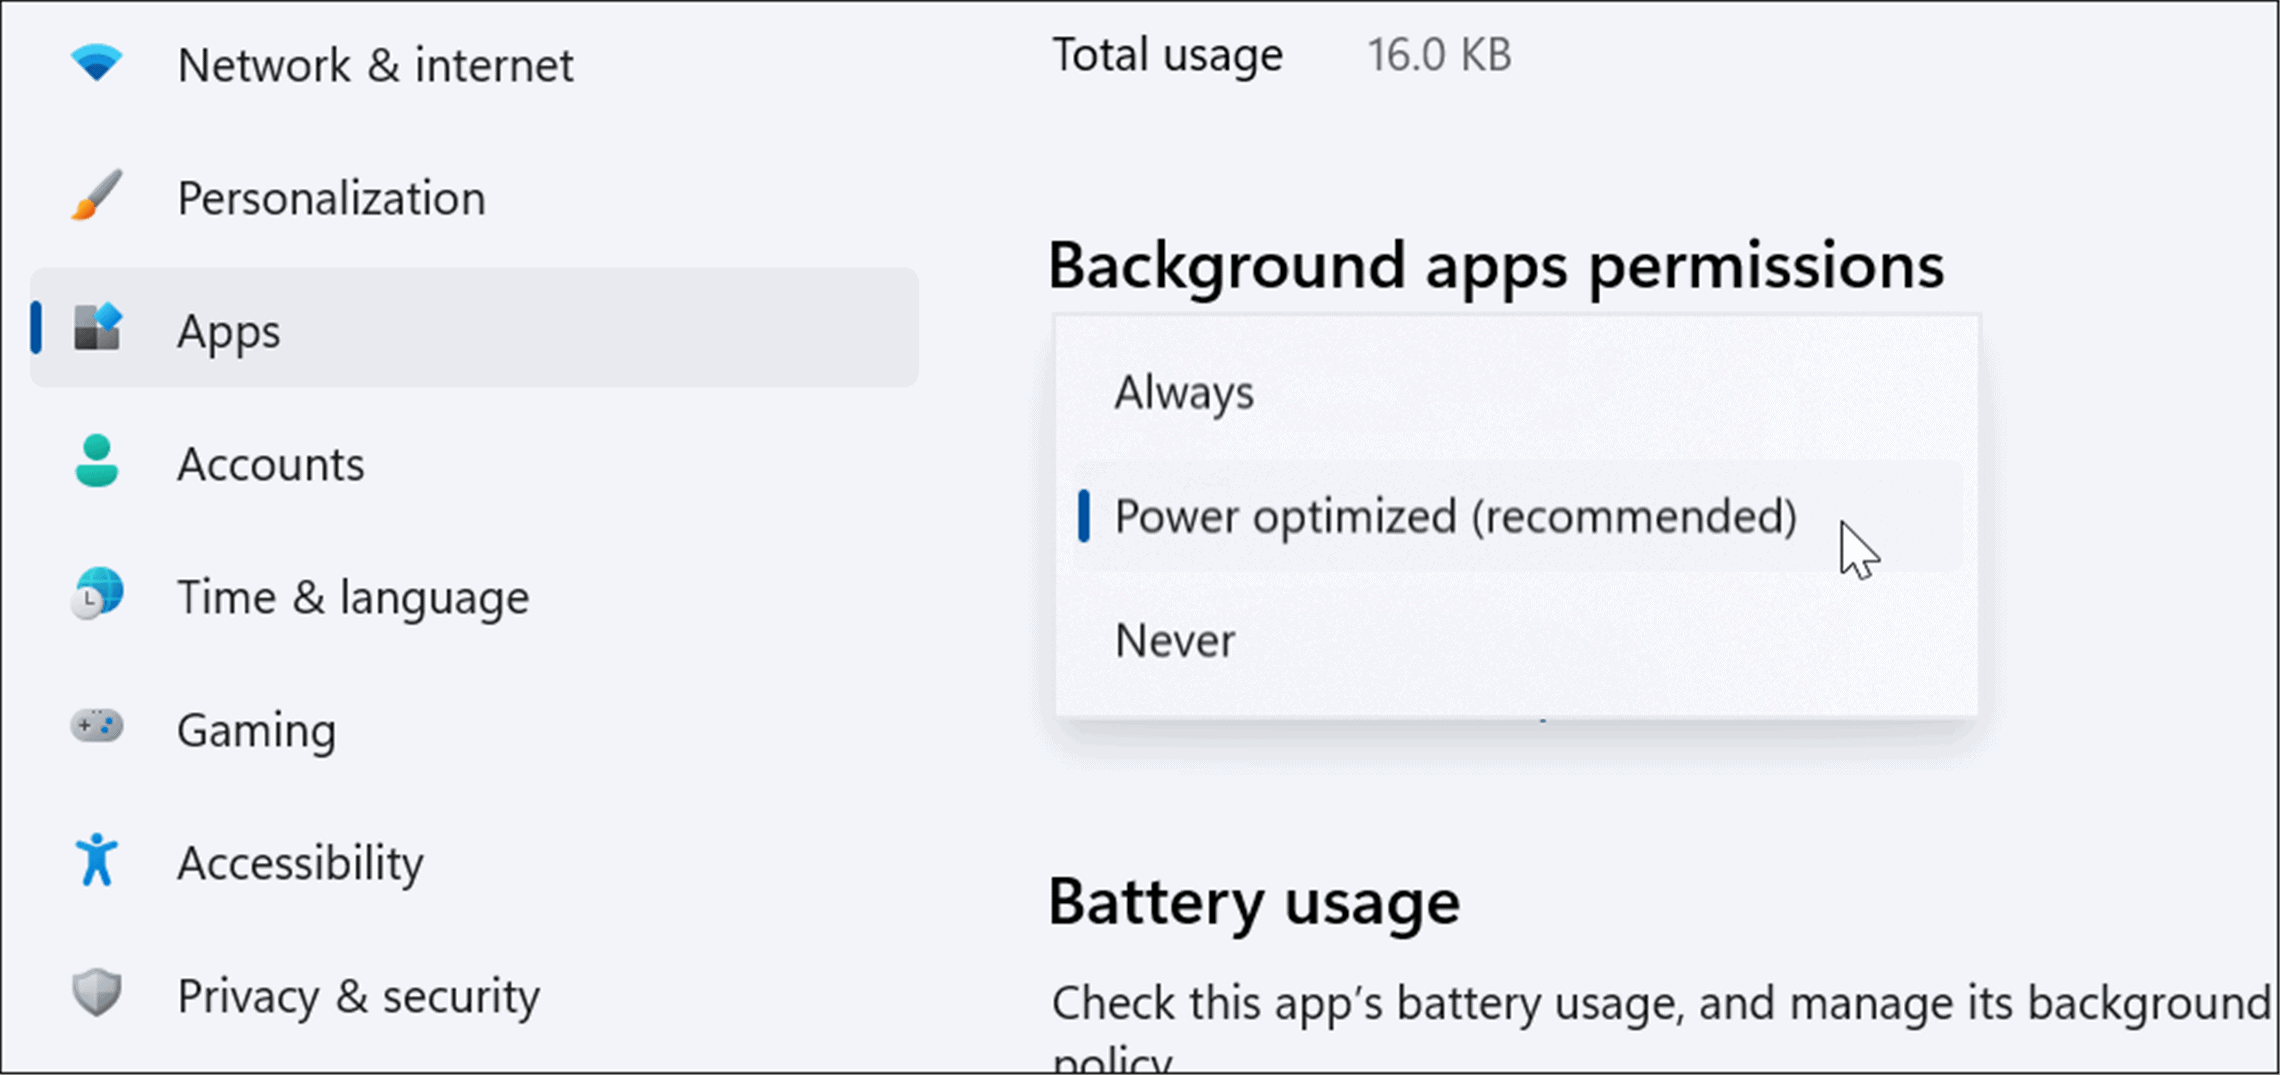
- Under the Background apps permissions section, choose how the app should run. You can select from Always, Power optimized (recommended), or Never.

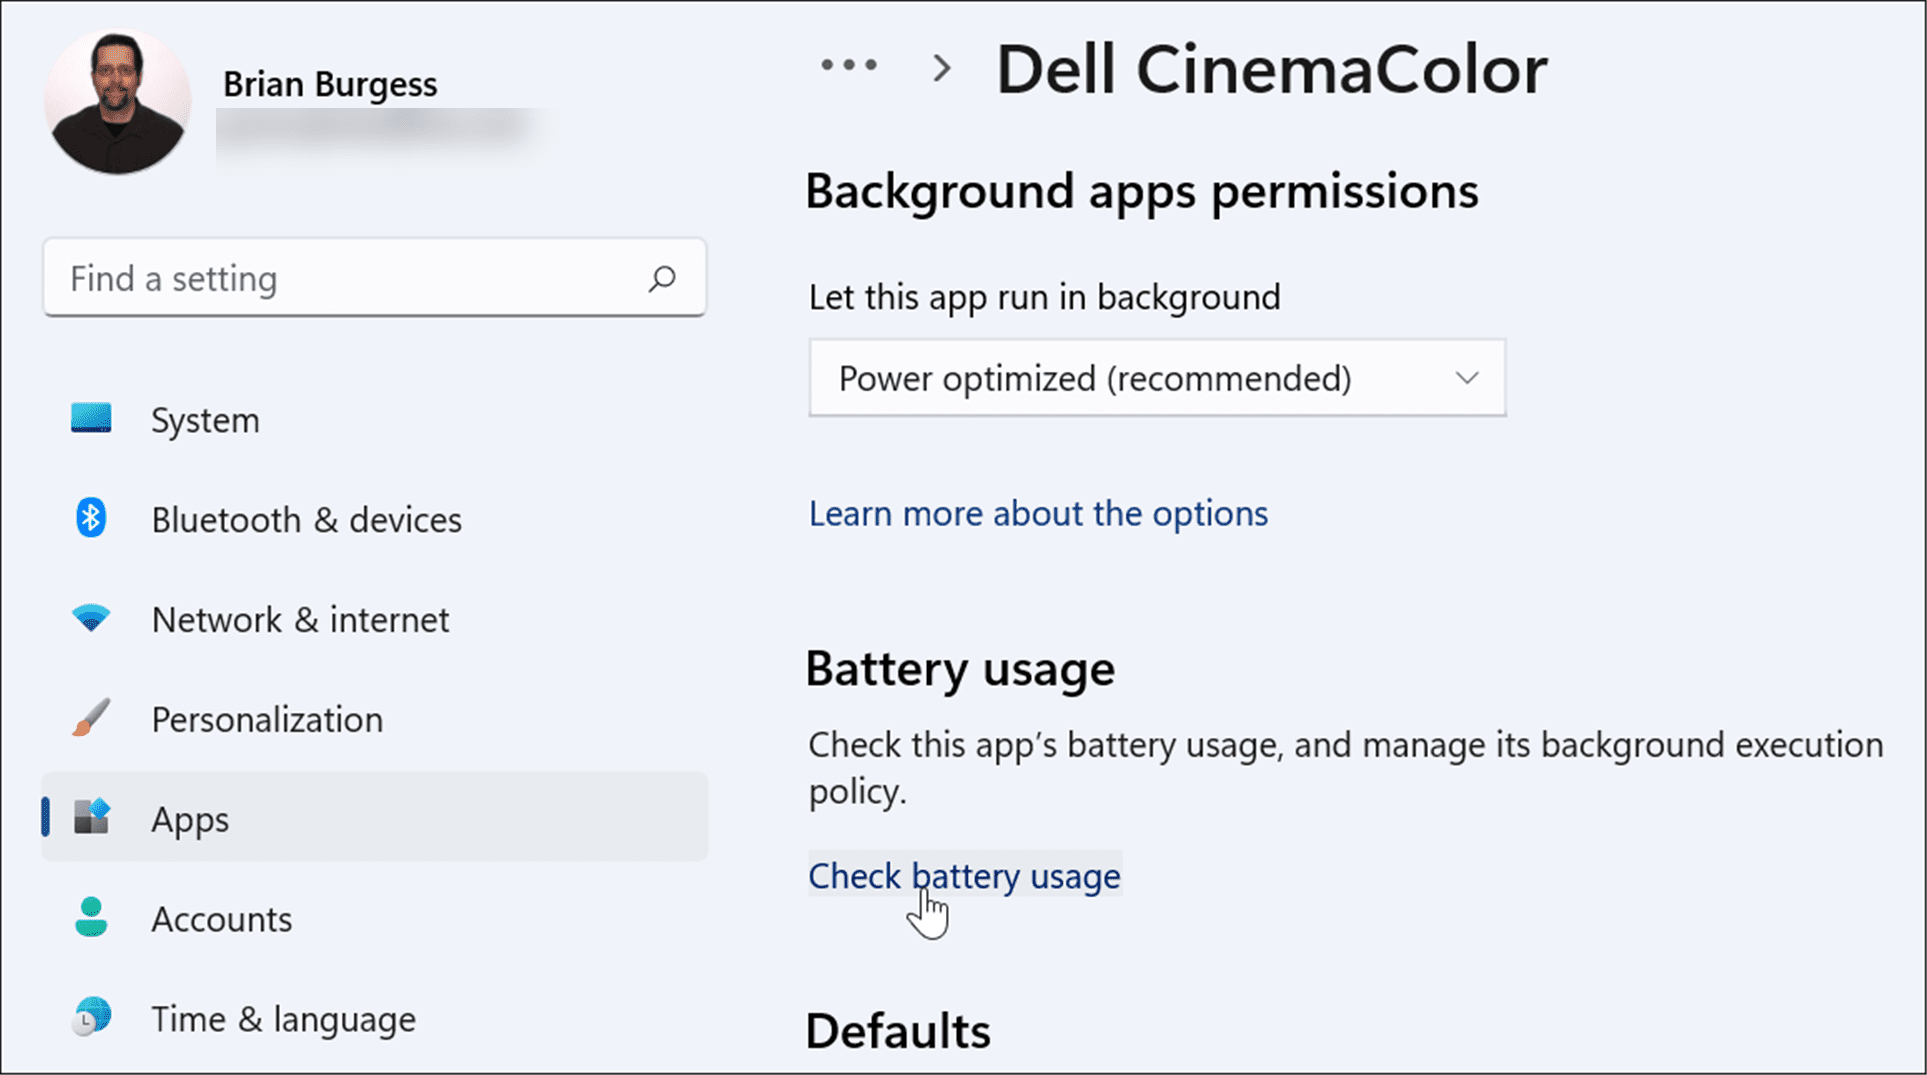
- If you’re not sure if an app uses a lot of battery power, you can check its usage. On the same page, click the Check battery usage link under the Battery usage section.

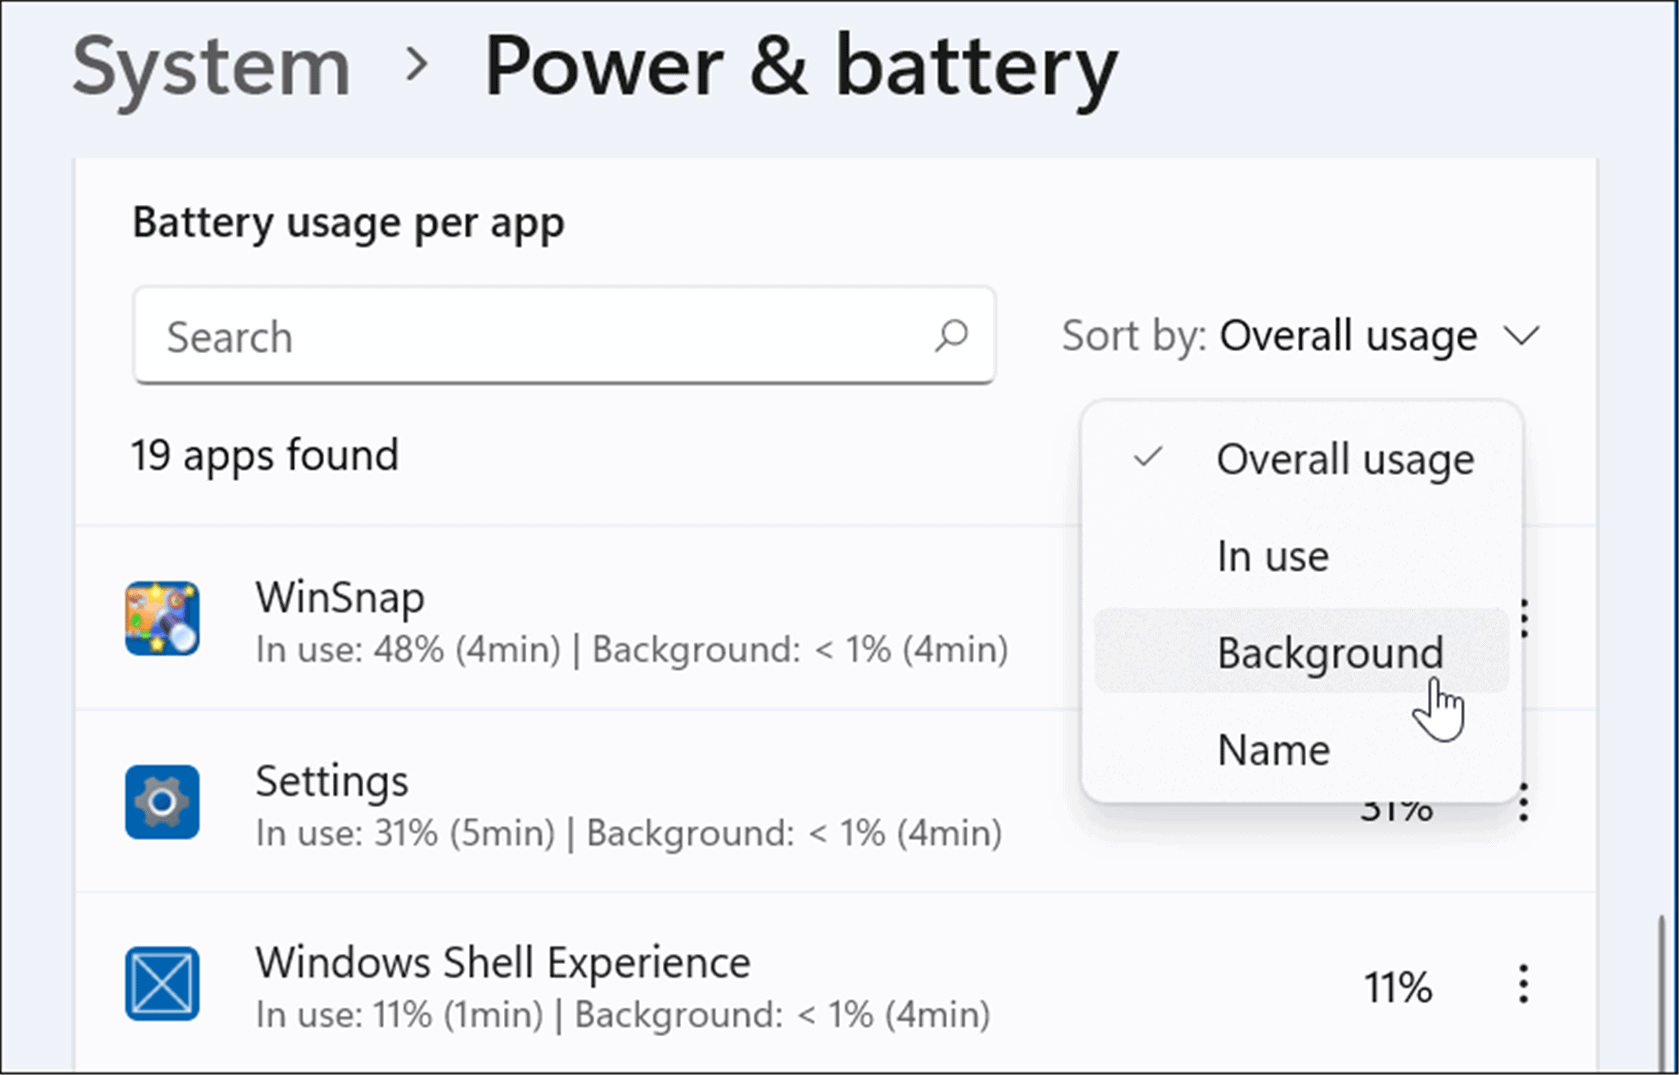
- It will bring you to the Power & battery page in Settings where you can scroll down and expand the Battery usage section. There you can see Battery use by app percentages. This section allows you to search for an app or filter them by different criteria like name or background use.

Use Hibernate Mode on Windows 11
When you enable Hibernation mode on Windows 11, it puts your system in a low-power state. The feature works by saving data in memory on the local drive to pick up where you left off without wasting power.
Using the Hibernate mode is as simple as using the Power button from the Start menu, but it must be enabled first. To use Hibernate mode on Windows 11, use the following steps:
- Open the Start menu, type control panel, and select the top result.


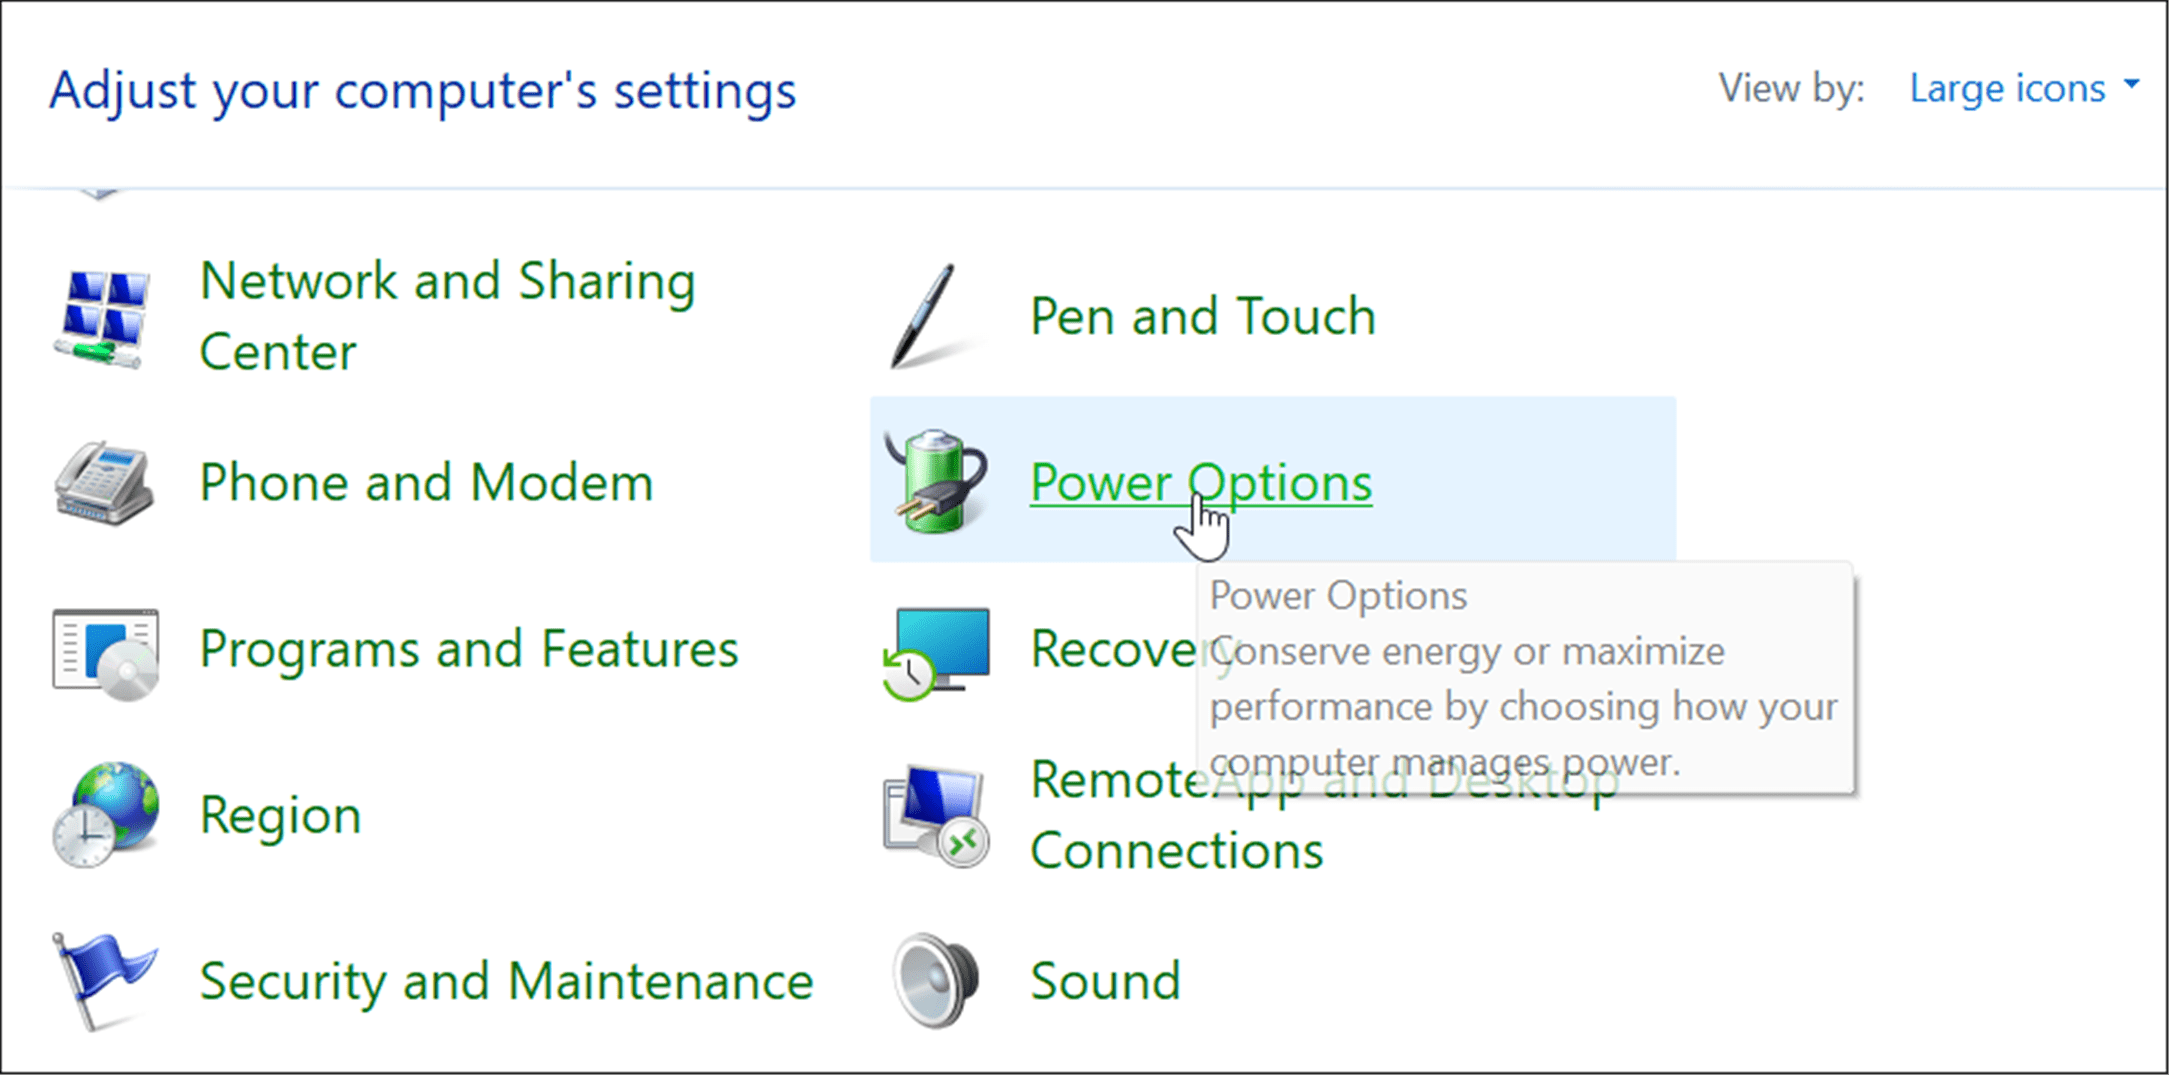
- When Control Panel opens, click Power Options.

- Next, click the Change what the power button does link on the upper-left corner.
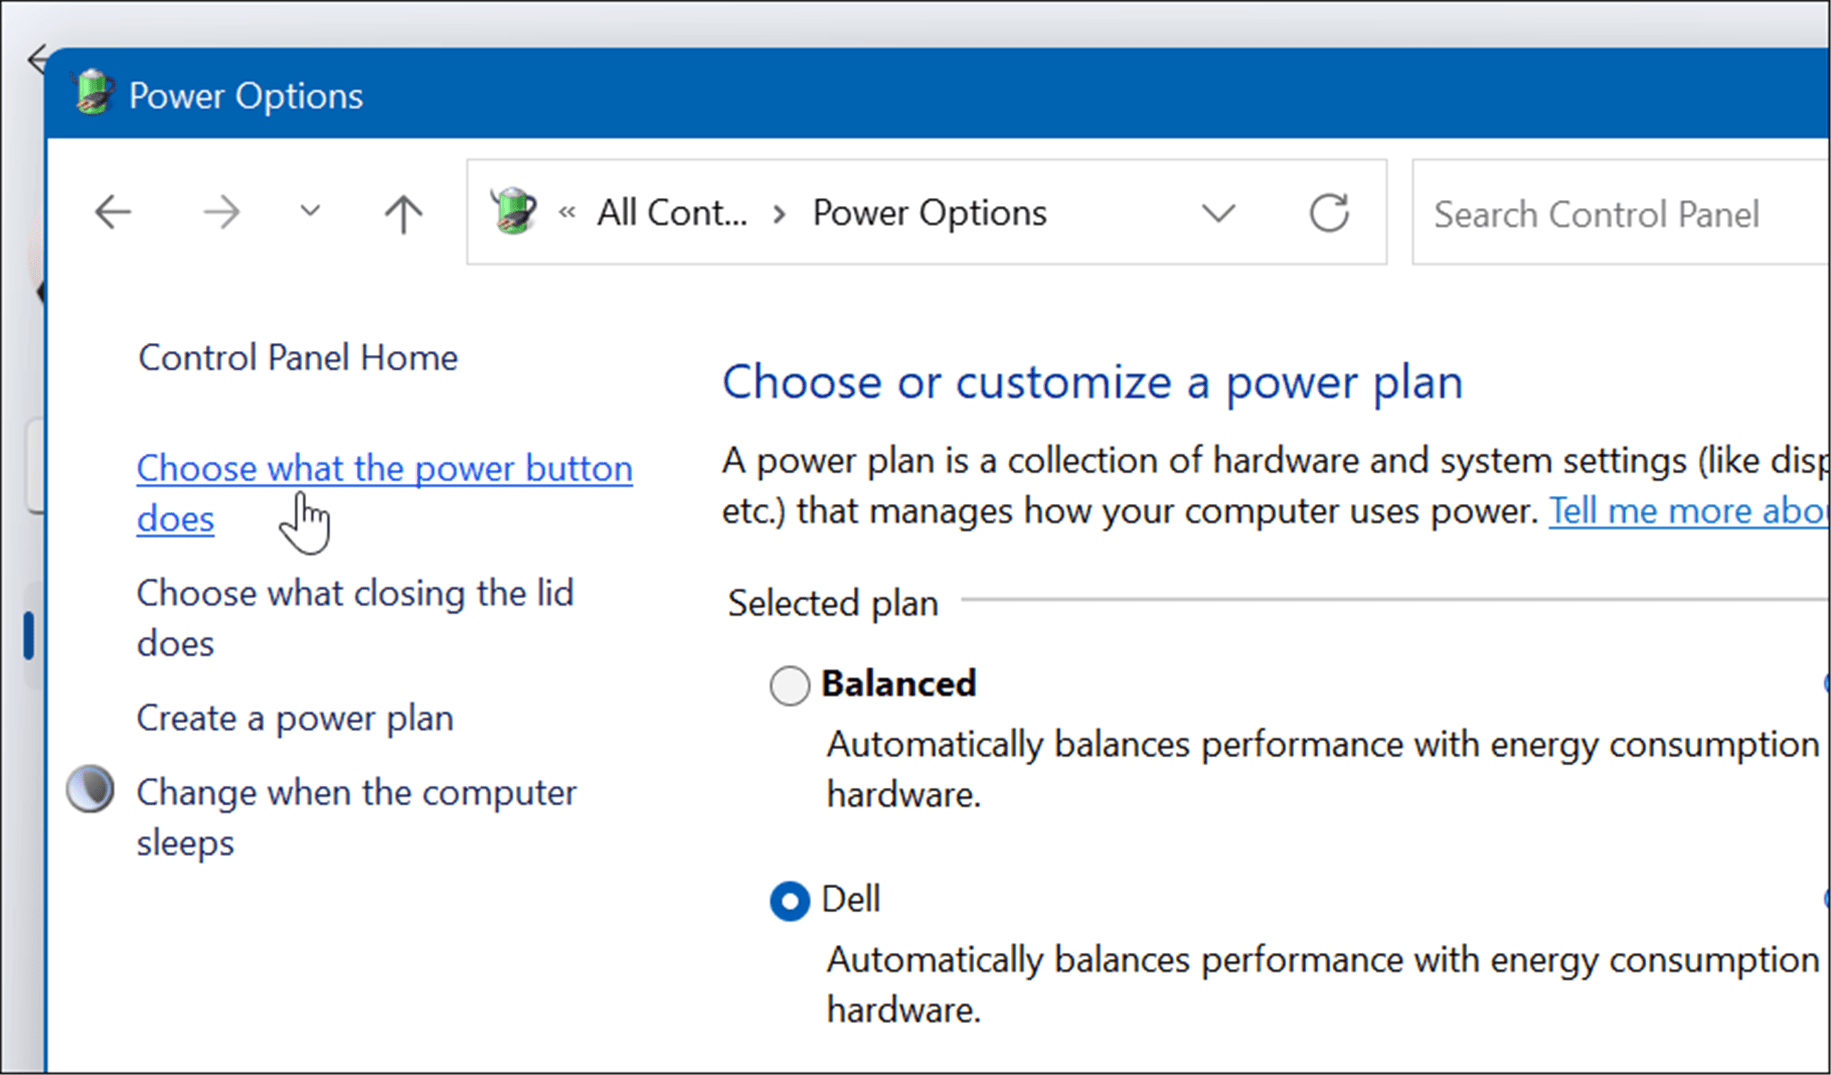

- On the following screen, click the Change settings that are currently unavailable link.


- Next, under the Shutdown settings section, select the Hibernate option and click the Save changes button at the bottom.


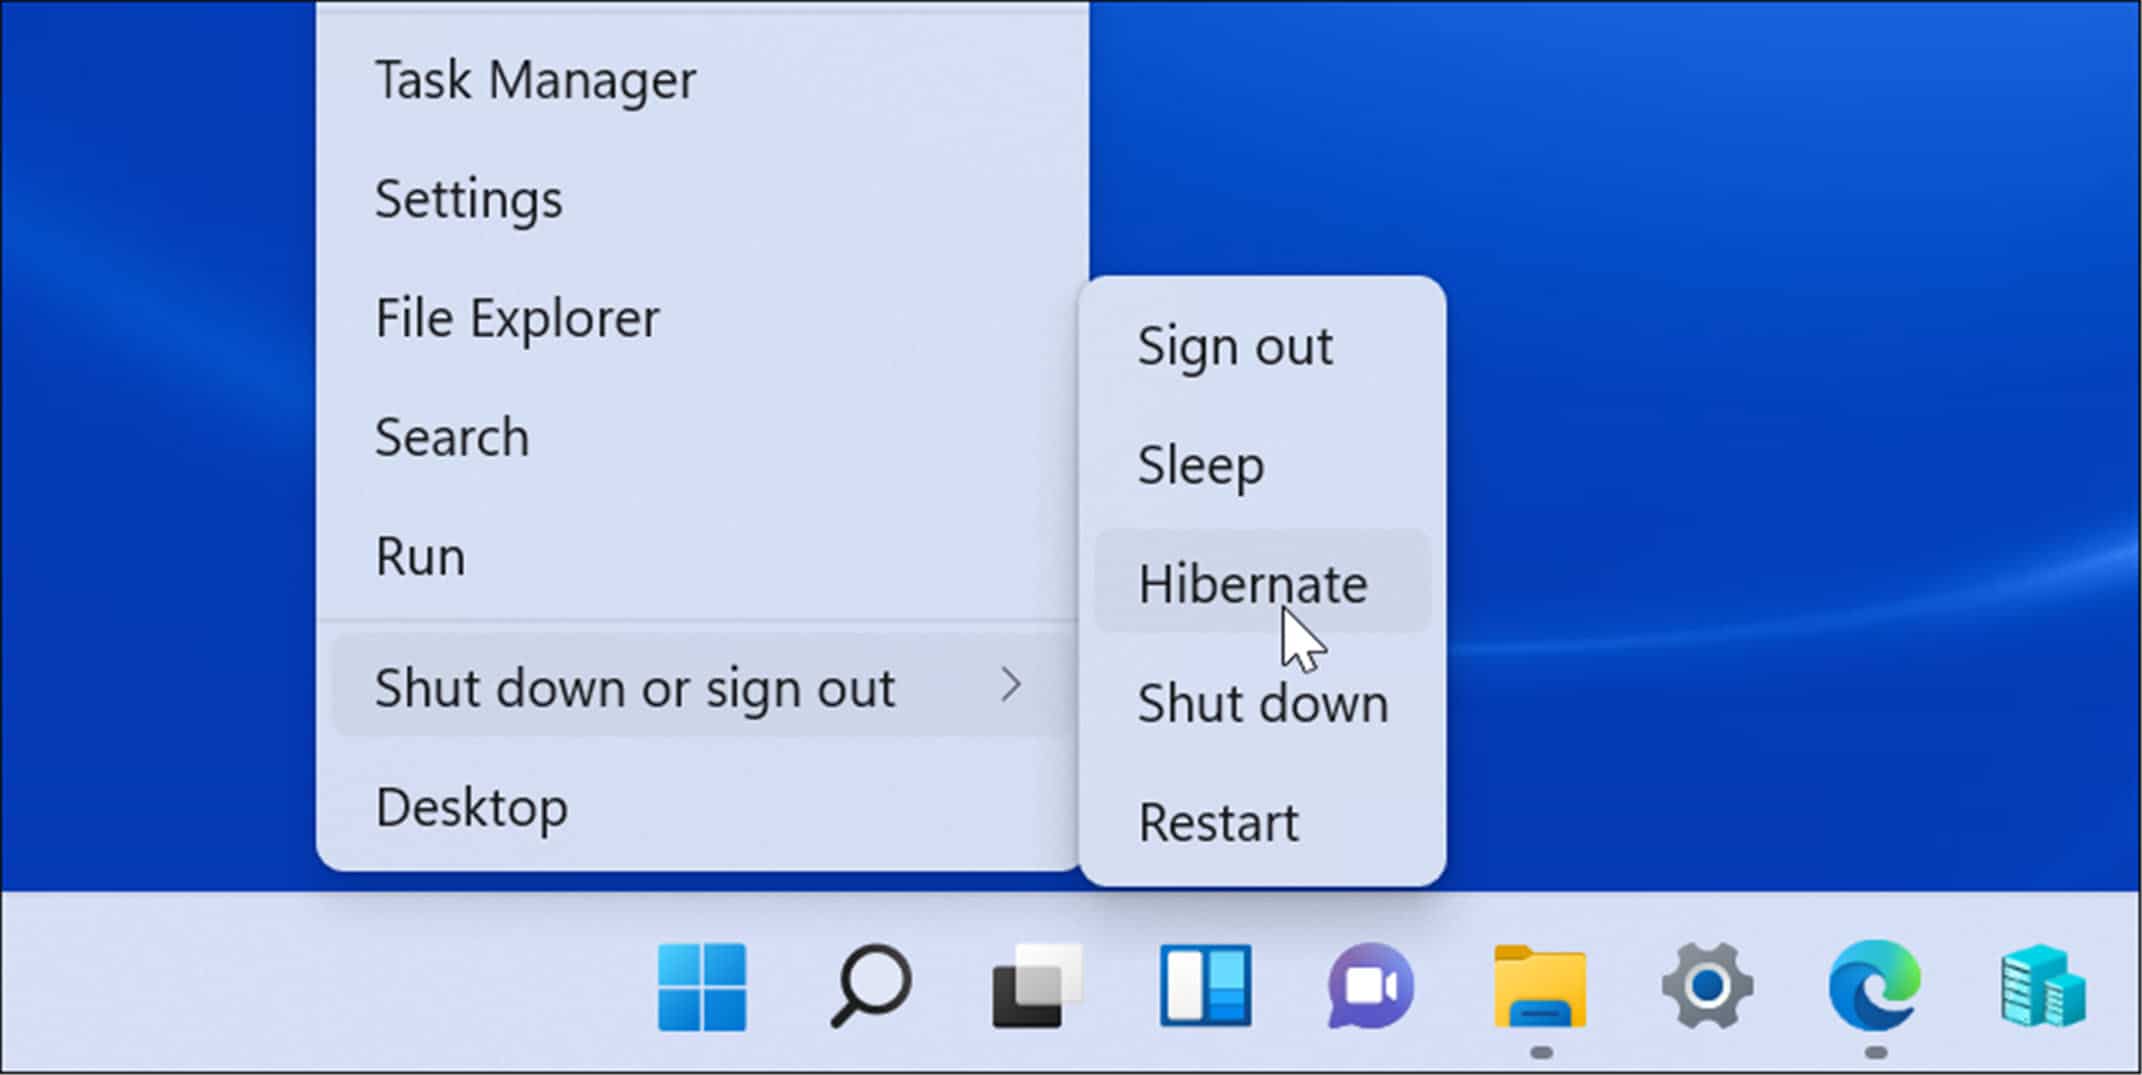
Hibernate mode is now an option when you shut down or restart Windows 11. Right-click the Start button, choose Shut down or Sign out > Hibernate.

Change What Happens When Closing Laptop Lid
Changing the action that happens when you close your laptop’s lid can help save battery power.
To change the power action when closing the lid, use the following steps:
- Open the Start menu, type control panel, and click the top result.
- When Control Panel opens, click the Power options option.


- Click the Choose what closing the lid does link from the upper-left.
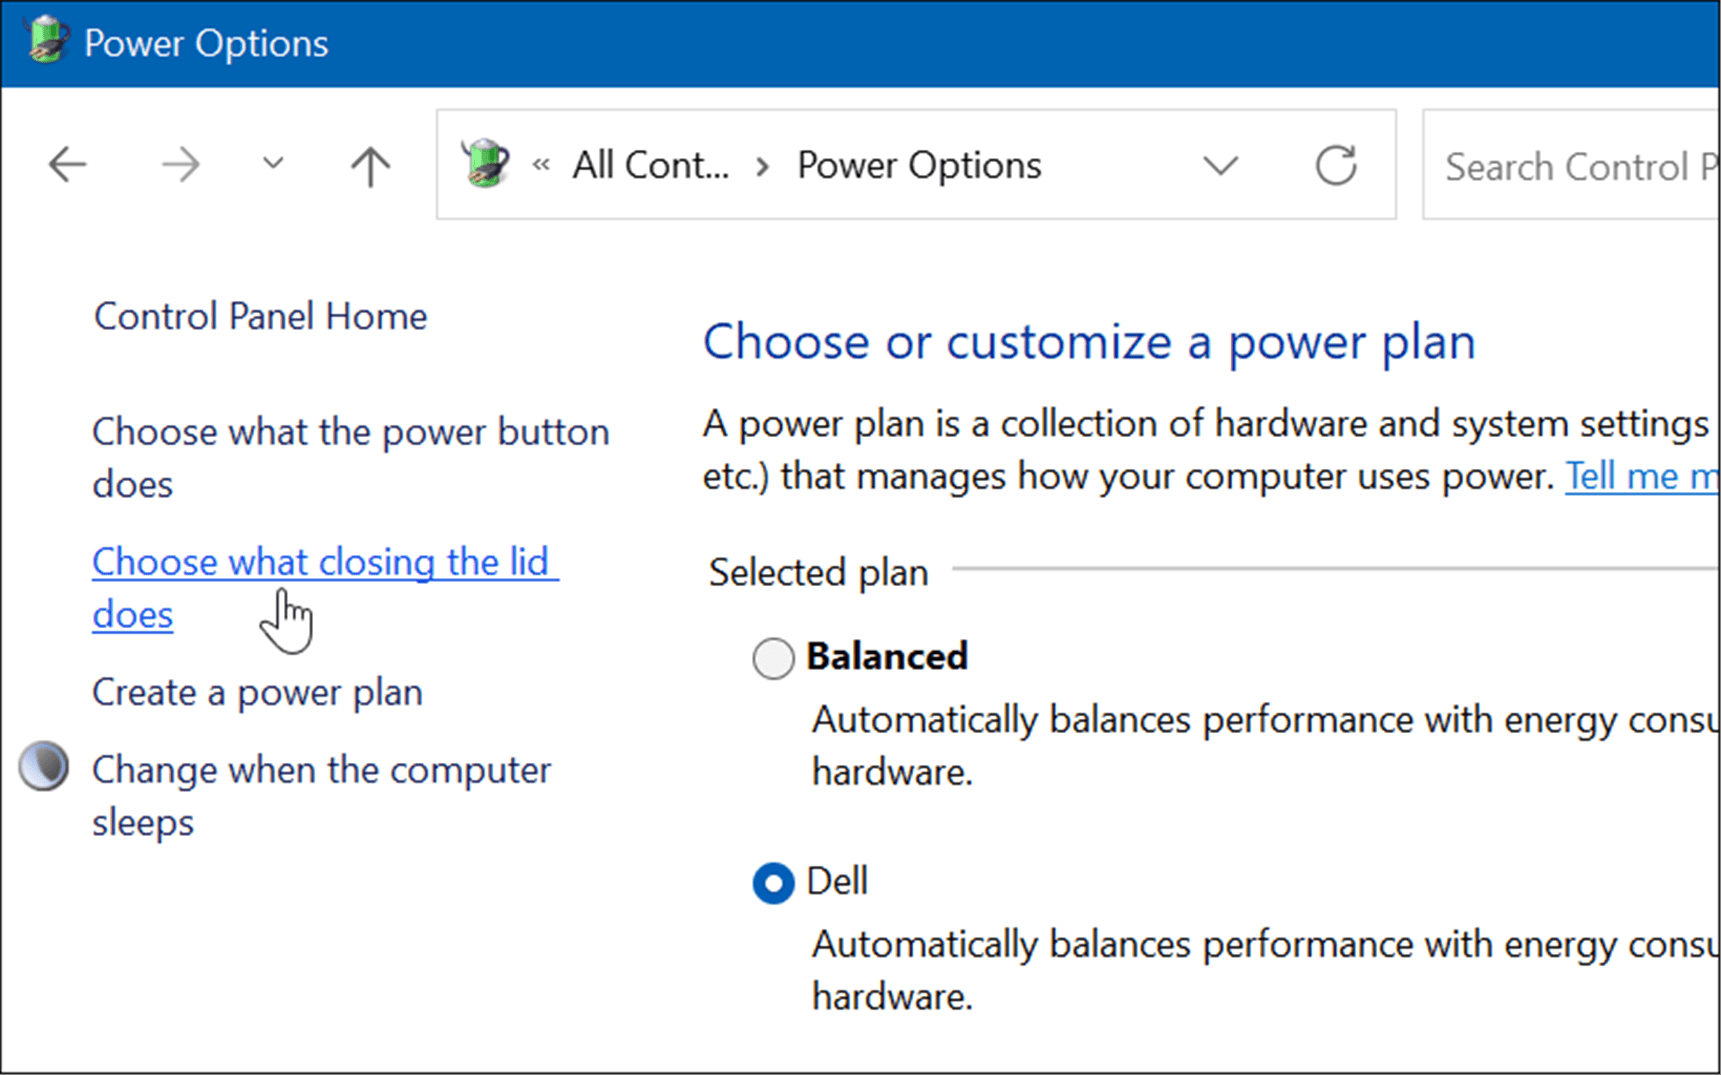

- Now, under the Power button and lid settings section, set it to Sleep or Hibernate next to the When I close the lid option.


Improving Windows 11 Battery Usage
Windows 11 comes with several options to manage power features to optimize energy consumption. Combining some or all of the options above will help save battery life and get you through the workday. Of course, if you regularly plug your laptop into an outlet, it’s not as much of a concern.
Still, when you do need to unplug and get through on a single charge, the Battery Saver feature alone will help get the most from your battery on a single charge. Lowering the display settings and making it turn off automatically will also significantly improve battery performance.
For more, take a look at managing Windows 11 Sleep settings. If you’re not sure whether to use Sleep or Hibernate, read about understanding Sleep vs Hibernate. If you’re not on Windows 11 yet, check out how to enable Hibernate mode on Windows 10.
Leave a Reply
Leave a Reply


