How to Install an NVMe M.2 SSD Hard Drive and Why You Should
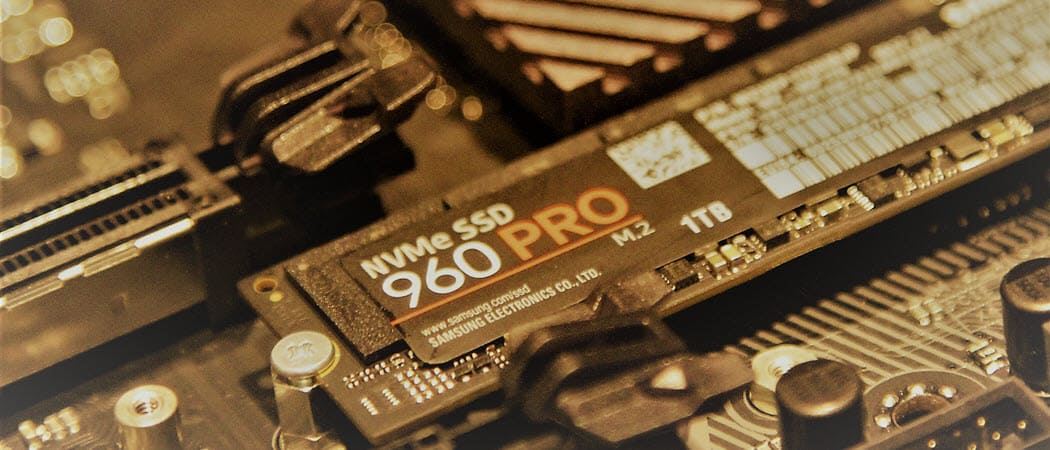
Installing a new NVMe M.2 SSD Hard Drive will not only increase your system performance, it will also greatly extend the life of the device. Here’s how to install one.
Whether you’re looking to upgrade the performance of your PC or extend the life of an older system, the most important component to replace first is your hard drive. Surprised I didn’t say your processor, memory, or video card? That’s where many people would start, and unfortunately, it would be a wrong move.
Yes, the faster the hard drive, the faster data can be read and written, thus speeding up all aspects of your computer experience. In fact, test results from Samsung have shown that performance benefits are even greater when combined with other high-end components, including CPUs and GPU graphics cards.


With this in mind, today, I’m going to demonstrate with screenshots how to install the next-generation hard drive, which leverages the new Non-Volatile Memory Express (NVMe) protocol, connected to your computer using an M.2 PCIe slot. That’s right, no messy cables are required for these new hard drives!
If your motherboard doesn’t have an M.2 PCIe slot, don’t panic. You can grab an M.2 PCIe Adapter on Amazon for under $20. It is a great option for older systems.
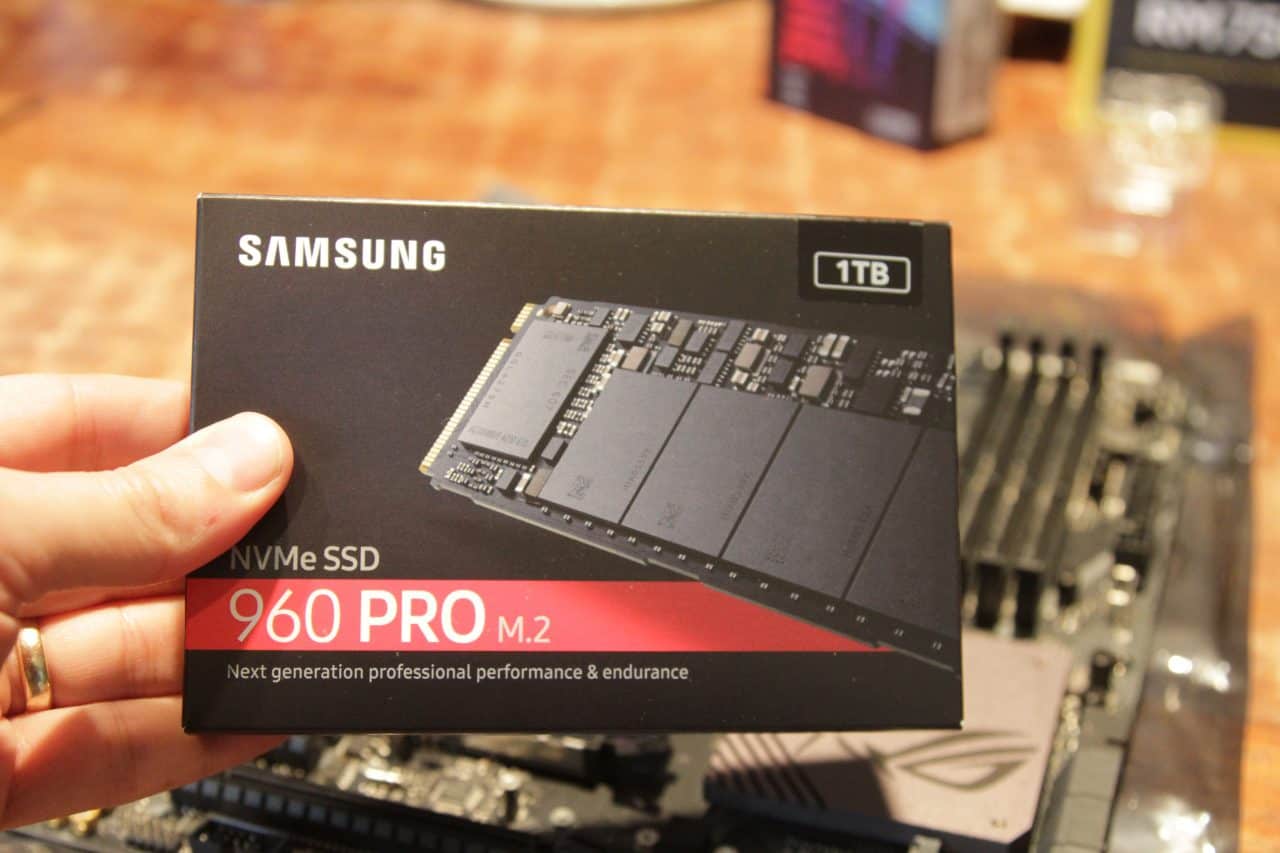

A quick reminder before getting started: you should never open your computer and start touching components without an anti-static wristband on — I use the Vastar ESD, which is inexpensive but works great.
Start by opening your system and locating the M.2 PCIe slot.

On my ASUS ROG Motherboard (which I absolutely love), the M.2 interface was hidden under a plate used to keep the drive cool.
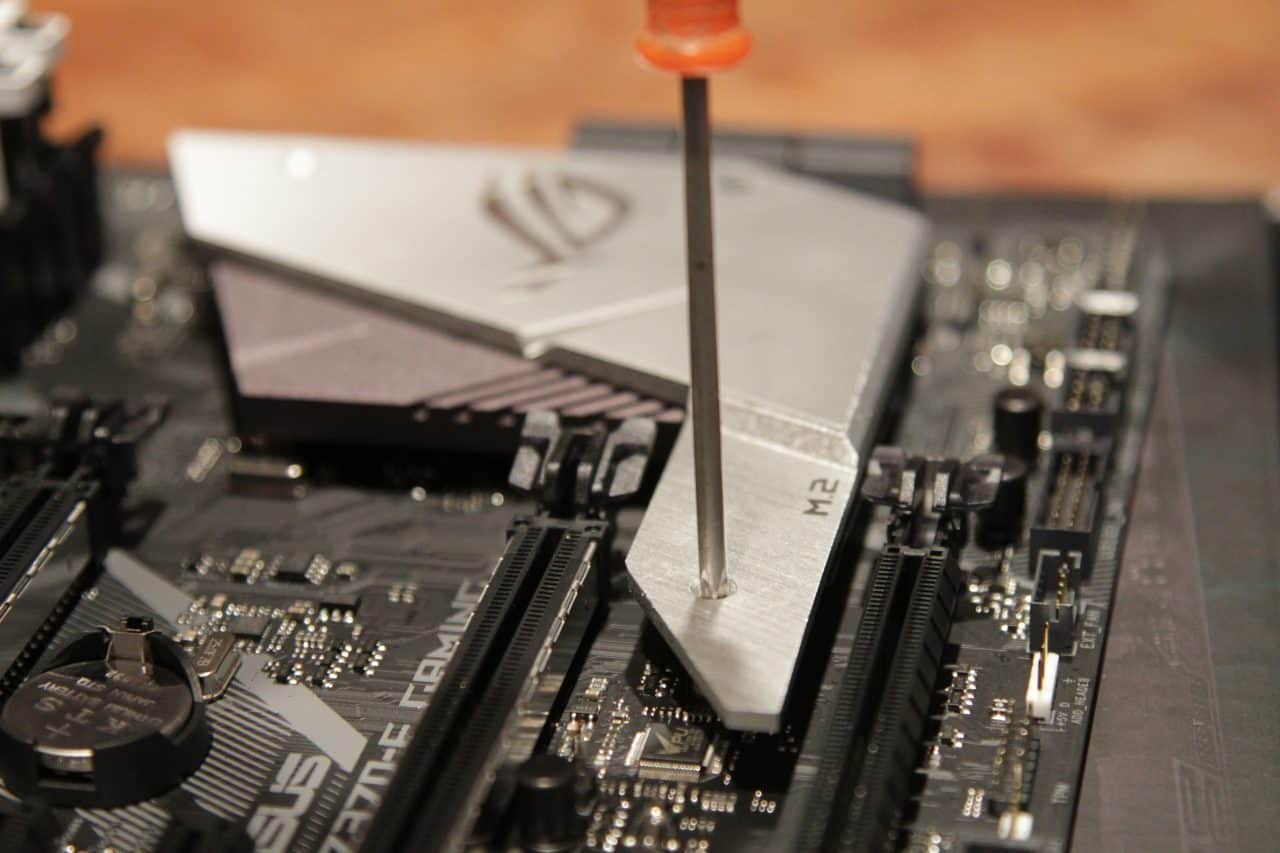

It can be quite shocking the first time you find the M.2 port. It’s small and compact.
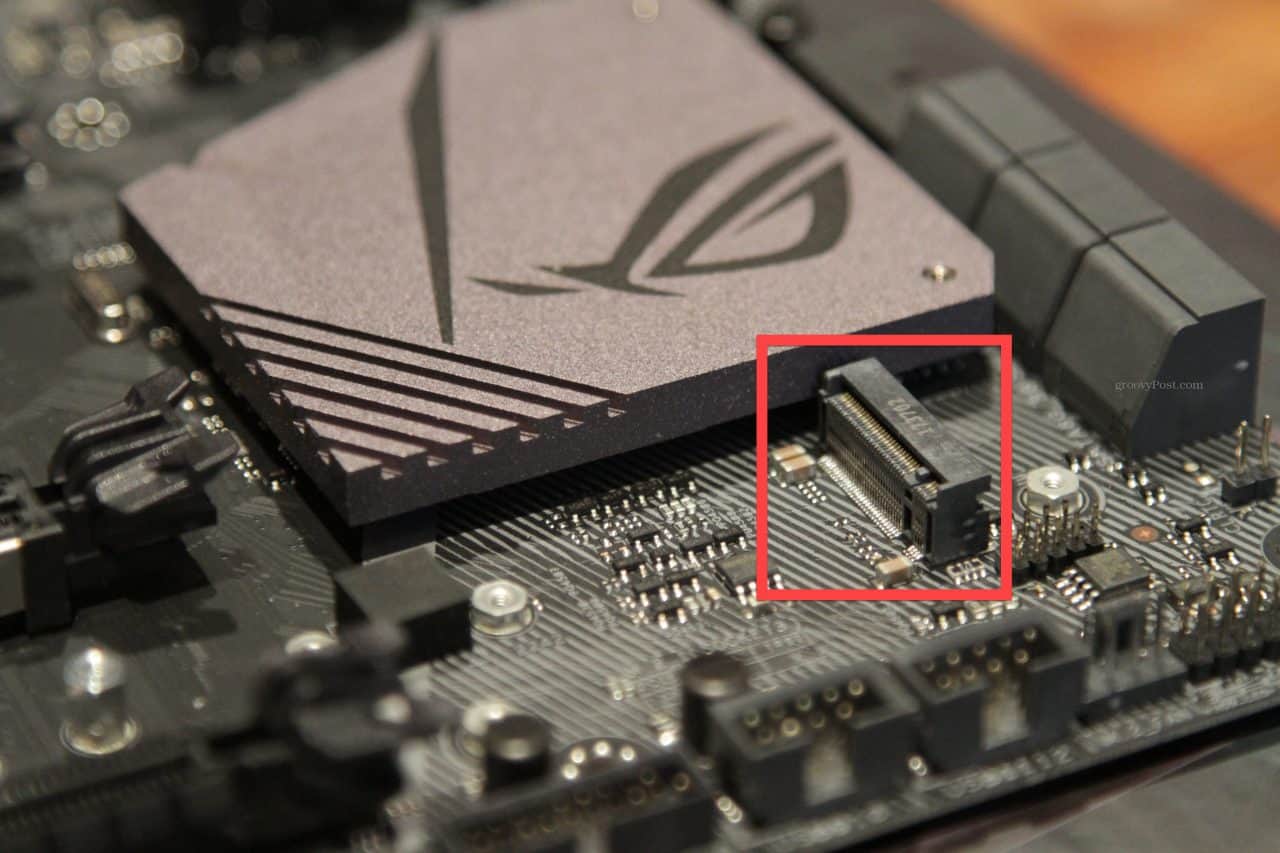

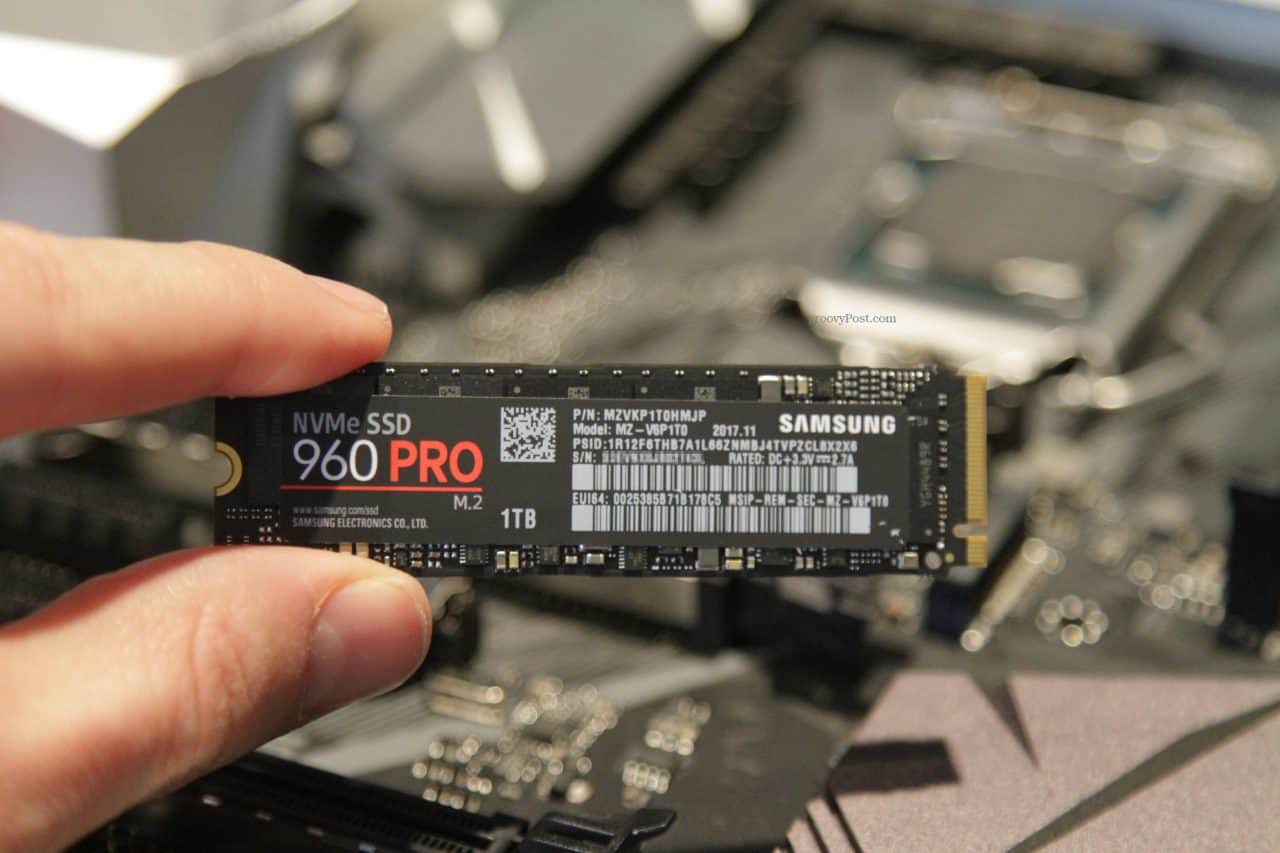
Install the motherboard standoff screw based on the length of your M.2 SSD drive. Most drives these days, including mine, use the M.2 2280 form factor.
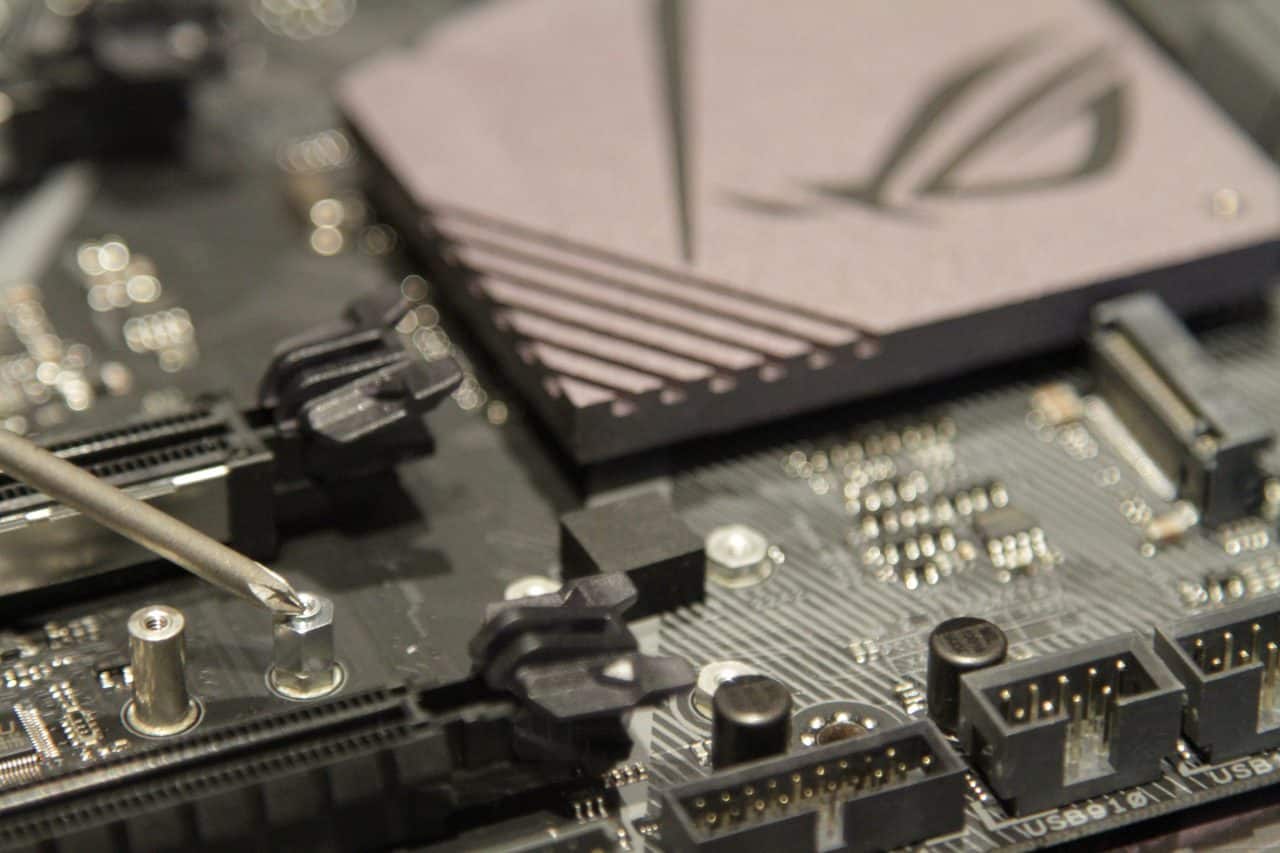

With the standoff screw in place, now’s the time to slide in the drive into the M.2 slot gently. Start at a 30-degree angle. It’s slightly notched, as shown below.
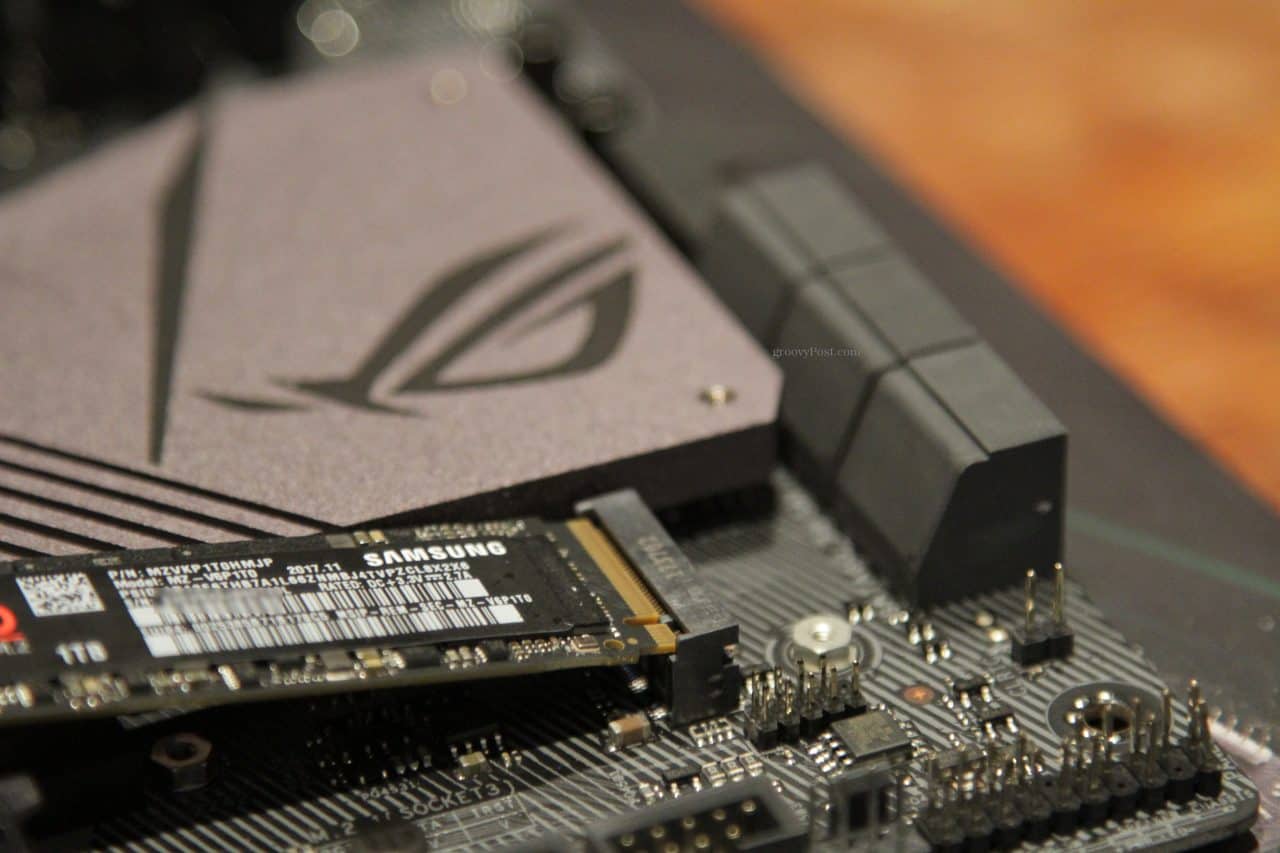

Push from the back, using just medium pressure. Do not force it.
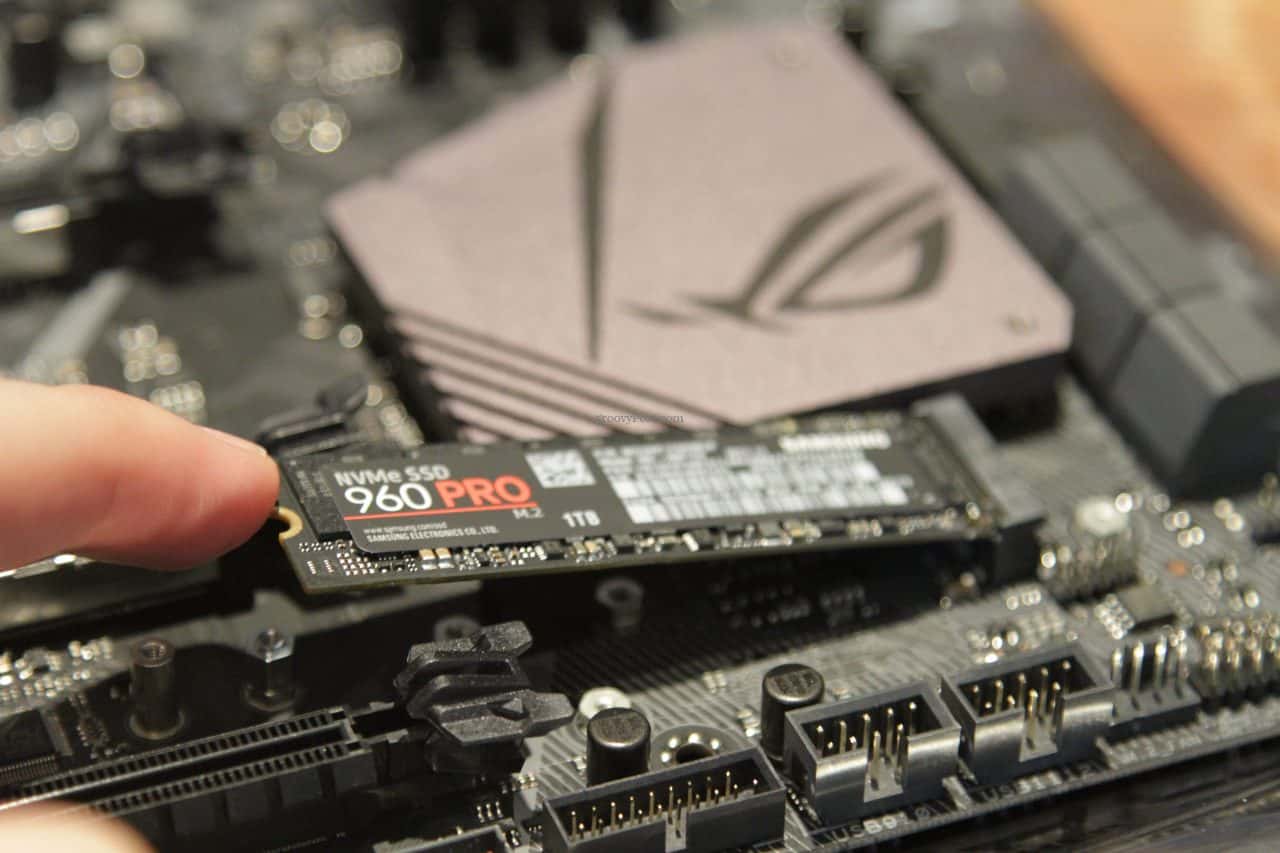

After installation, it will sit in a raised position. This is normal.
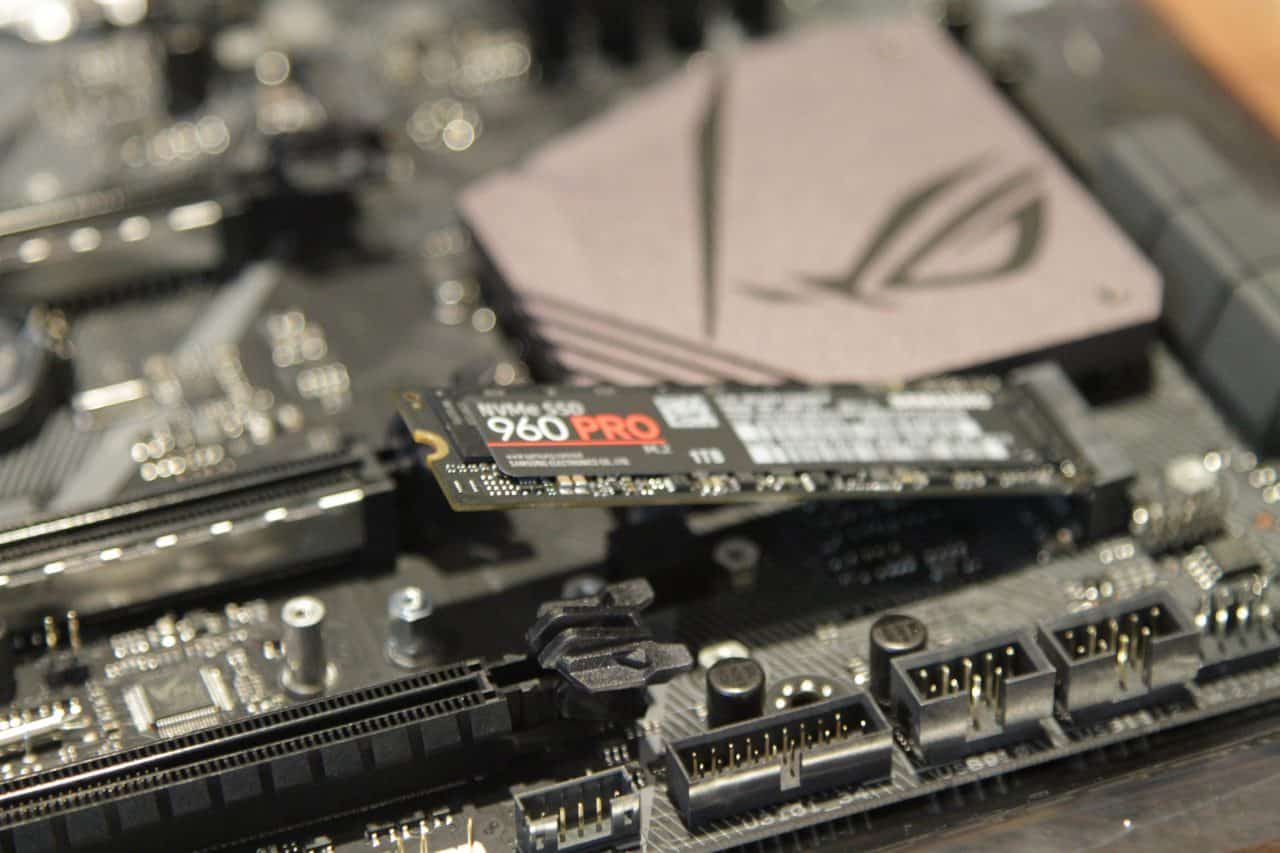

Push down so the SSD is flush with the motherboard and sitting on the standoff mount screw.
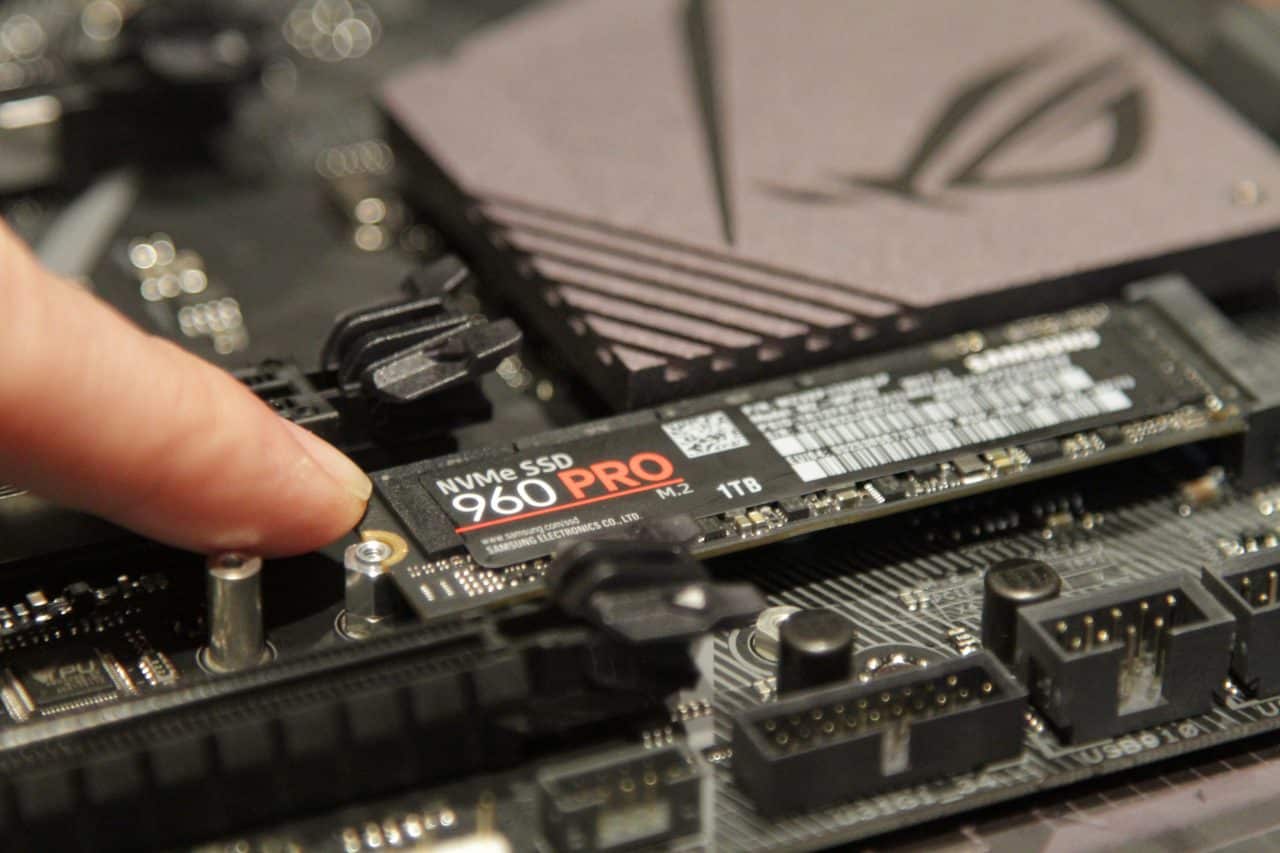

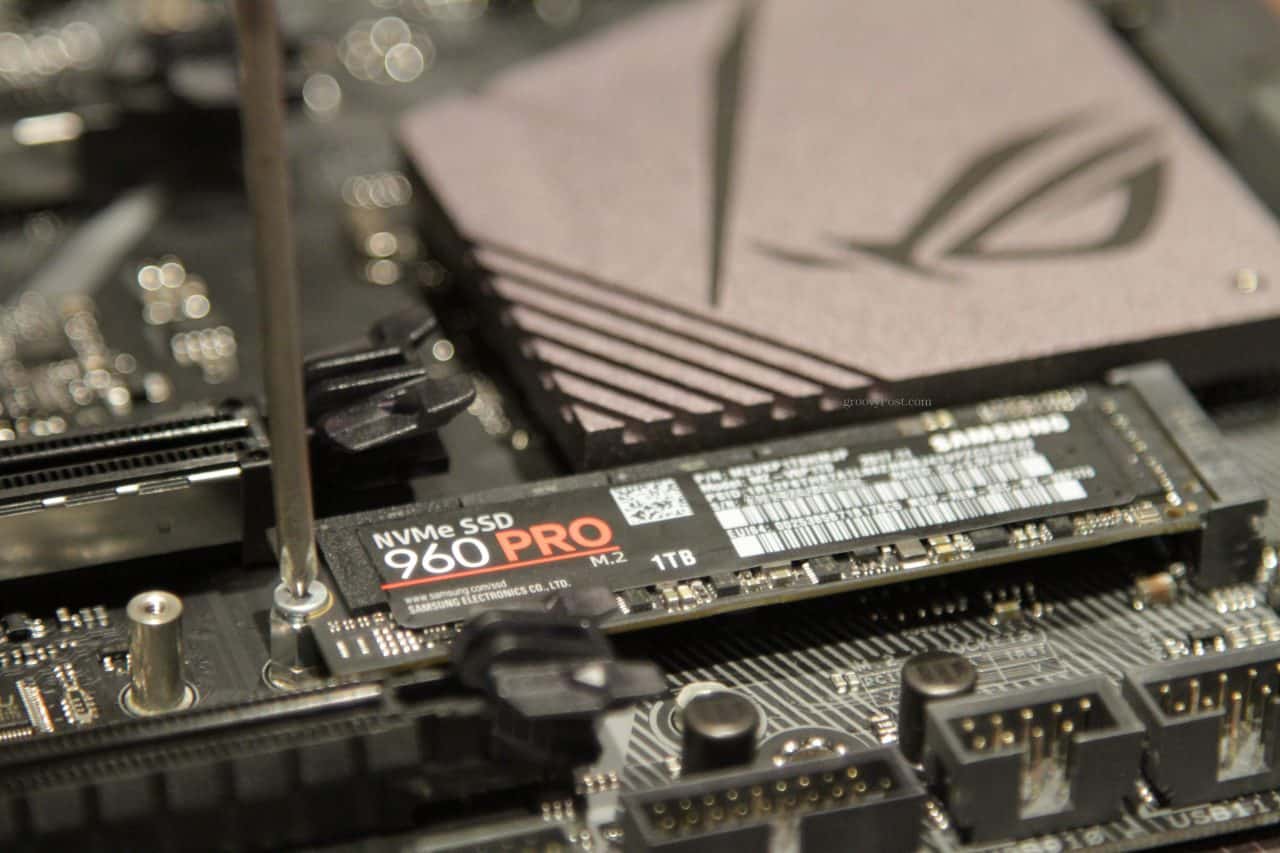
Screw down the SSD drive to the motherboard standoff mount. Tighten until it’s snug—no need to torque it down.

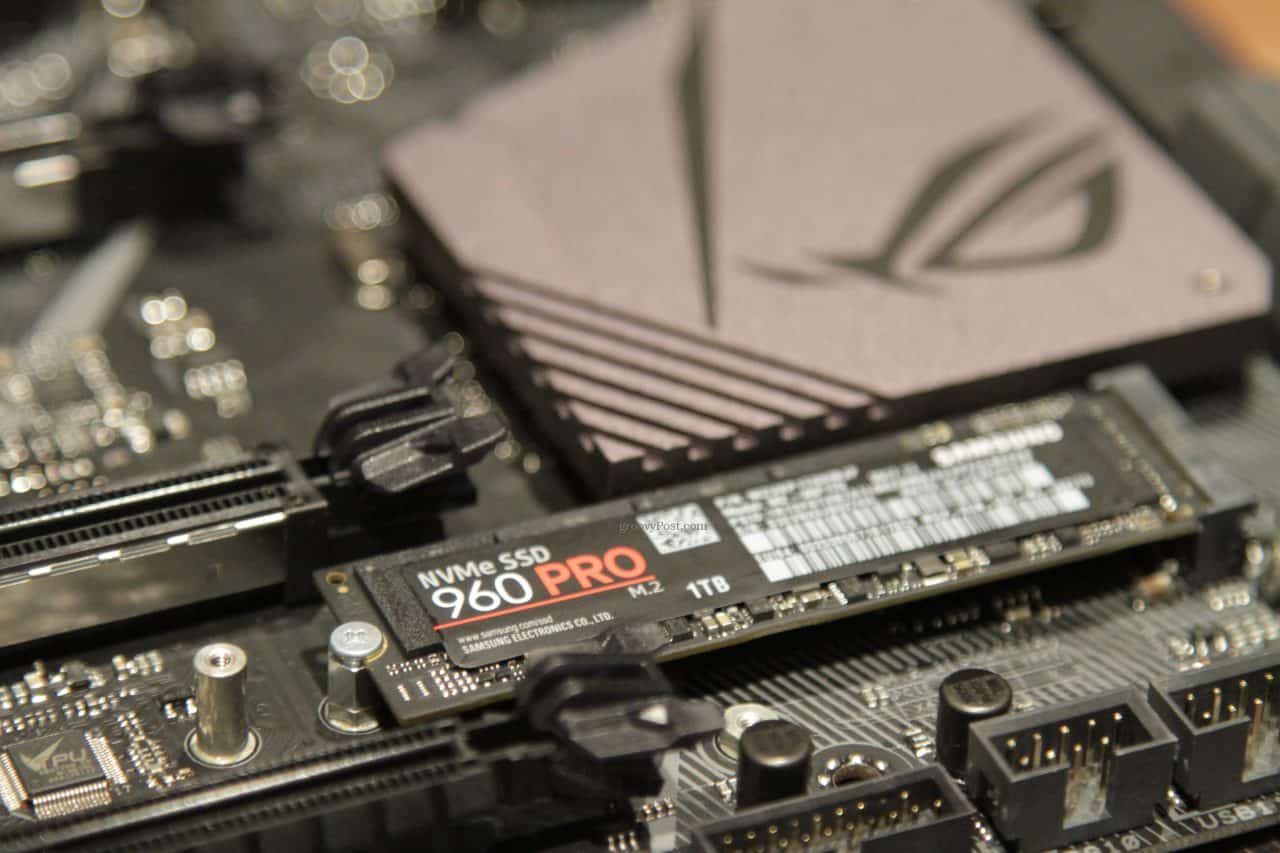
Here’s what it looks like installed.

With the introduction of the PCIe Gen 3 NVMe SSD (and now the Gen 4 NVMe drives), there is no better time than now to upgrade the overall performance and reliability of your computer. The Samsung NVMe M.2 drives finally unleash the full potential of the latest memory modules and GPUs out there, blowing through the 600 MB/s limitations of SATA III.
26 Comments
Leave a Reply
Leave a Reply






Trey Tudor
April 30, 2018 at 6:42 am
Awesome tutorial! Clear, concise, and informative. The photos are extremely helpful as well. Thank you!
Steve Krause
May 8, 2018 at 10:13 am
Awesome. Thanks for the feedback Trey. Glad it was helpful to you.
Paul Fullmer
April 30, 2018 at 7:40 am
Can this device be installed in a Lenovo (non-Samsung) laptop? Thanks!
Steve Krause
May 8, 2018 at 10:18 am
Yeah you bet, this is a new STANDARD so it’s not just isolated to Samsung equipment. Unlike a Desktop PC however, you can’t install a PCIe card to get the M.2 slot if your motherboard doesn’t have it. So, on your laptop, check with your manufacturer via your manual or Google to see if you have an M.2 slot on your Laptop motherboard. From there you can look into installing an NVME drive that fits it.
But, in the future, 100% be sure to verify you buy a Laptop with an NVME SSD Hard Drive vs. the legacy, outdated SATA SSD.
Troy
April 30, 2018 at 1:06 pm
Is this the future for hard drives? Honestly, this new tech looks like a memory stick. I love the fact that there are no cables and the speed is just incredible… Unfortunately, I don’t have a motherboard with m.2 slots.
But what happens if I want to have two of them? Seems like I’m losing something if I want to have multiple hard drives / storage.
Steve Krause
May 8, 2018 at 10:23 am
Yes – this is the future of Hard Drives in computers. The NVMe protocol gives you disk IO performance never before possible with SATA.
As mentioned in the article, if you don’t have M.2 slots on your desktop PC, check to see if you have any open PCIe slots. You can then buy an M.2 PCIe Adapter card — https://amzn.to/2r6SUyc and go from there.
Regarding multiple NVMe hard drives – my motherboard actually does have two M.2 slots so I’m golden. No need to burn a PCIe slot. For now, however, I just installed a single drive as 1TB is good enough. In the future, however, as prices drop I’ll probably grab a 2TB or 4TB to get the extra space in a year or two. Again, right now the 2TB is available but way too expensive – $1346.00 USD as of May 2018 https://amzn.to/2K51Nz4. Will be waiting for prices to come down.
DeFaux
June 24, 2018 at 4:40 pm
I have been searching forever but I can’t seem to find out which two m.2 drives will work in harmony on the z370-e. Would love some help.
Steve Krause
June 24, 2018 at 6:04 pm
Hi there – I have the z370-e also. You should be fine with most m.2 SSD drives. My suggestion would be to stick with Samsung. Either the 960 PRO or EVO. If you want to save some cash, go with the 960 EVO from Samsung. You can grab 500 Gig for under $250 USD.
Bryan Clark
June 29, 2018 at 1:31 pm
Do you have to leave the plate you removed (cover) off? or can you put back over on top of the m.2?
Steve Krause
June 30, 2018 at 10:47 am
Hi Bryan,
The plate goes back on over the top of the m.2 drive. In my case, it acts as a heat sync also. So yes, be sure to put the plate back on.
Luci
September 10, 2018 at 12:14 pm
Thanks for this great tutorial. Really comprehensive. Please tell me, how do I transport my data? I mean right now my laptop is very slow as it came with a 2TB HDD, so I presume I would have to put some of the startup software on the SSD once I have it installed in order to speed up the performance. Please forgive me if my question sounds ignorant, I’m not very Techy. I use Q524UQK ASUS laptop. Ive bought the Samsung NVMe960 Evo 250GB Thanks
Jennifer
September 11, 2018 at 6:48 pm
You would want to reinstall Windows entirely on the NVMe drive. To do this, you’ll need to open your laptop up, put the NVMe drive in, initialize its partition table, download the windows bootable flash drive installer to a flash drive, then boot it up, choosing the flash drive in boot options in initial BIOS.
If your laptop has an NVMe slot, it’s a different size and place than your SATA slot that the 2TB HDD plugs into, so you can actually have *both* drives in at once. I run a similar setup (using a 250 GB NVMe SSD and a 500 GB SATA SSD). The smaller NVMe drive would run your system files speedily, and the larger HDD would act as an archive for your documents, projects, pictures, downloads, etc.
You’ll want to look up how to move your libraries in Windows so that it uses your HDD as your user folder, as that would prevent wear on the SSD.
Steve Krause
September 13, 2018 at 11:16 am
Jennifer is correct – You first need to make sure your Computer supports the new m.2 standard. It’s a specific M.2 slot which you can verify either by opening up your computer and checking your motherboard or (better idea), check the manual for your computer/motherboard.
When it comes to laptops, if you don’t have the m.2 slot, you’re out of luck. If you have a desktop however, as I mentioned in the article, if you have a spare PCI slot, you can buy a PCI m.2 card from Newegg or Amazon.
Great question and thank you for the comments Luci & Jennifer.
Luci
September 18, 2018 at 12:53 am
Thanks Jennifer and Steve for your responses. I have checked and my laptop has an NVMe slot. Wolfgang’s question is exactly where I was going. My issue now is that I dont have the product key for the Windows that came along with my laptop. Its a new laptop that came installed with windows 10 but the packaging was thrown out accidentally so now I dont have the product key. Any advice on how I can copy or transfer the existing softwares in their current state, Windows 10 to be precise? Or are there any other means of getting the product activation code that came with my laptop.
Thanks a lot
Steve Krause
September 29, 2018 at 12:31 pm
Great Question Luci. It’s a little more complex when upgrading your primary hard drive. Regarding your question, we have the exact article you’re looking for – How to transfer your Windows 10 License to another computer. If you don’t want to start over 100%, you can try taking a look at this article: https://www.groovypost.com/howto/clone-move-windows-10-data-larger-ssd-disk-drive/. That said, I really really really suggest doing a clean install on your new NVME M.2 Hard drive. Honestly, it’s a good idea for performance and security reasons to start fresh from time-to-time.
As long as you have a good back up of all your data, you should be fine. Do the new install and reinstall your apps and copy your data back from your backup.
Thanks!
Luci
November 28, 2018 at 9:03 am
So sorry I’ve been traveling I couldn’t respond immediately. Steve I thank you so so much for pointing me in the right direction. These links are exactly what I need.
Thanks ever so much.
When you say a clean install, you mean like installing an entirely new Windows 10, or does transferring the license count as a clean install? Forgive my question.
Thanks
S H Bien
July 6, 2020 at 7:53 pm
I found this on bestbuy and your laptop does support NVMe M.2 SSD.
https://www.bestbuy.com/site/questions/asus-q524uq-2-in-1-15-6-touch-screen-laptop-intel-core-i7-12gb-memory-nvidia-geforce-940mx-2tb-hard-drive-sandblasted-black-aluminum-with-gunmetal-hinge/5561400
Wolfgang Ernst
September 13, 2018 at 12:07 pm
Hello Steve,
Unfortunately I was misled by the title “Installation . . .”.
Your tutorial is truly perfect, it explains the MECHANICAL installation of a 960 Pro in all details. Fine.
But after the mechanical installation the real (painful) story starts first: The installation of the OS Win 10.
I was hoping that you could explain how to deal with all the hurdles for a smooth Win 10 installation, which seems to be not trivial. Because the web is full of cry for help: “I can’t install Win 10 on my Sam 960 NVMe M.2 SSD” or “My 960 will not be detected in the bios” or “The installation stops in the middle” or “Which installation media should I use“ and more like this. Obviously the ultrafast PCIe 3.0 / x4 mode is somehow tricky to set up properly when installing Windows 10.
It would be great if you could give another tutorial on “Win 10 installation of Samsung 960/970 NVMe M.2 SSD for the ultrafast PCIe 3.0 / x4 mode”. Thanks.
Greetings from Germany, Wolfgang
Steve Krause
September 13, 2018 at 9:48 pm
Hi Wolfgang,
Thanks. I’m glad you enjoyed the article.
In regards to how to install Windows 10, from a working computer, goto this web page. Click the OS you want to install and the site will send you to the right Microsoft page. In regards to Windows 10, after clicking the Windows 10 link, Click the “Download Tool Now”. This will download the Windows 10 Creating Tool and you can put the OS on a USB drive which you can use to Boot the computer up and install Windows 10.
If that doesn’t work, your computer might be having issues seeing the NVME hard drive. You should check with your computer manufacturer and flash the Motherboard / System Bios to the latest version. Not guarantees… but a few things for you to try. If you’re still having issues, please post your issues on https://windows10.help – our free tech support forum.
Leah
October 11, 2018 at 5:30 pm
Steve,
Thanks for the advice on increasing performance with running Windows 10 from a M.2 SSD .
We recently upgraded our Dell 2720 All-In-One Desktop with a Crucial 500GB M.2 SSD and replaced a legacy 2TB HD that was begini with a Samssung EVO 960 SSD and everything opens and runs about 2-3x faster wuhu..!
Mark
January 28, 2020 at 1:14 pm
The m.2 NVME in my Dell Optiplex Xe3 uses a B type or Sata III, I cloned the B type to the Samsung 970 Pro A type in a PCIe card. Windows 10 Pro failed to load. So I formatted the B type and use that for storage and boot the Samsung from the card. The thing reads and writes well over (r 3535 and w 3261) the spec by Samsung.But windows loads didn’t improve over the SATA III m.2 reading at 558mb/s. No complaints, just real world.
Jacques
July 21, 2020 at 8:45 am
How did it comes that my computer has no driver other than Microsoft´s JUn 21st 2006 version 10.0.18362.1 and doen´t register as a ready disk even if I mirror my SAta? I´m lost (and devasted, too)!
Steve Krause
July 21, 2020 at 10:56 am
Hi Jacques – Please create a free account in our Forum and I’ll try to help you – https://forum.groovypost.com – Comments are not great for support.
Jacques G Lerner
December 3, 2020 at 11:16 am
In a few words: SOLVED
Harshavardhan Kanji
July 4, 2021 at 7:24 am
Hi Steve, I have followed the same steps as you mentioned for installing ssd. Mine is crucial NVME M.2 ssd 1TB. After Installing it Iam getting BSOD(your pc ran into problem “KERNEL SECURITY CHECK FAILURE”everytime I restart it. My Bios is updated to latest. Could you please help to tell what could be the issue here?
Steve Krause
July 5, 2021 at 12:30 pm
The brand won’t matter so you’re fine with the crucial. As with all things, there may be an incompatibility somewhere.
What is your setup? Is the NVMe going to be the 2nd drive? Or will it be your new system drive? Either way, I would pull the NVMe drive and make sure things still boot up and you’re not having an issue. If things boot up fine with no NVMe drive, try this next.
Make sure the BIOS is configured and your M.2 NVMe slots are enabled. Most are enabled by default but, there could be a conflict with your setup with your SATA drives. Also, be sure to boot using the correct system drive (your old SSD drive). From there, boot into safe mode and see if the drive comes up and things look good. You might even go grab an NVMe driver from Crucial as a driver could be your issue.
From there, boot up as normal and see if things are working as planned.