How to Make Windows 11 Faster on Old Hardware

If you run Windows 11 on an older PC, and it’s might be sluggish, ou can make Windows 11 faster on old hardware with this guide.
You may notice a performance hit if you’re running Windows 11 on older hardware. Perhaps your windows and menus are taking longer to display, or your PC is taking longer to boot up.
If you’re experiencing a less responsive experience, there are a few things you can do to make Windows 11 faster on old hardware. You can disable animation and visual effects, restore the classic context menu, ensure drivers and Windows itself is up-to-date, and more.
Short of upgrading existing hardware or buying a new computer, you can tweak settings to improve performance. Here’s how.
How to Make Windows 11 Faster on Old Hardware
Like Windows 10 before it, Windows 11 uses several animations and other visual effects that take up system resources, which can take a toll on older graphics cards. The effects and animations provide some nice eye candy but they aren’t necessary to run Windows 11.
To Disable Animation Effects on Windows 11
- Use the keyboard shortcut Windows key + R to launch the Run dialog.
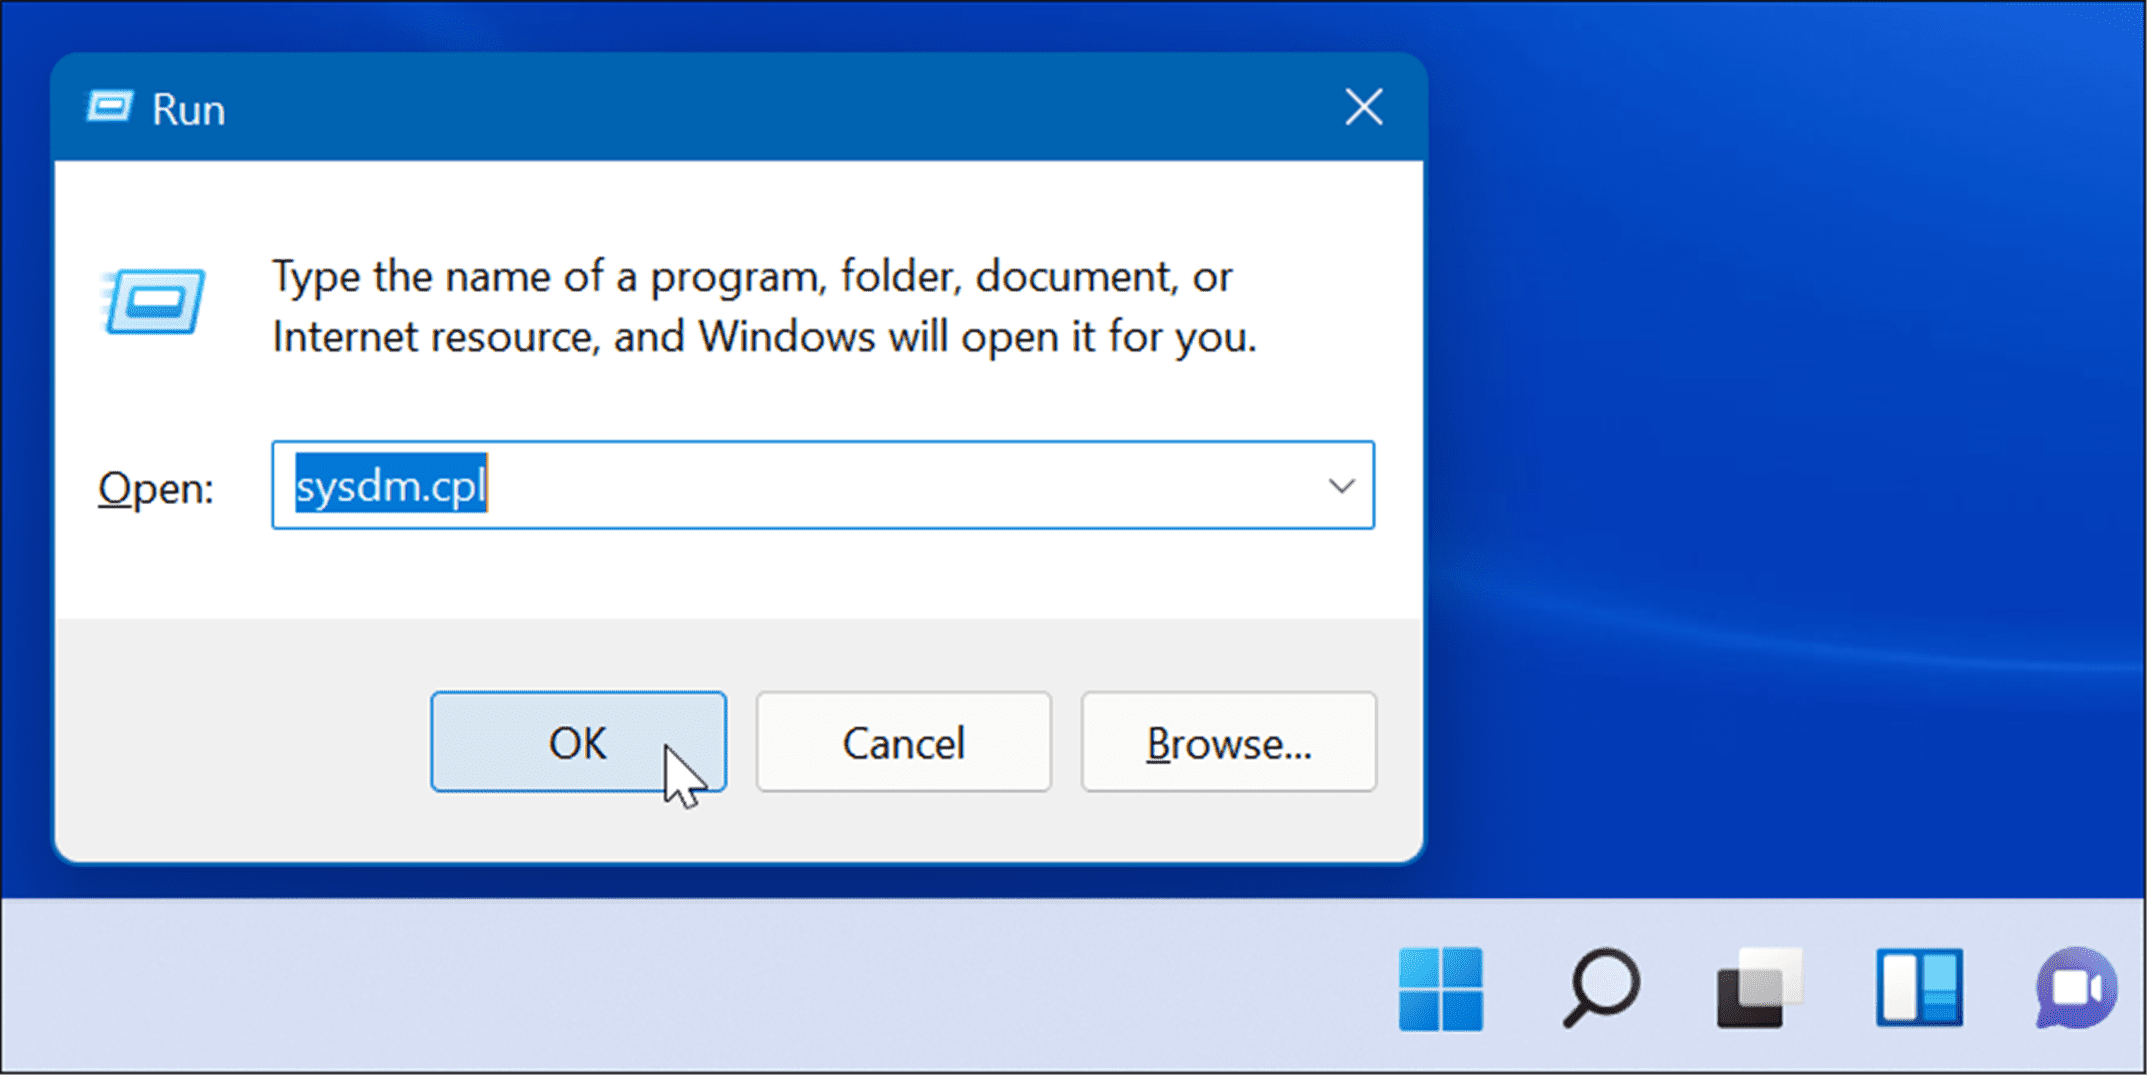
- Type sysdm.cpl and click OK.

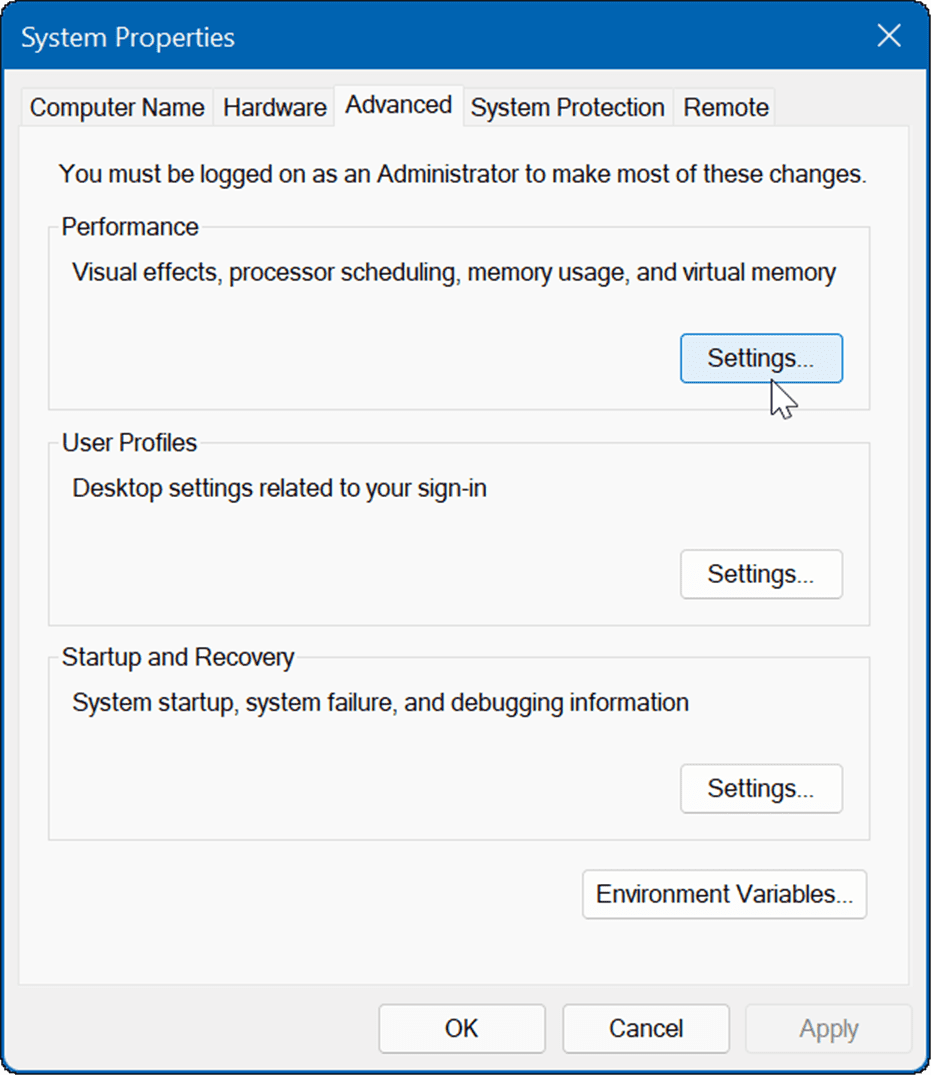
- When the System Properties window opens, click the Advanced tab, then press the Settings button under the Performance section.

- Next, go through and uncheck the visual features you no longer want. You can improve performance just by turning off Animate windows when minimizing and maximizing and Show windows contents while dragging.

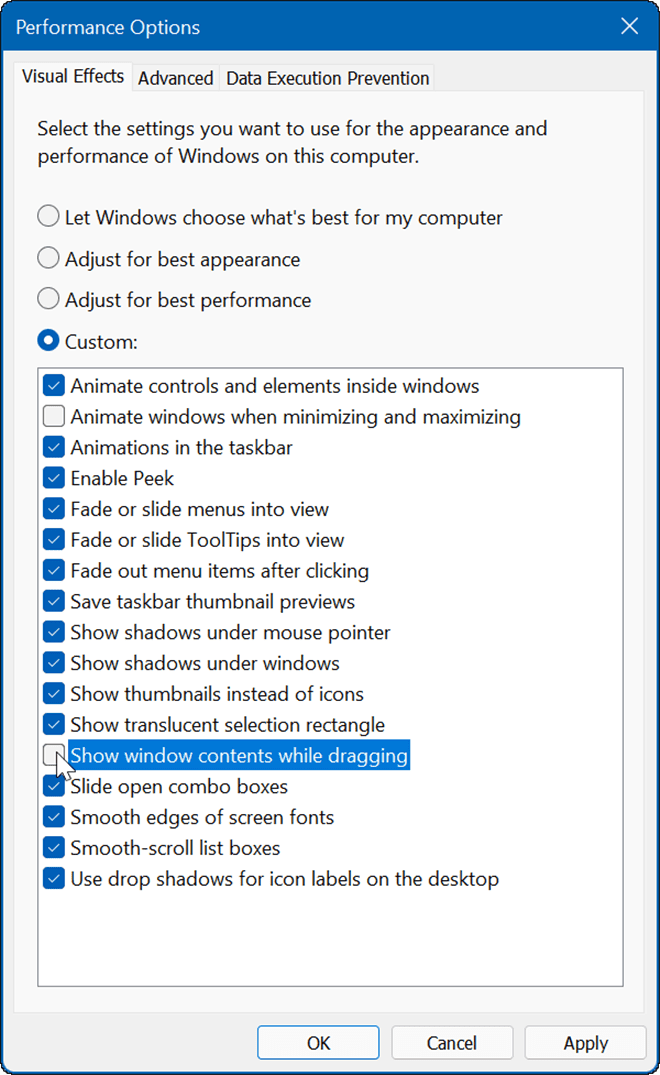
- You can then go through and disable various effects and see if the OS is more responsive. If you’re not concerned about effects at all, select the Adjust for best performance option at the top and click OK.
How to Disable Animation and Transparency Effects on Windows 11
You can disable animation and transparency effects on Windows 11 through Settings and achieve similar results as the steps above.
- Click the Start button or press the Windows key and click the Settings.
- Alternately, you can use the keyboard shortcut Windows key + I to open Settings.

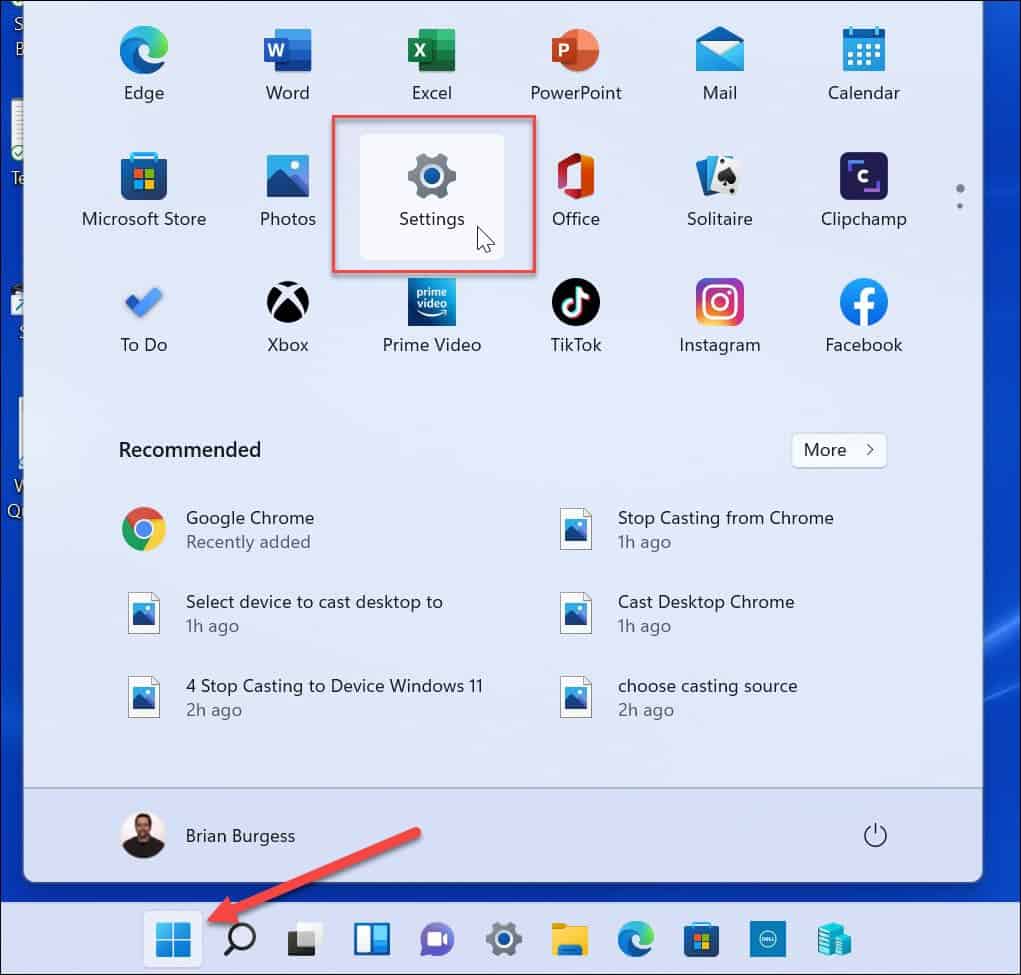
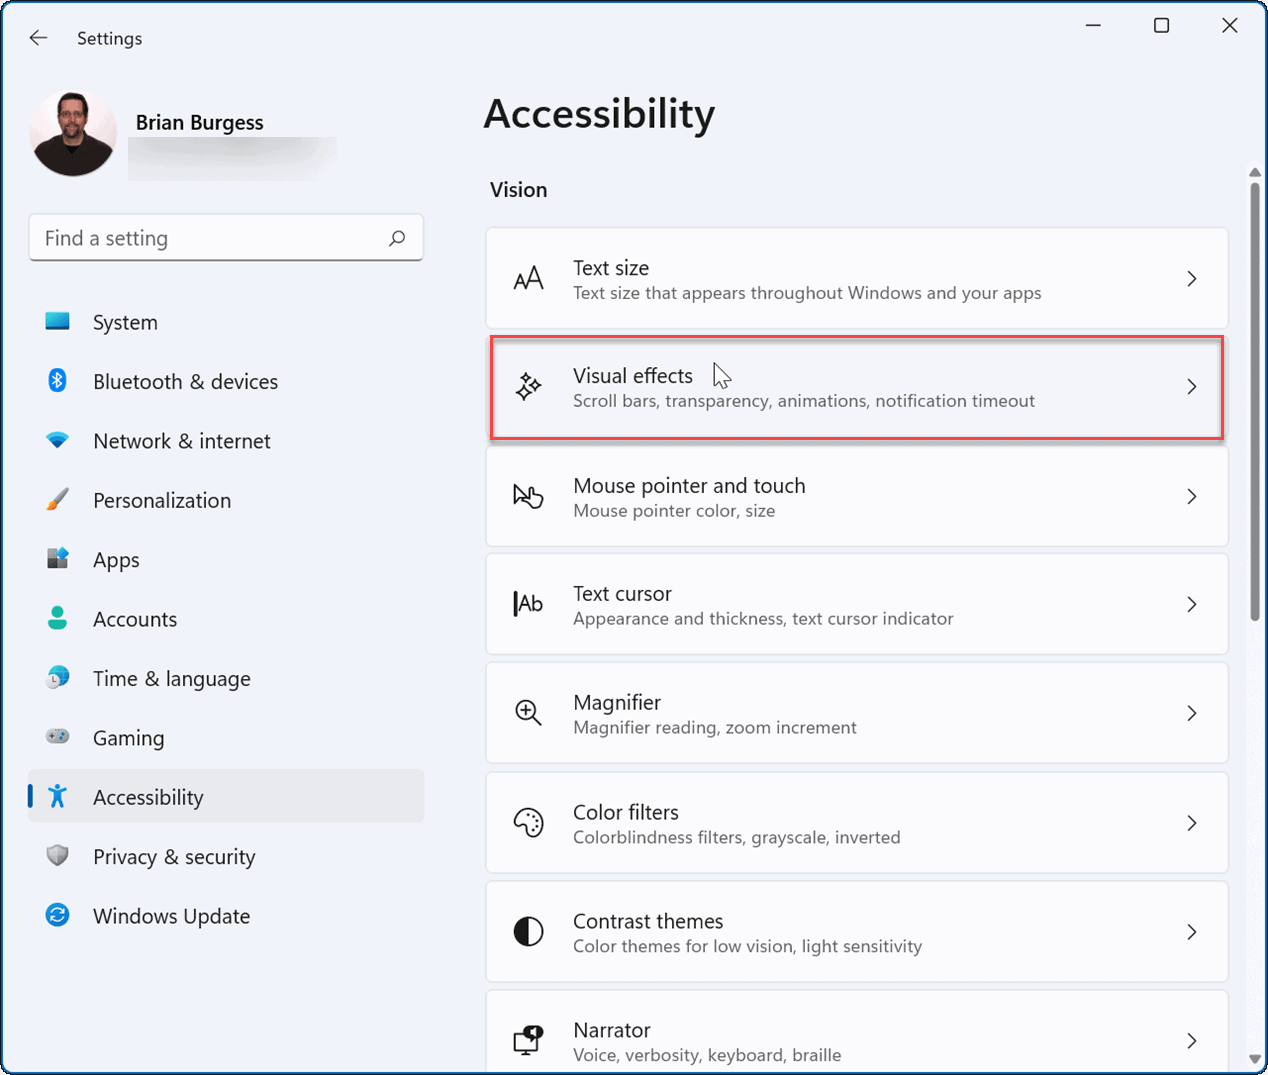
- When Settings opens, click Accessibility from the list on the left and click on Visual effects on the right.

- Next, toggle the Animation effects and Transparency effect buttons to the Off position.

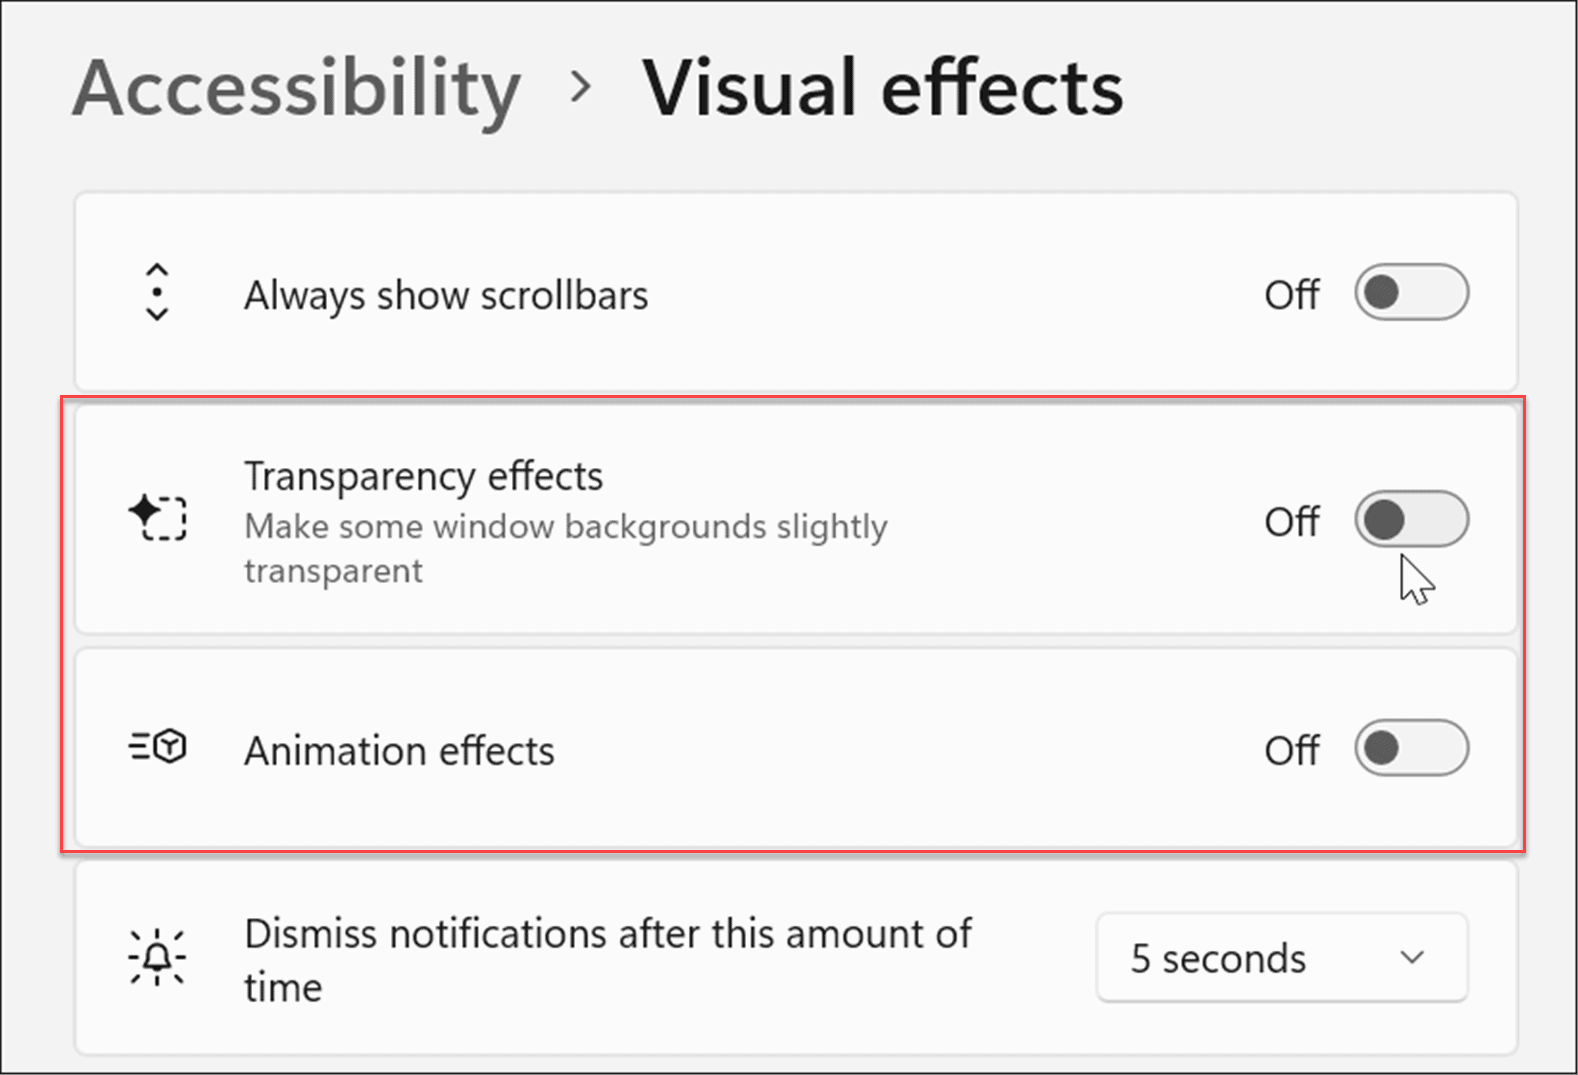
Note: It’s important to note that turning off specific effects through Settings will allow for a more responsive experience. However, if you want more control over visual effects, use the above’s first option.
How to Disable Startup Apps on Windows 11
One of the best ways to improve the boot time of your Windows machine is by disabling startup apps. If you have several apps loading when you boot up your device, it delays the entire process.
- Launch Task Manager using the keyboard shortcut Ctrl + Shift + Esc.
- Alternatively, right-click the Start button and choose Task Manager from the menu.
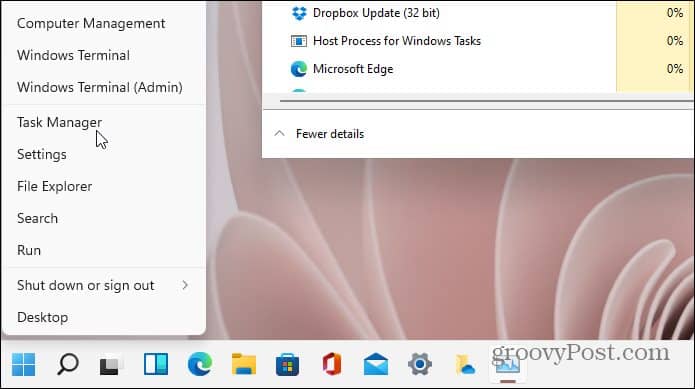

- When the Task Manager screen opens, click the Startup tab. From the list of apps, right-click the apps that have a high impact on startup time and select Disable from the menu.


How to Bring Back the Classic Context Menu on Windows 11
The new context menu on Windows 11 includes new ways to perform actions. However, you might want the familiarity of the classic context menu to get things done. It also prevents the sluggishness of the new UI and opens faster.
Note: Bringing back the classic context menu requires you to hack the Registry. Make sure to back up your PC before making any changes.
Use Registry Editor to Restore Classic Context Menu
- Open the Start menu and type regedit, then select Run as Administrator.
- In the Registry Editor, head to the following path:
Computer\HKEY_CURRENT_USER\SOFTWARE\CLASSES\CLSID\
- Right-click in the empty space on the left, select New > Key, and then paste the following:
{86ca1aa0-34aa-4e8b-a509-50c905bae2a2}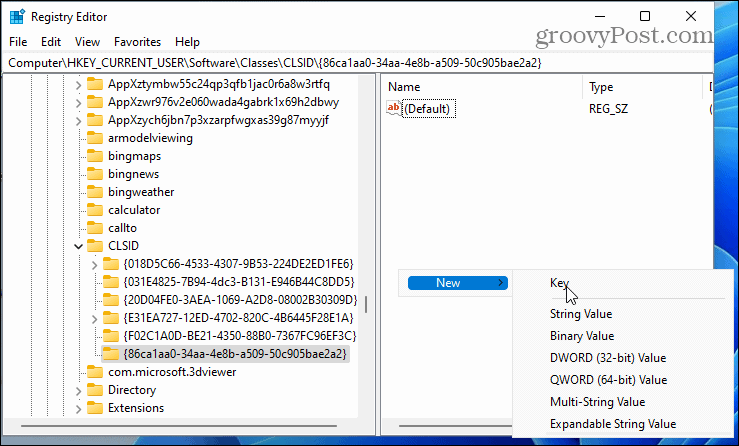

- Right-click the key above it, select New > Key, and name it the following:
InprocServer32
- After that, restart Windows 11.
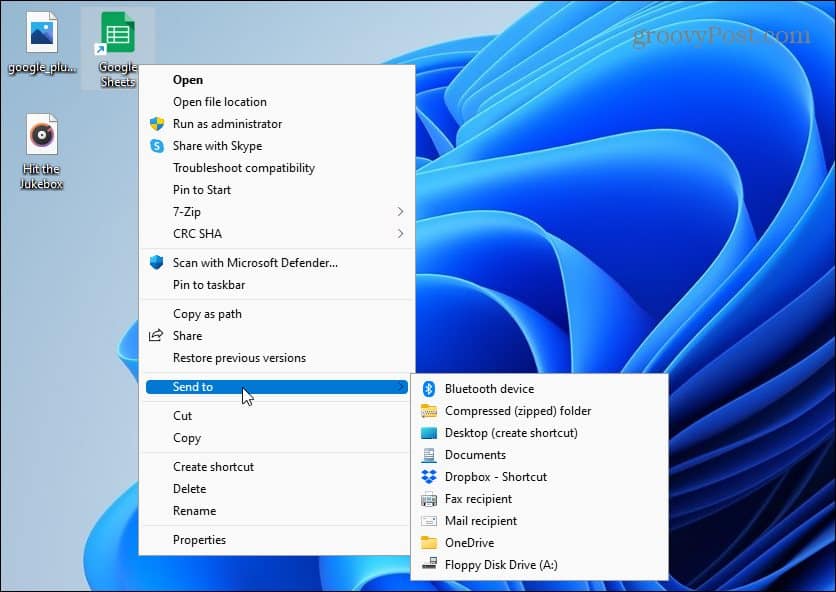

For complete step-by-step instructions, read our guide on getting the classic context menu on Windows 11.
Keep Windows Updated
Microsoft releases regular updates each month to keep your system secure. In addition, specific updates will improve system stability and performance.
Windows 11 will update in the background and restart outside of Active Hours. Still, there could be a performance update you need to install sooner than later. The good news is you can manually update Windows 11.
- Press the Start button or the Windows key and open Settings.


- When Settings opens, click Windows Update from the list on the left, then press the Check for updates button on the right.


If an update is available, go ahead and install it and restart your system if necessary.
Update Hardware Drivers
Even if your hardware is older, you still want to update your drivers to ensure it’s running optimally. You’ll find new drivers on the manufacturer’s website or you can have Windows check for driver updates from Device Manager.
To Update Hardware Drivers on Windows 11
- Press the Start button or the Windows key to open the Start menu.
- Type device manager in the search and select the top result.

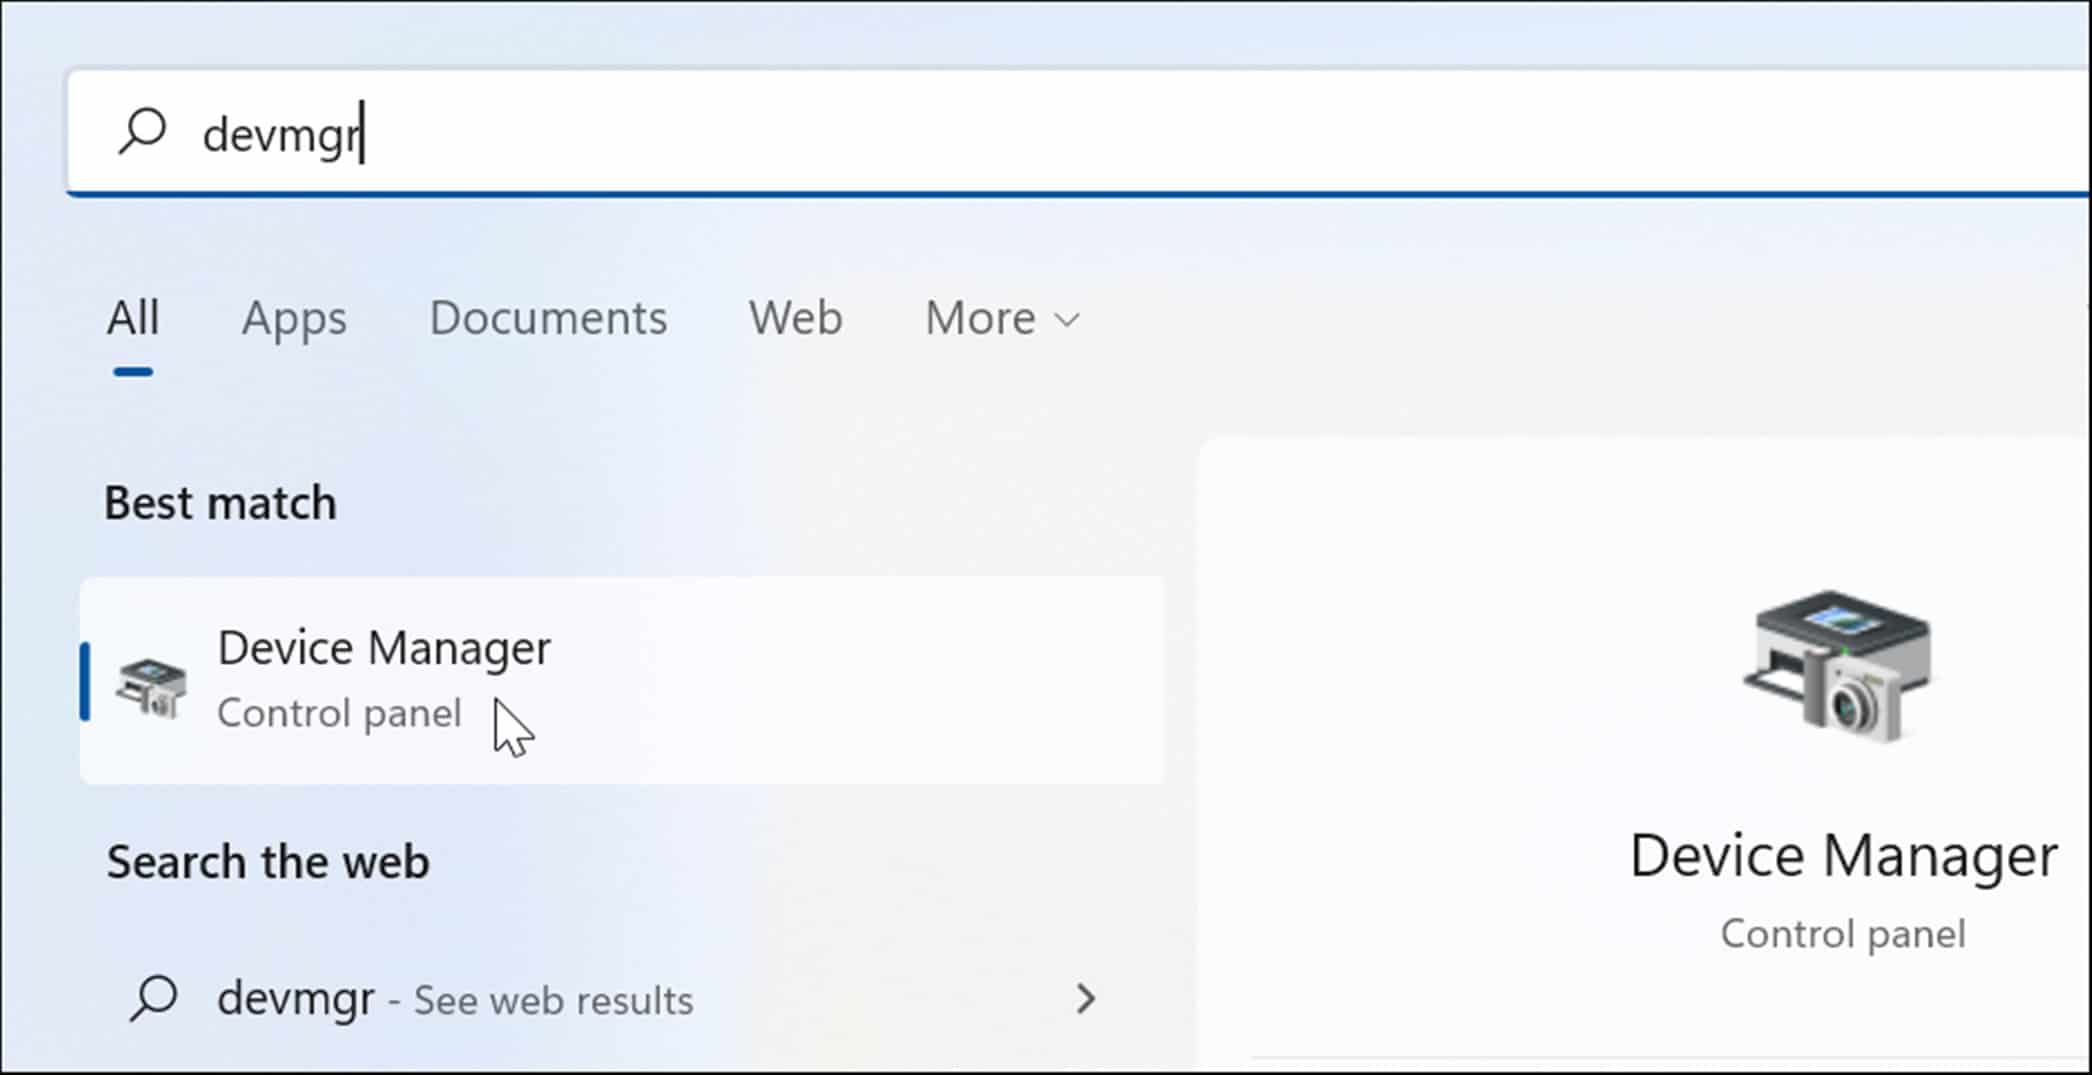
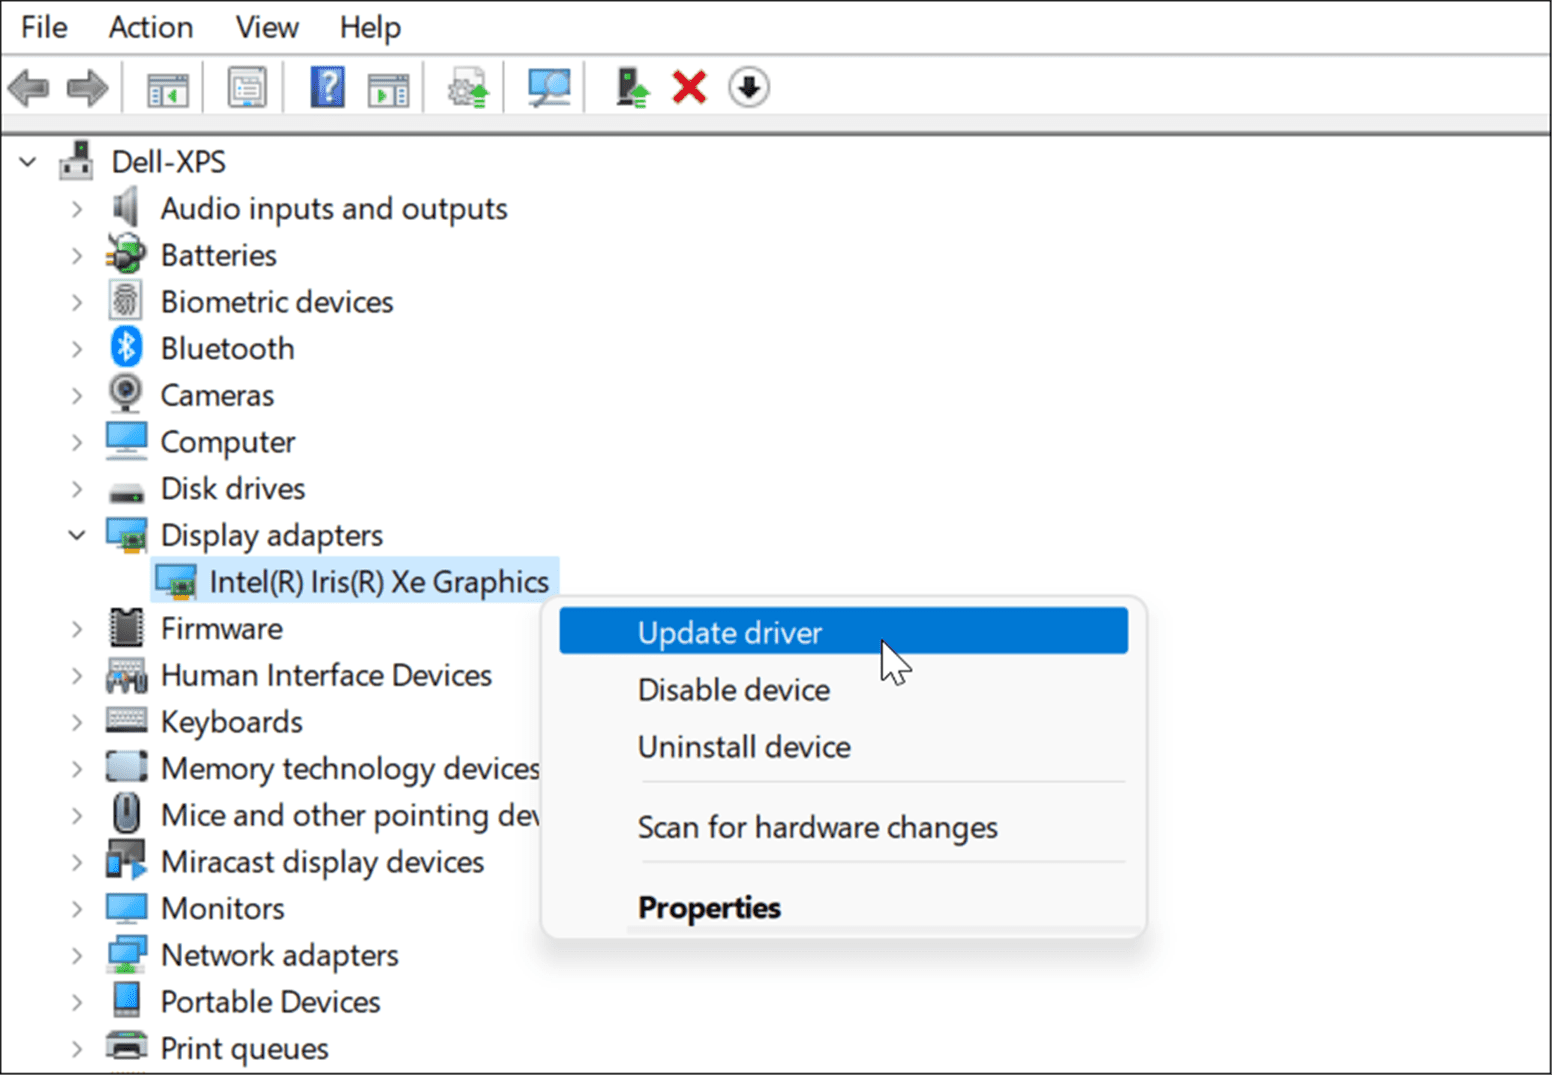
- In Device Manager, find the hardware you want to update, right-click it, and select Update driver from the menu.

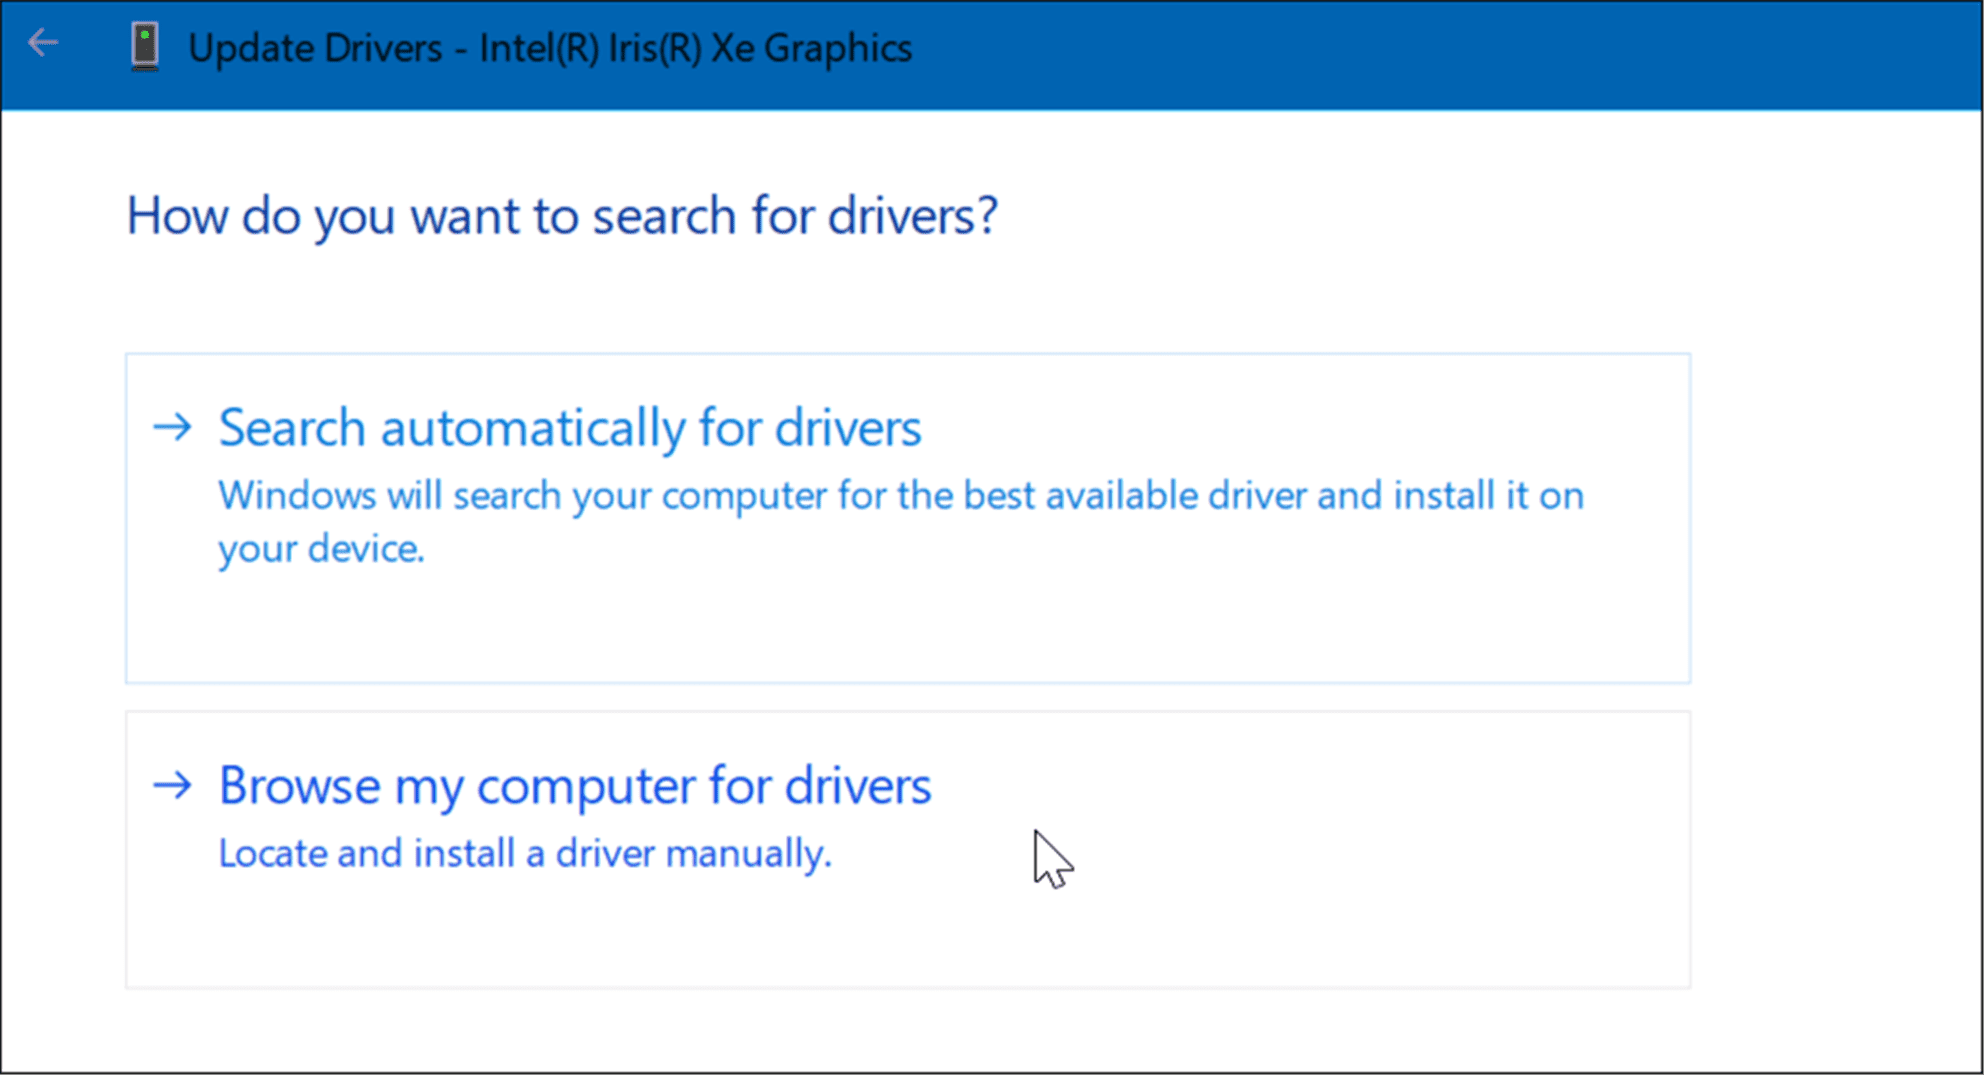
- Next, if you downloaded a driver, select Browse my computer for drivers and install it. If you want Windows to search for one, click Search automatically for drivers and follow the on-screen instructions.

Making Windows 11 Run Faster
If you have an older PC and want to make Windows 11 run faster on it, you can, by using the steps above. You might miss out on some of the eye candy like transparencey and animation effects, but at least you’ll be able to get things done because it runs snapier.
Leave a Reply
Leave a Reply


